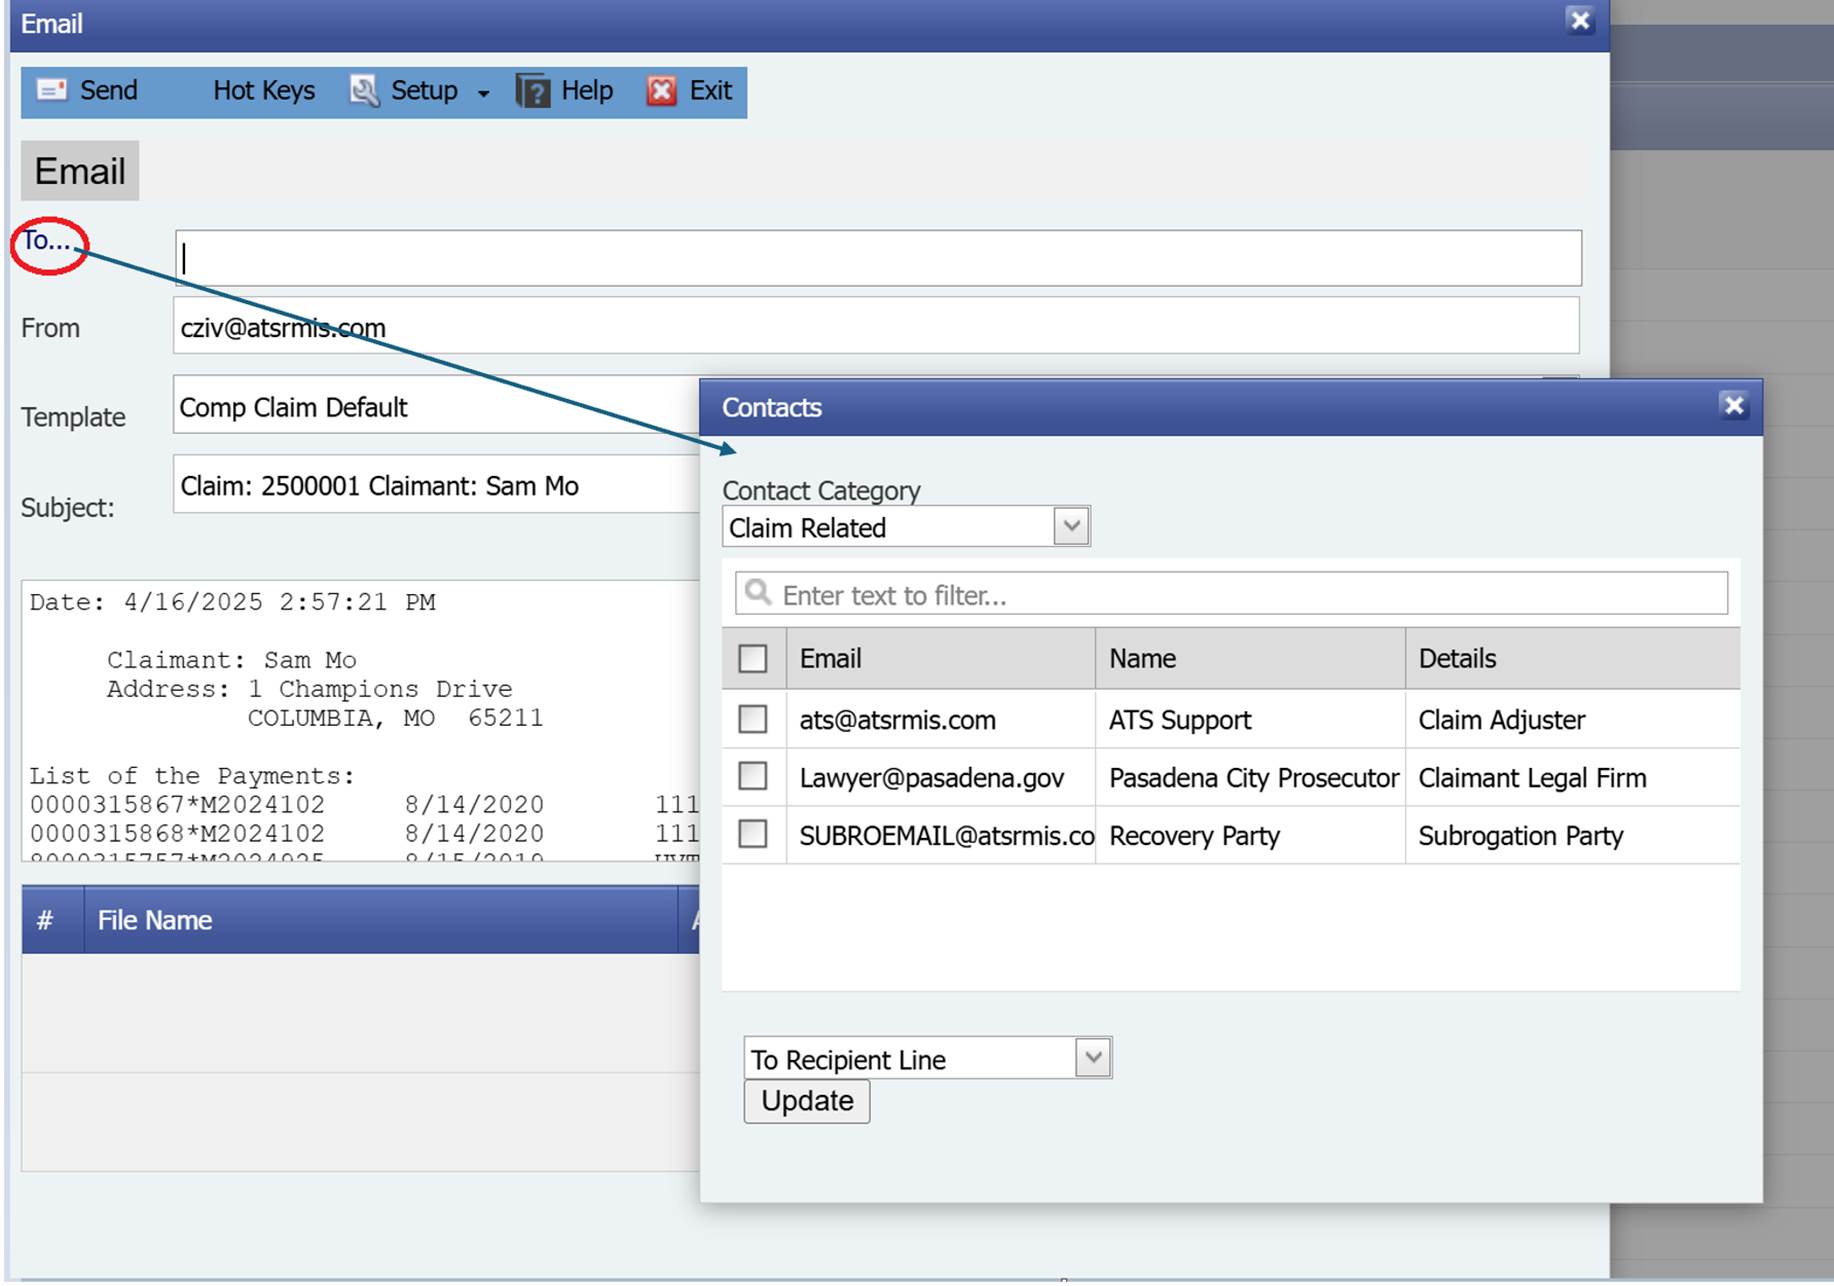
Email
Many screens contain an email option on the tool bar and next to email fields on the screen. The intent is to help quickly create an email by pulling in related data formatted with user defined templates.
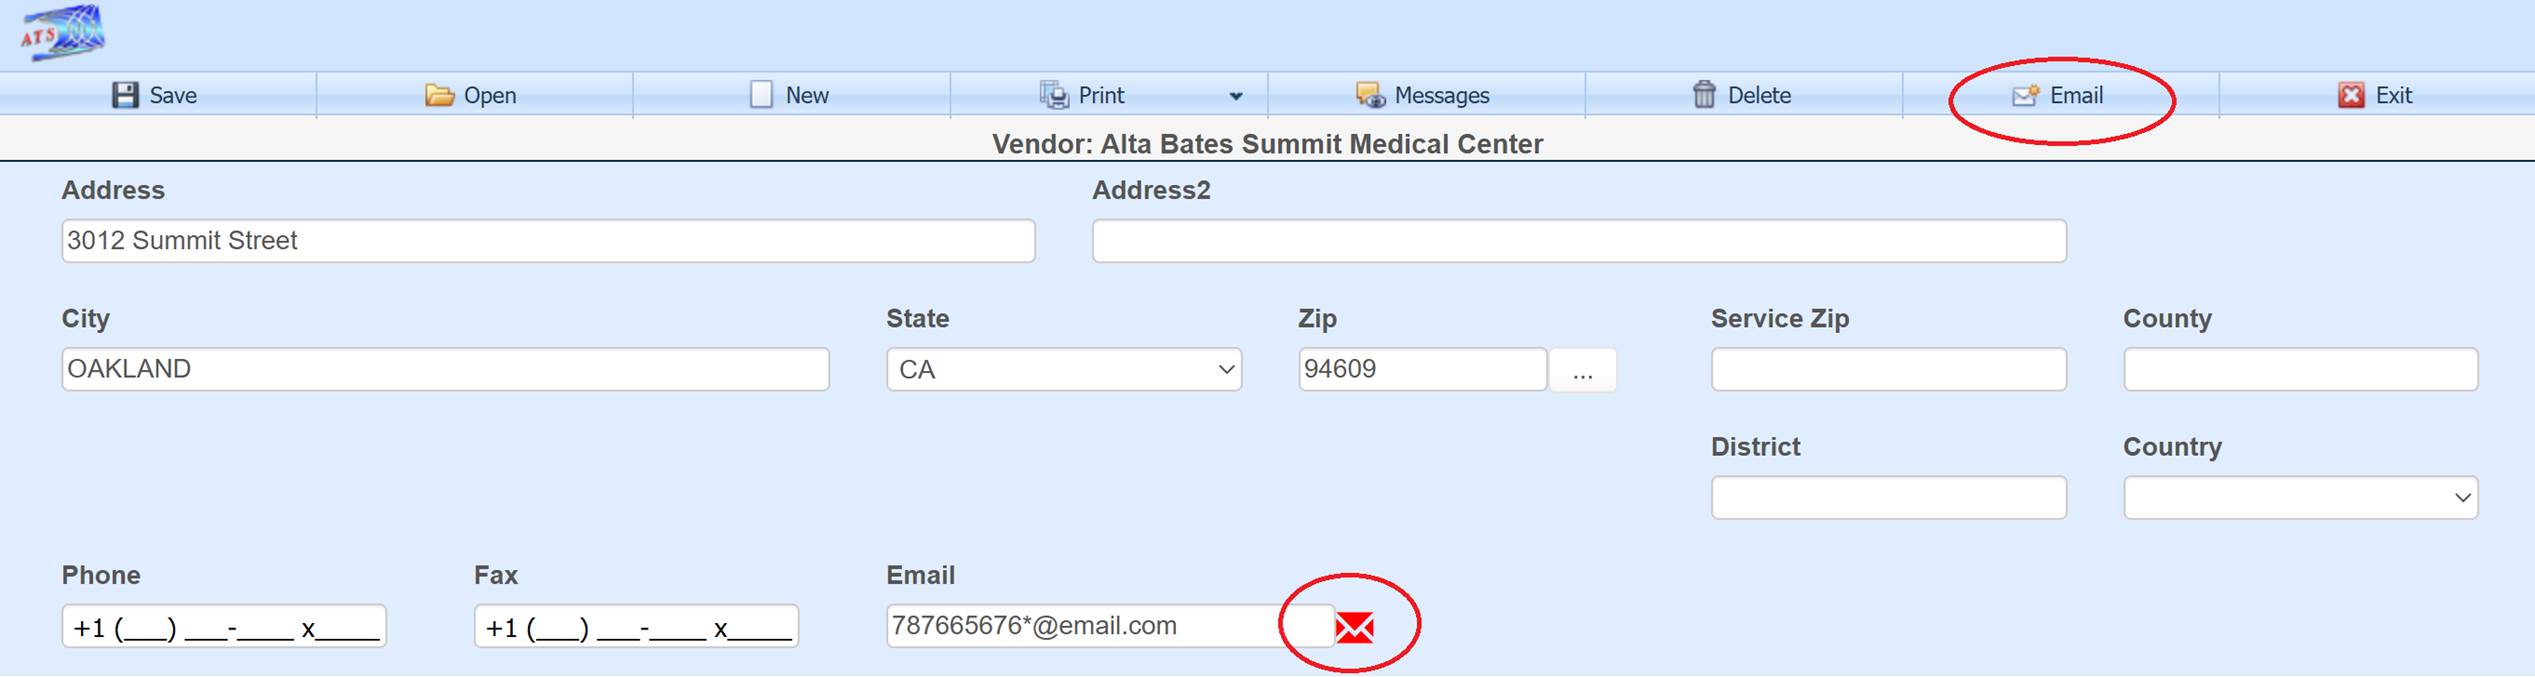
For example, the vendor data entry screen has an Email button on
the tool bar and a red ![]() button next to the Email field on the screen. If the user selects the toolbar Email button
and a default template is defined for the main table being edited, in this case
the vendor table, then the email page will open with the subject and body text
already filled in as defined by the default template specifically created for
the vendor table.
button next to the Email field on the screen. If the user selects the toolbar Email button
and a default template is defined for the main table being edited, in this case
the vendor table, then the email page will open with the subject and body text
already filled in as defined by the default template specifically created for
the vendor table.
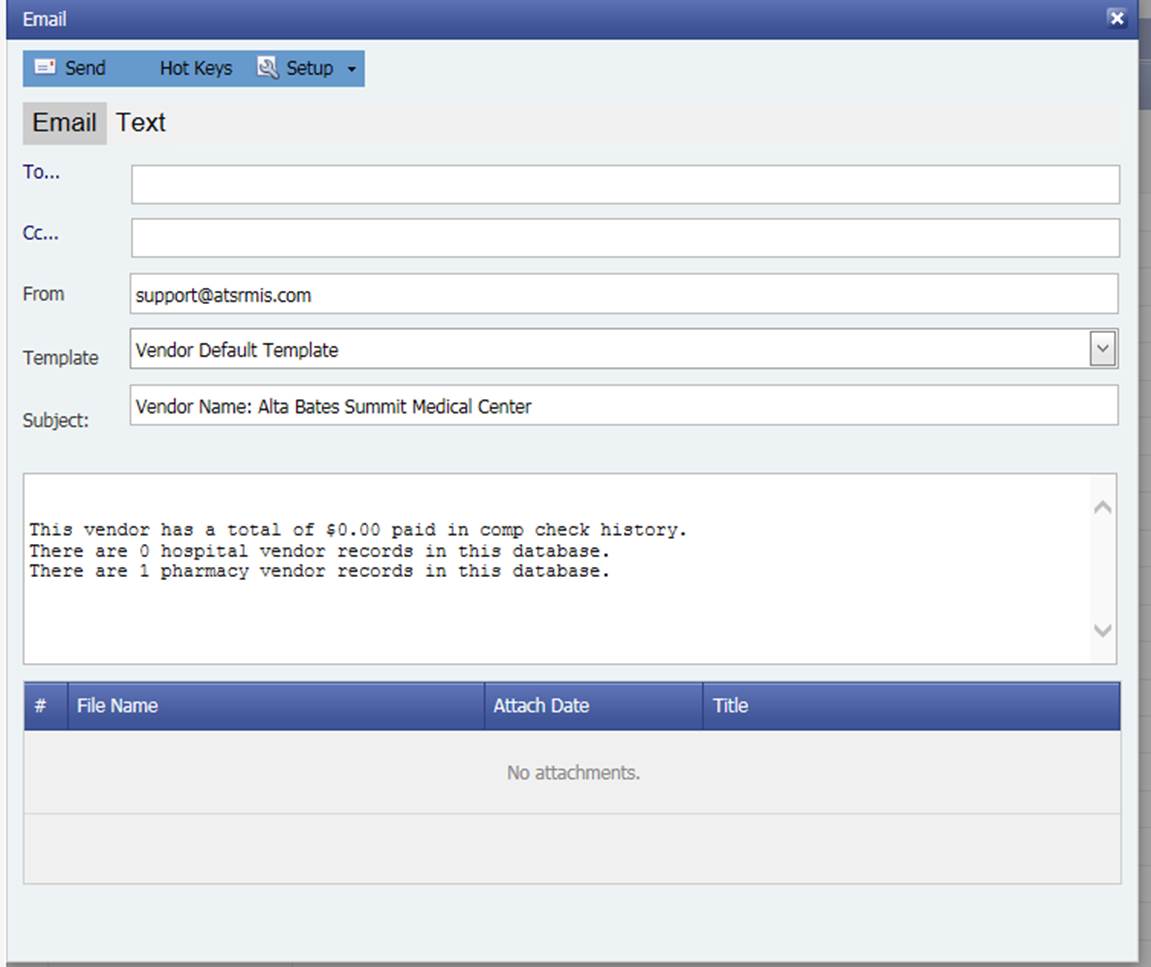
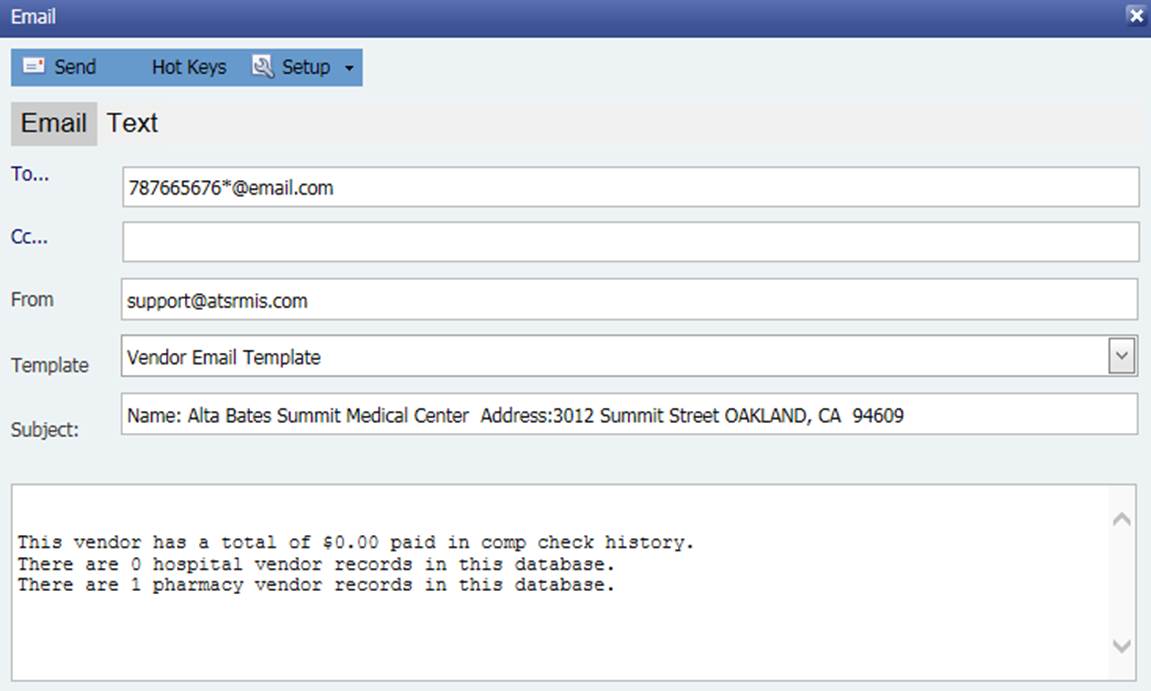
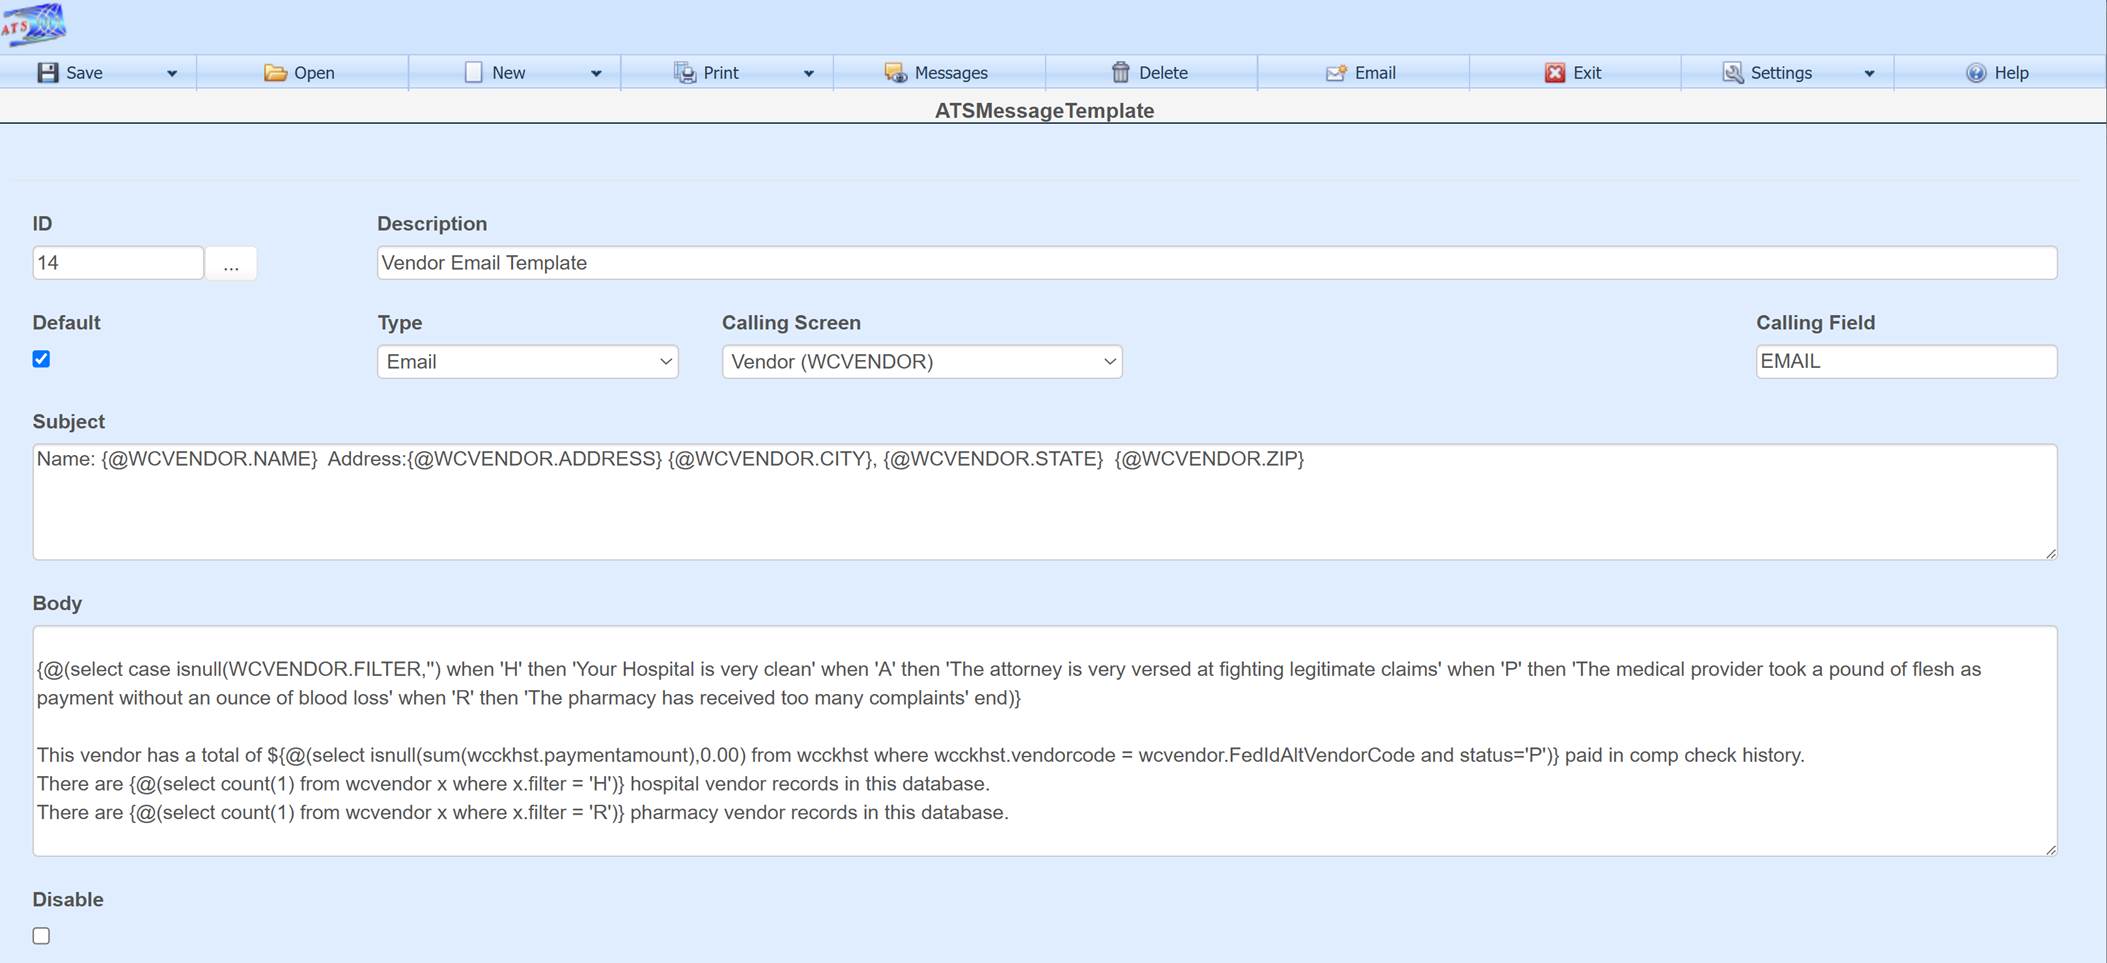
Here the default vendor template was set up to use three queries to return the total of all payments to the specific vendor, the number of vendors in the entire system that are flagged as hospitals, and the number of vendors in the entire system flagged as pharmacy.
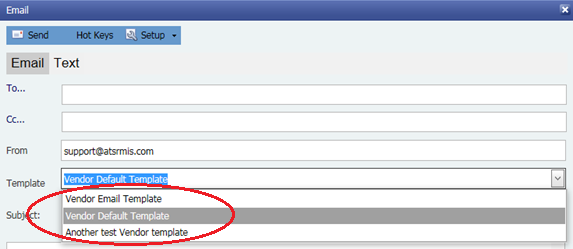
This shows two other templates set up for the vendor table besides the default. The user can select a different one from the Template drop-down to re-populate the subject and body text. The templates are user definable, and an unlimited number of templates can be defined for a specific table or field on that table.
For another example, the red ![]() button on the vendor data entry screen was
used to open the email screen. The
default template defined for the vendor email field will determine the email
text. Had there not been a default
email template for the vendor email field, then the default for the vendor table
would have been used. This example only
differs from the last one in the subject line which now includes the
address. The To… field is also filled in with
the email address from the vendor email field, in this example
"787665676*@email.com".
button on the vendor data entry screen was
used to open the email screen. The
default template defined for the vendor email field will determine the email
text. Had there not been a default
email template for the vendor email field, then the default for the vendor table
would have been used. This example only
differs from the last one in the subject line which now includes the
address. The To… field is also filled in with
the email address from the vendor email field, in this example
"787665676*@email.com".
The templates can only be defined by users with permission to do so. The Edit Templates menu option under the Setup toolbar button is used to access the template setup screen.

This is the definition used in the above example for the email field of the vendor screen.
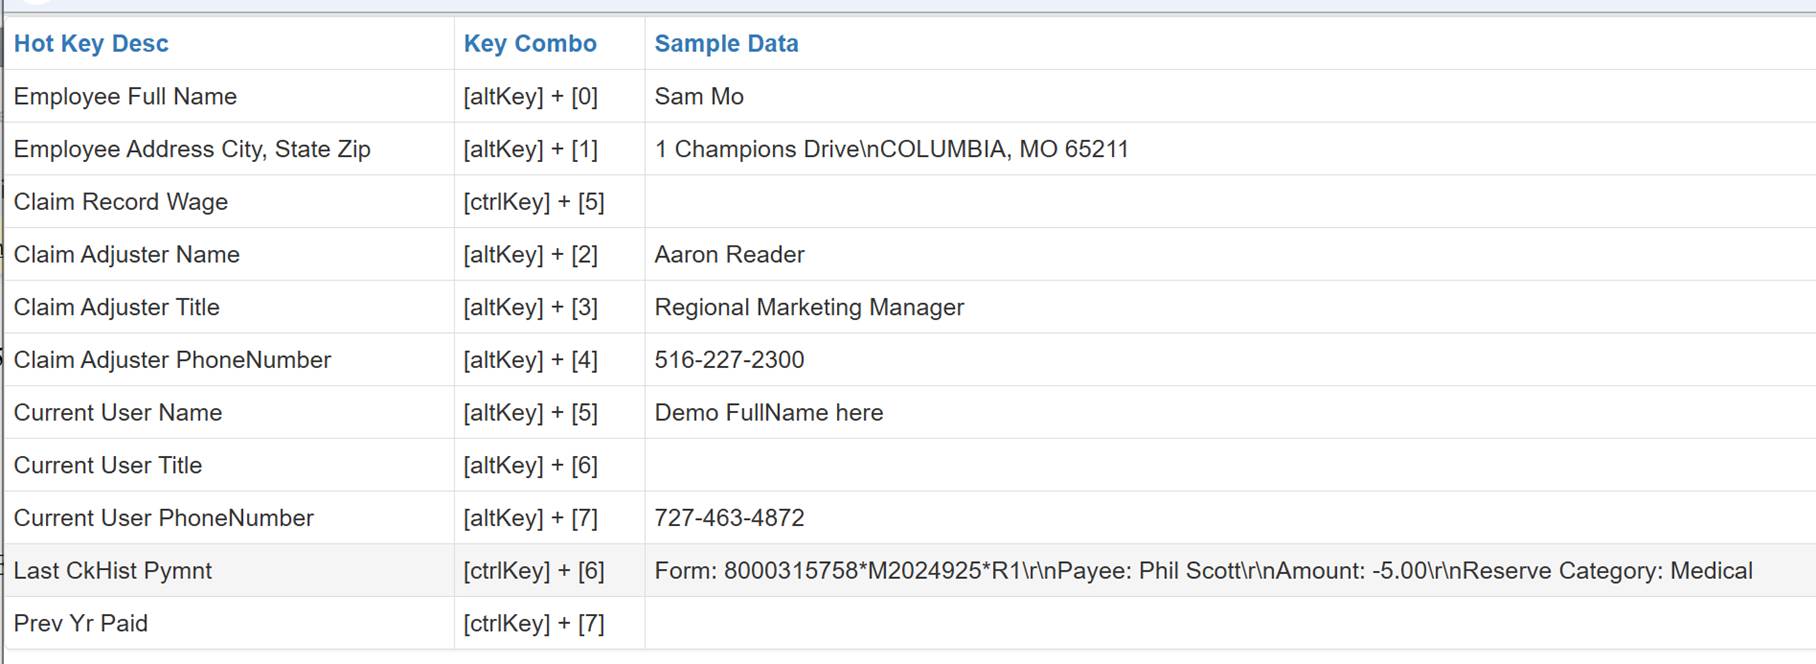
Hot Keys
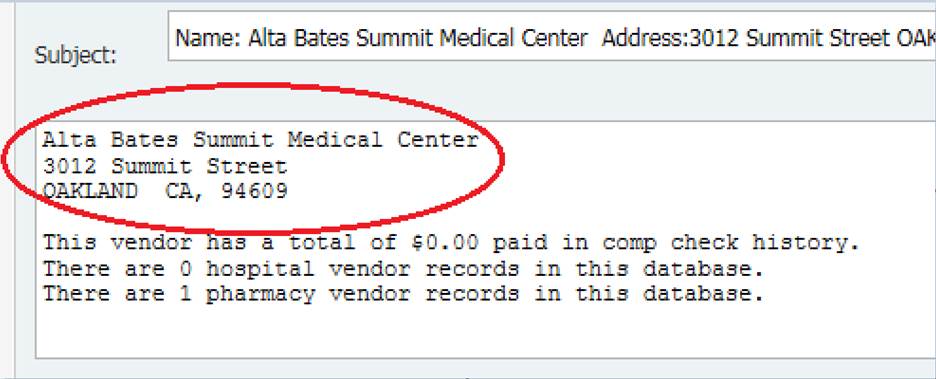
Hot keys can be set up so the user can easily insert routinely used data from the database vs doing a copy and paste from the screens. A list of existing hot keys can be accessed with the Hot Keys toolbar button. In this example for the vendor table only one hot key has been defined. It’s set up so that when the user holds down the Alt-0 key combination in the subject line or email body, the vendor’s name and address will be placed at the current cursor location.
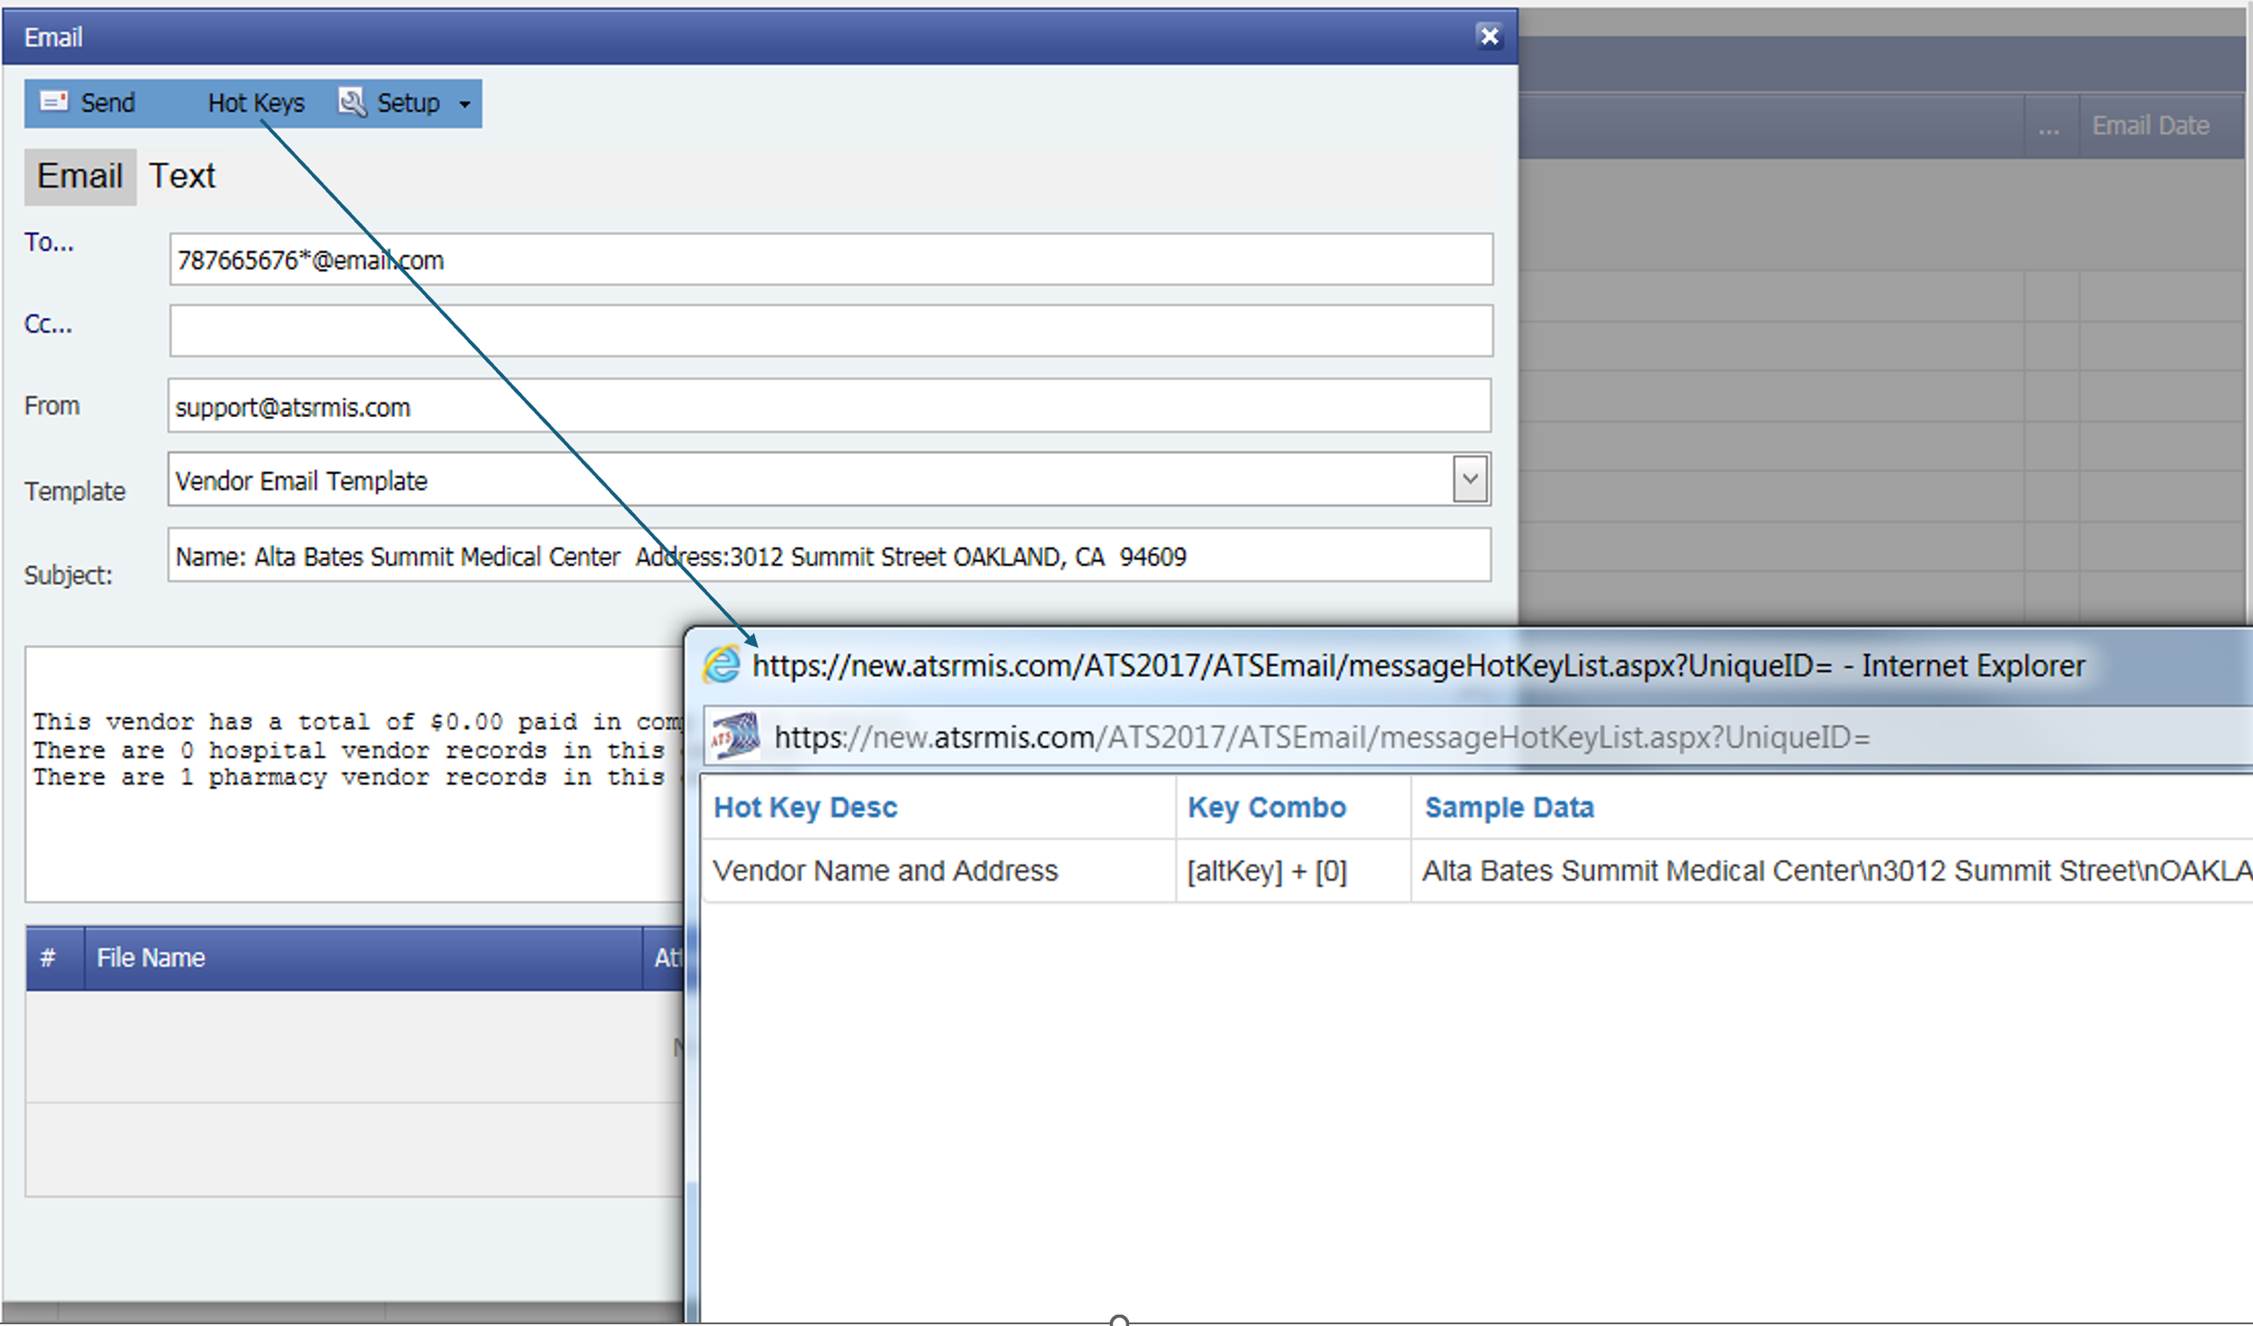
In this example, with the cursor located at the top of the email body, the user held down the key combination Alt-0. The name and address of the vendor was inserted.
Another example of user defined hot keys that were set up for the claim record. The Sample Data is actual data from the record having called the email. The Edit Hot Keys option allows hot keys to be set up.

Diary Screen Email
The diary screen contains an email button on the tool bar which also works with templates.
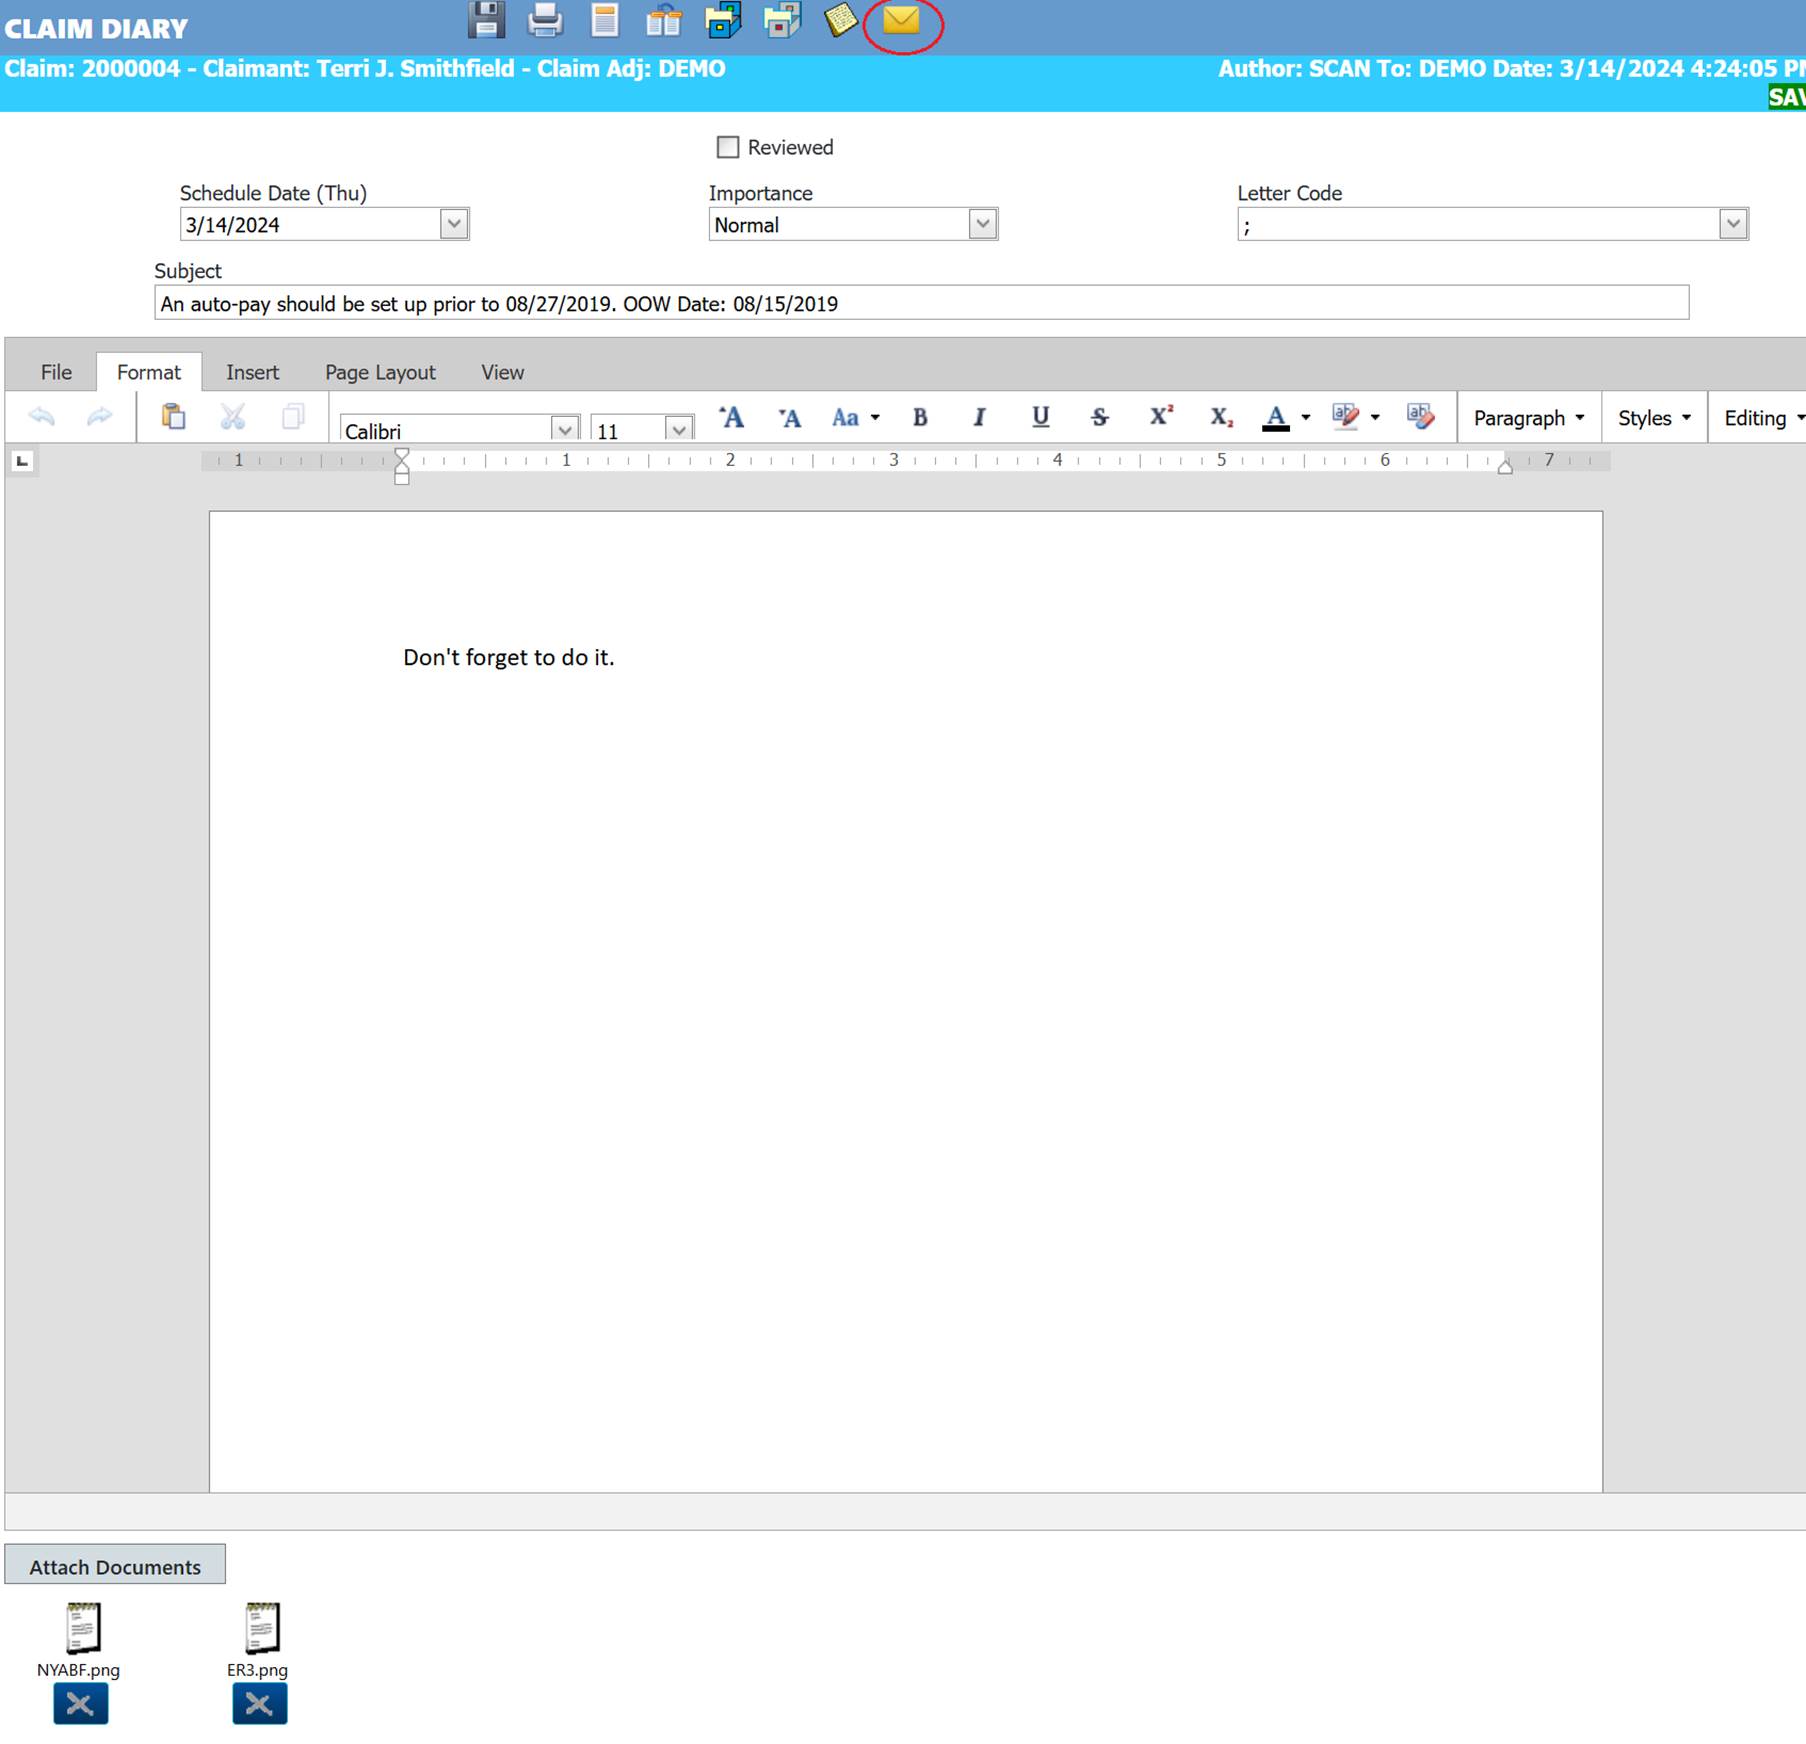
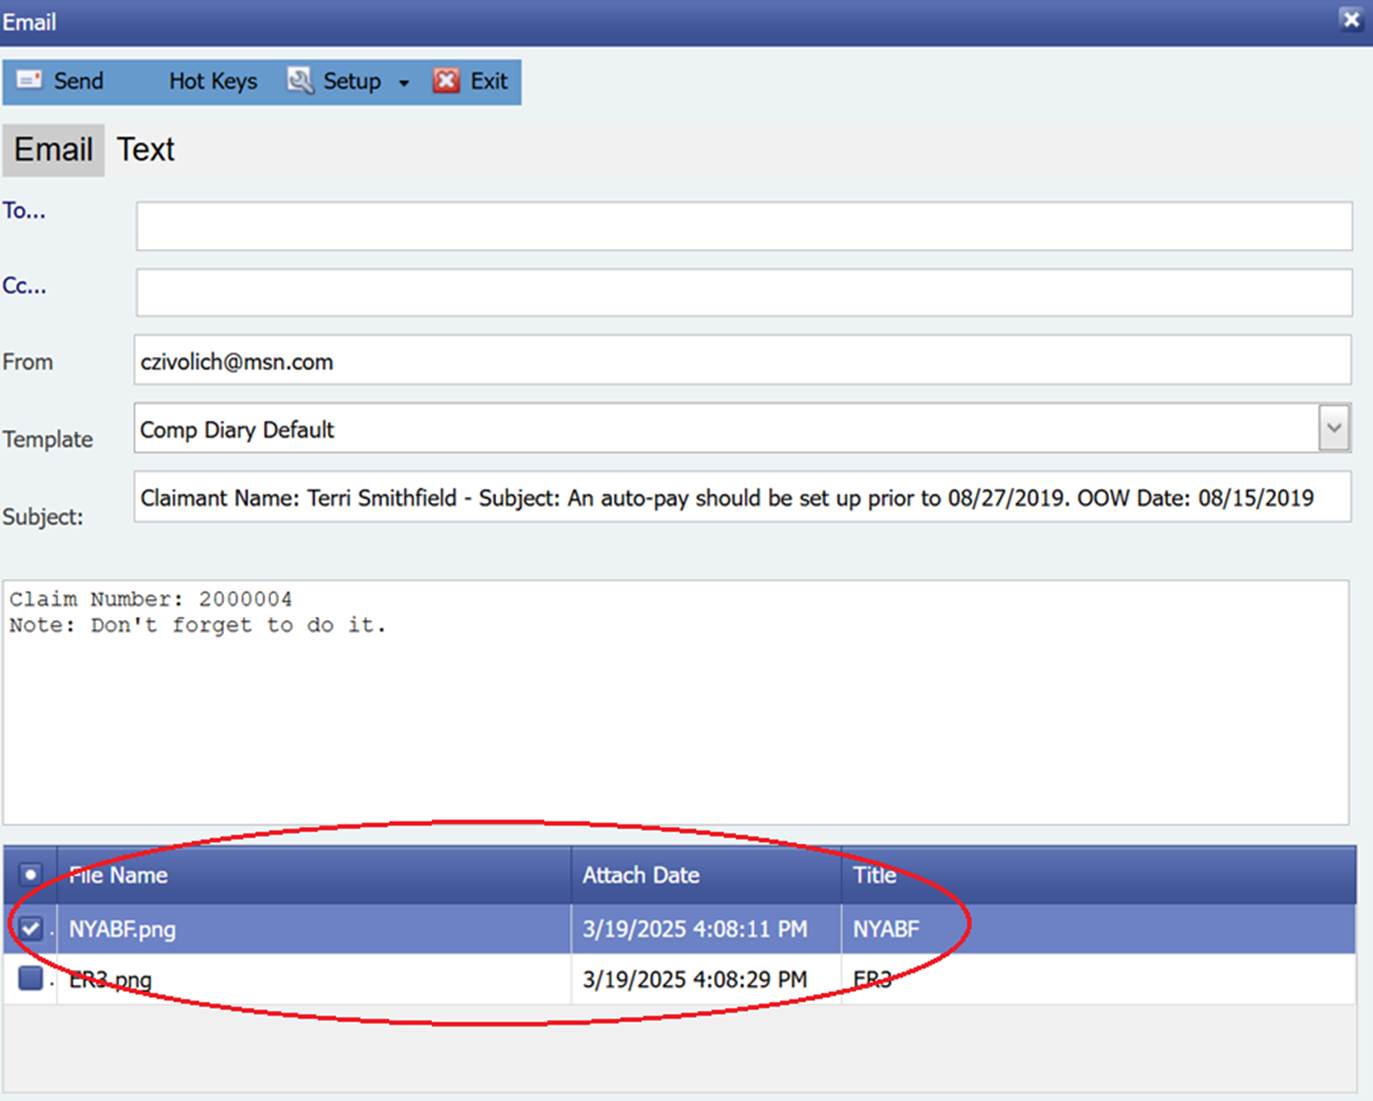
If there are attachments connected to the diary, then they will show on the email with checkboxes. To include attachments, the checkboxes must be checked.
Templates
This is the template used for the diary email example.

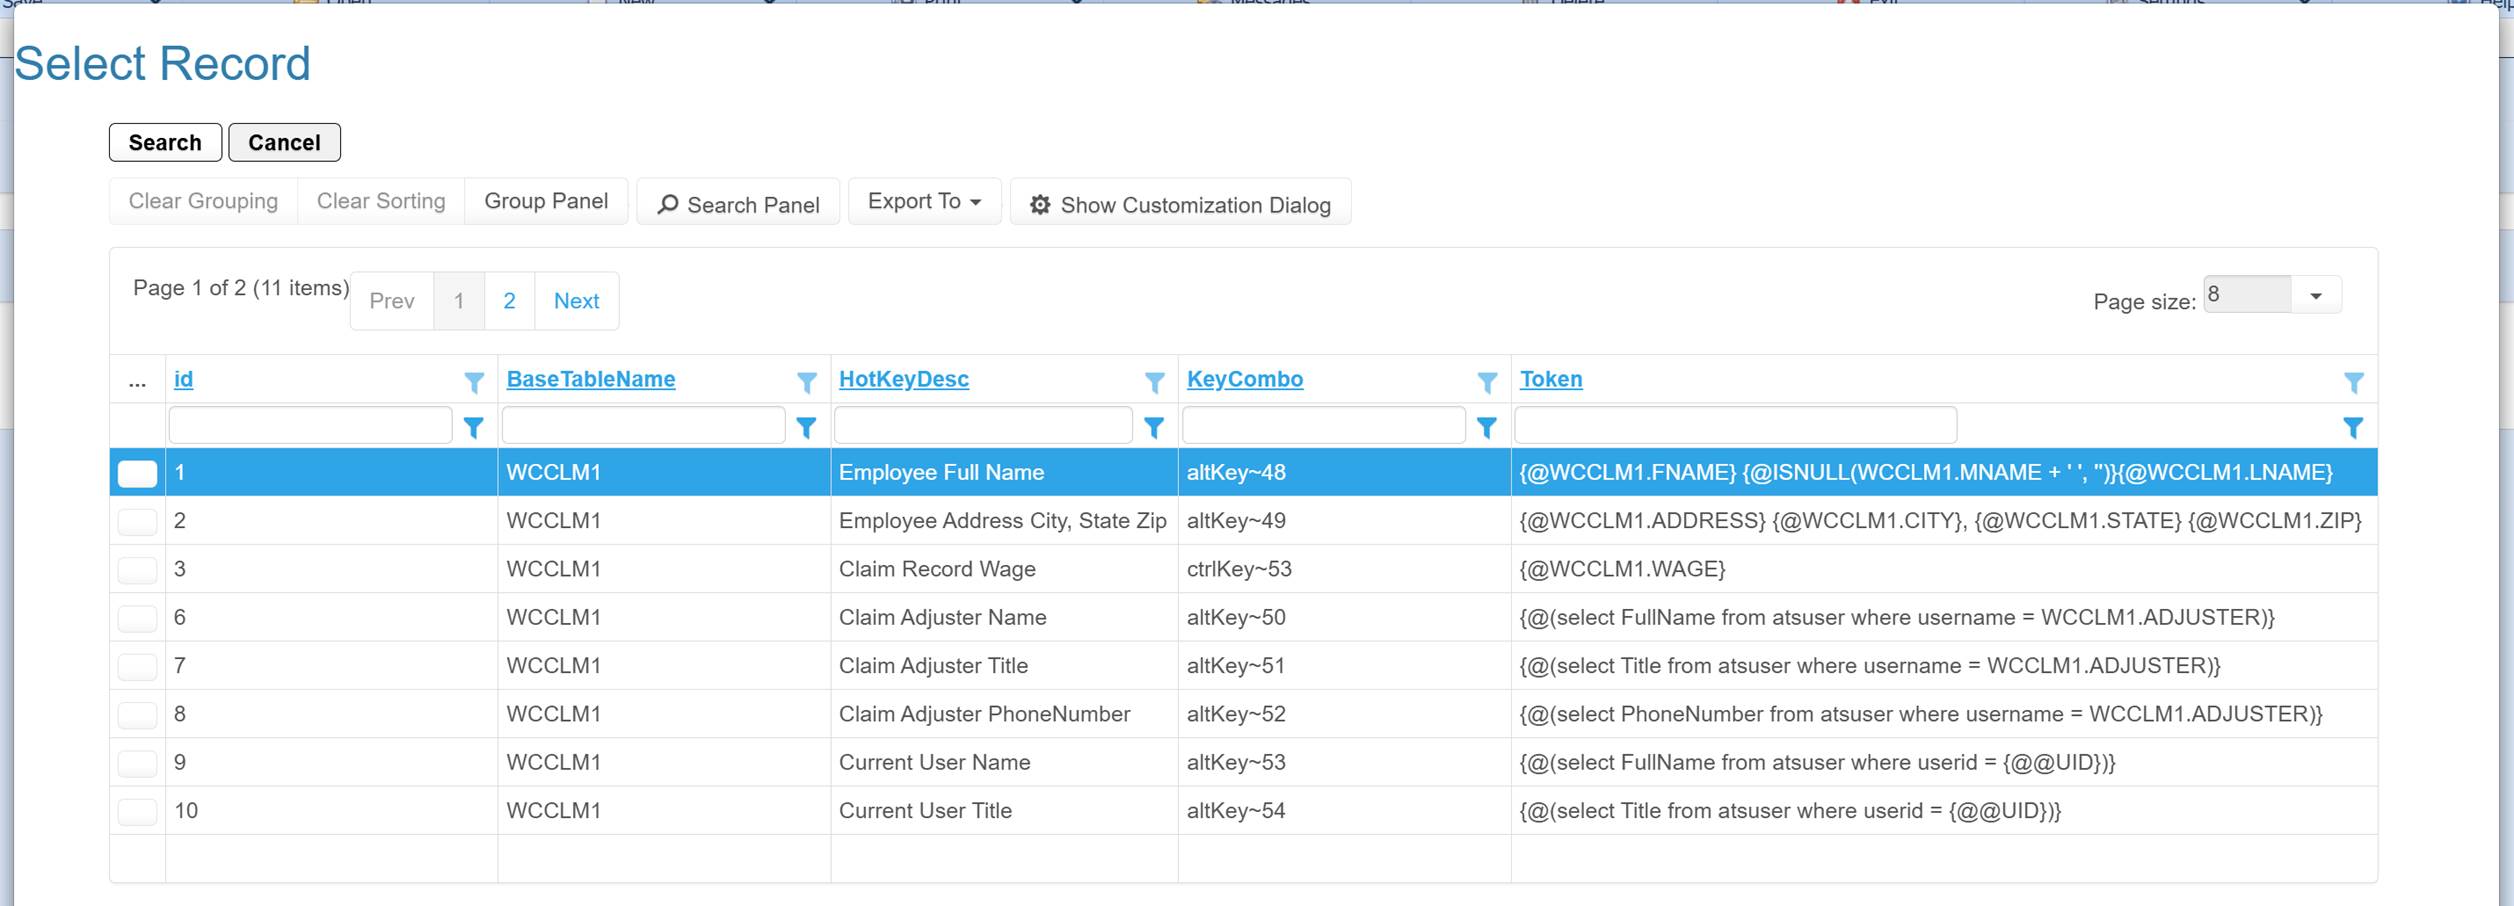
This is an example of a template created for the claim screen. Fields found on the screen which the email option was opened from can be used as tokens in the template, in this case the claim screen. For example {@WCCLM1.FNAME} is the table name and column name.
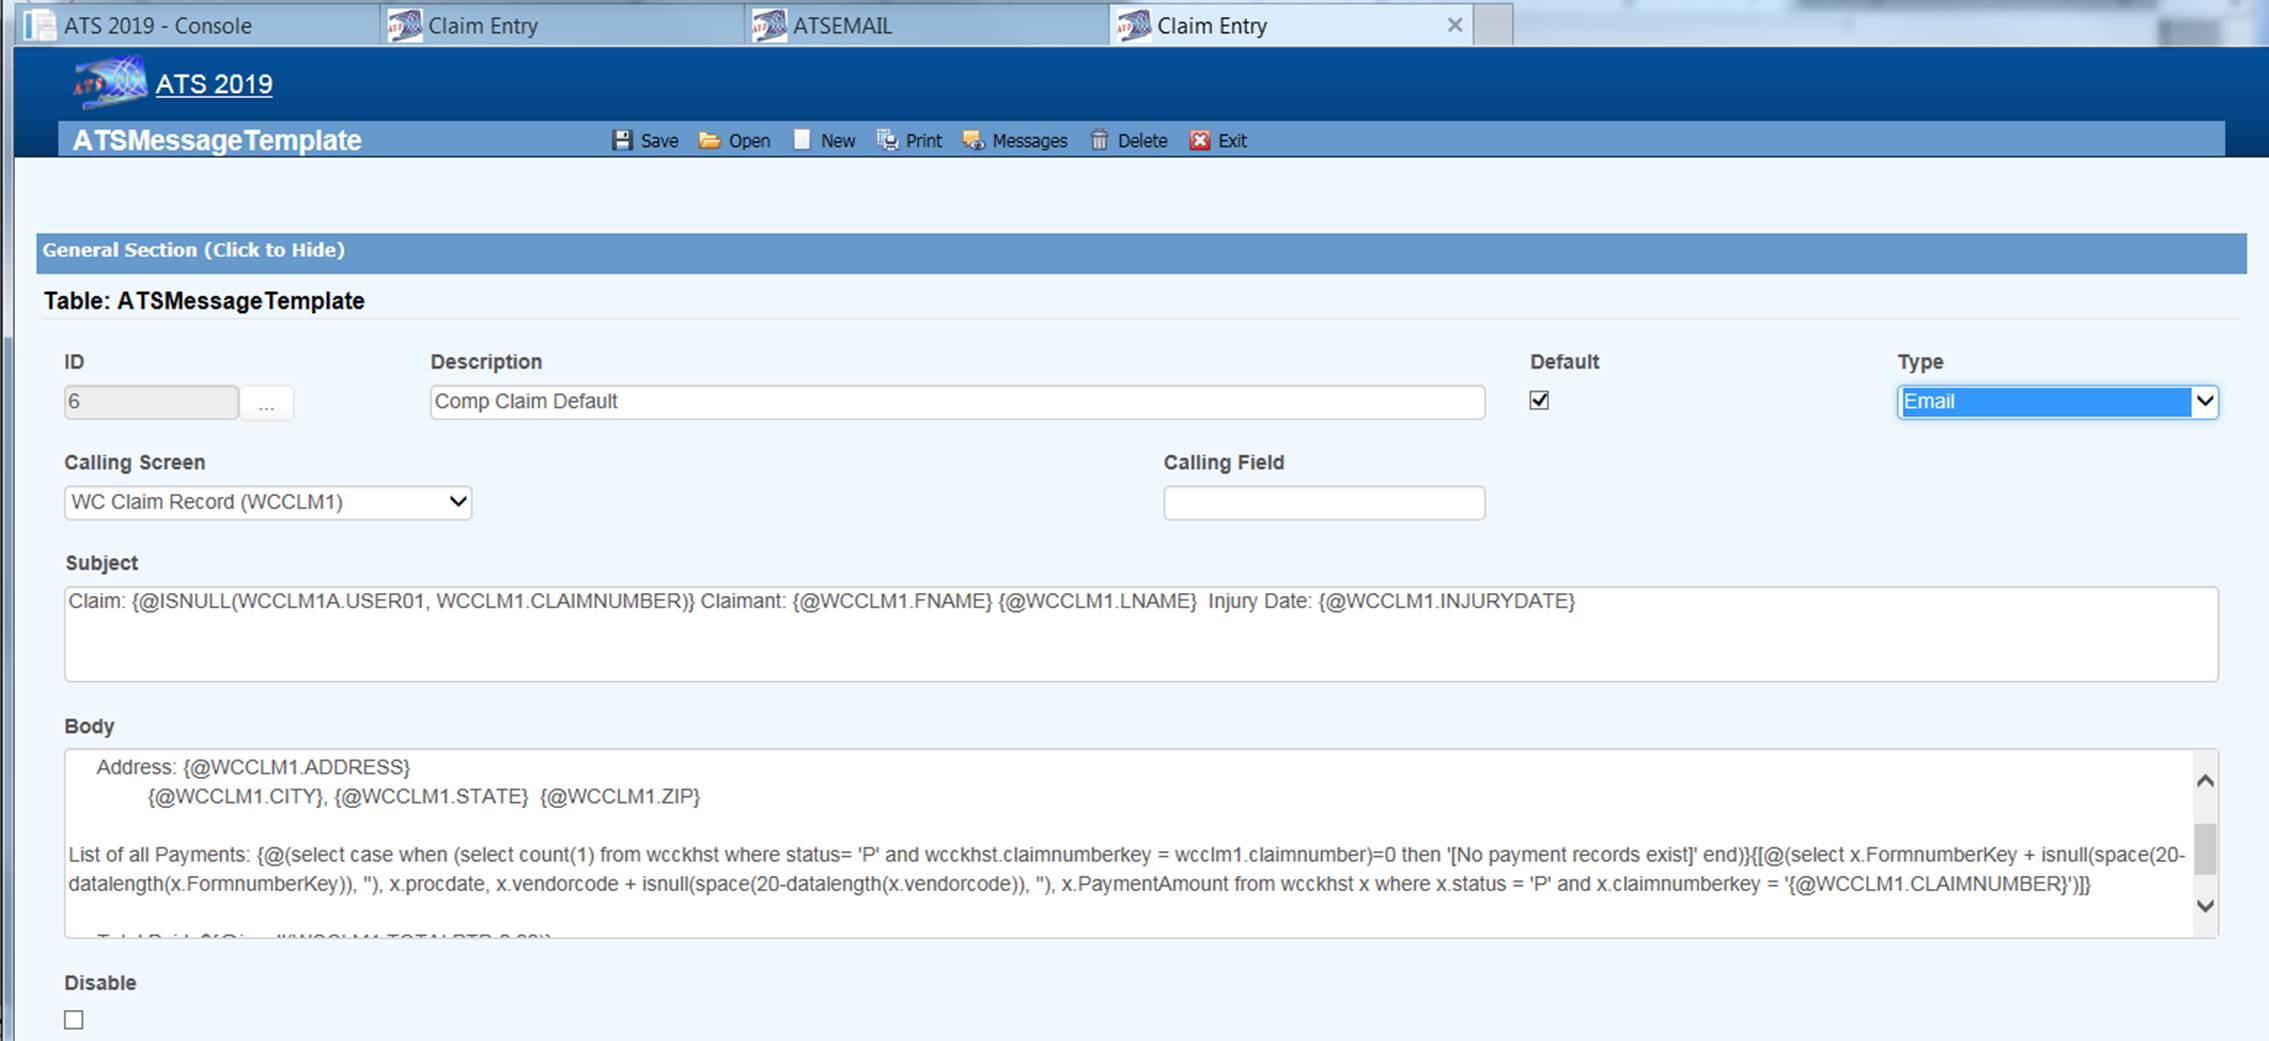
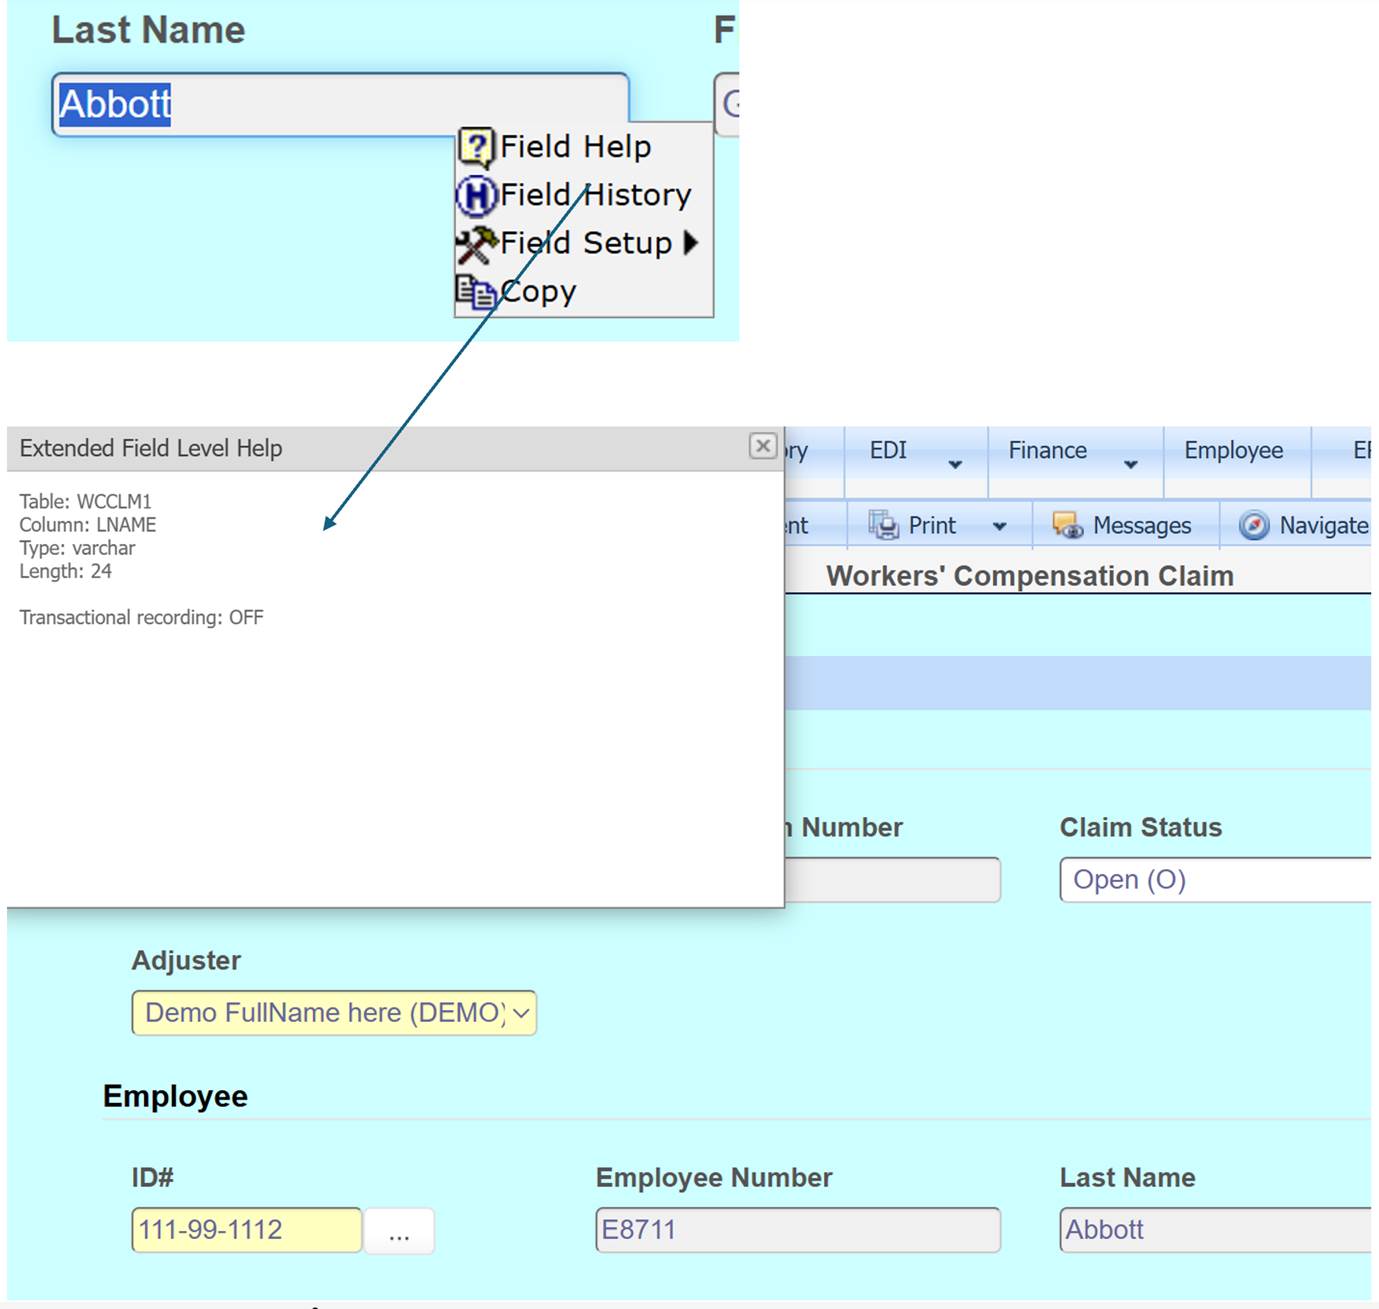
The Field Help option on the field context menu shows the table and column name. Double-click in the text box to bring up the context menu.
In addition to tokens for a specific data entry field, a query can be done to return a specific data item or list of data. In this example a list of payments is returned.
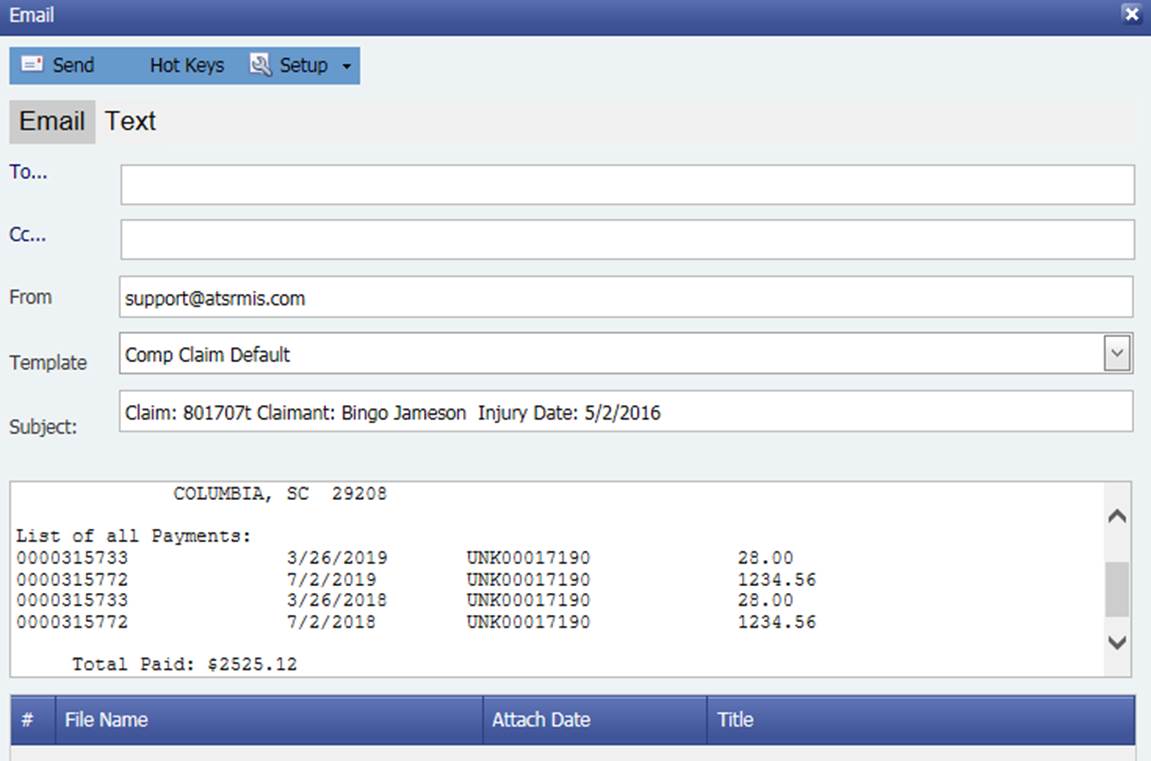
Syntax to return the list of payments in this example:
{[@(select x.FormnumberKey + isnull(space(20-datalength(x.FormnumberKey)), ''), x.procdate, x.vendorcode
+ isnull(space(20-datalength(x.vendorcode)), ''), x.PaymentAmount from wcckhst
x where x.status = 'P' and x.claimnumberkey =
'{@WCCLM1.CLAIMNUMBER}')]}

Another example which would return a single element from a query:
{@(select case when (select count(1) from wcckhst where status= 'P' and wcckhst.claimnumberkey = wcclm1.claimnumber)=0 then '[No payment records exist]' end)}
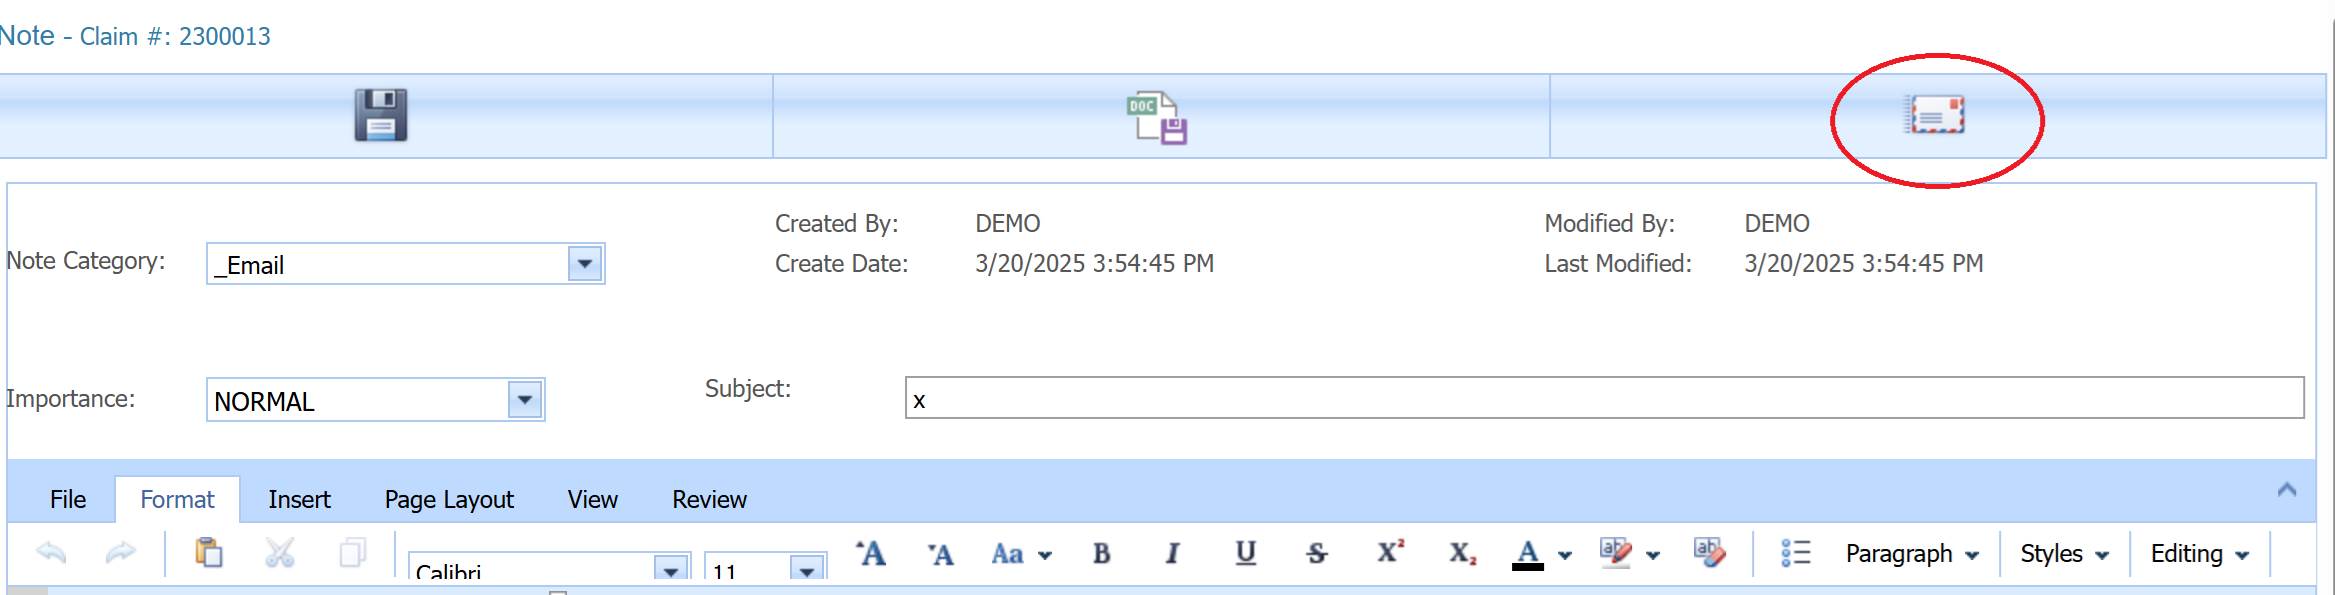
Note Emails
Notes also have an email option.
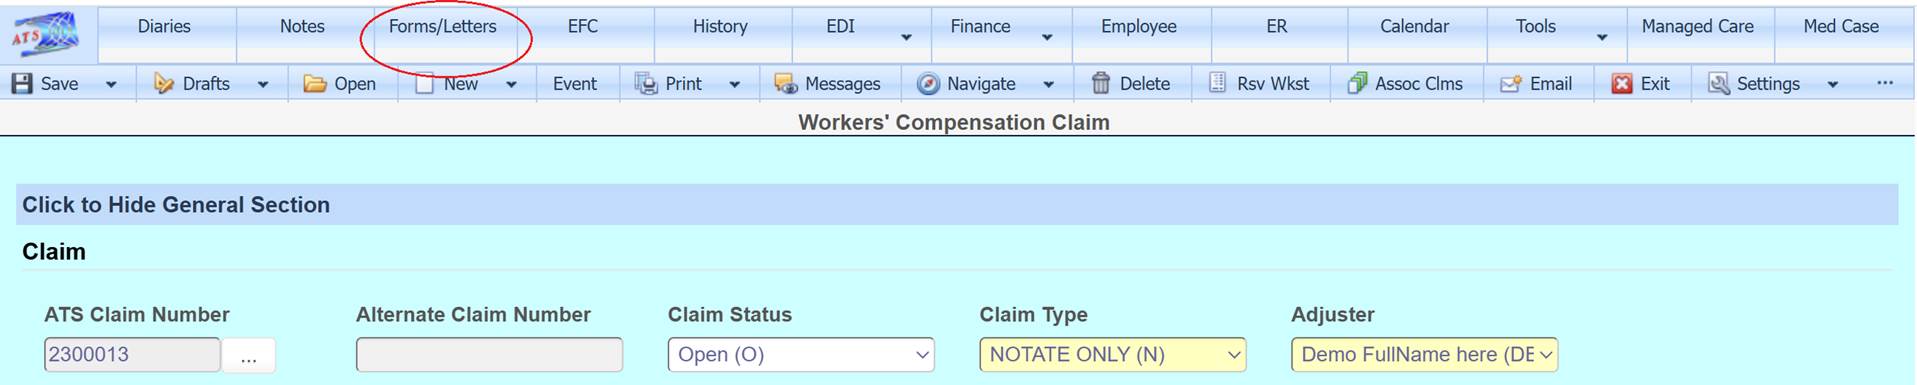
Claim Forms Emails
Forms can be emailed automatically when created and saved from a claim record.
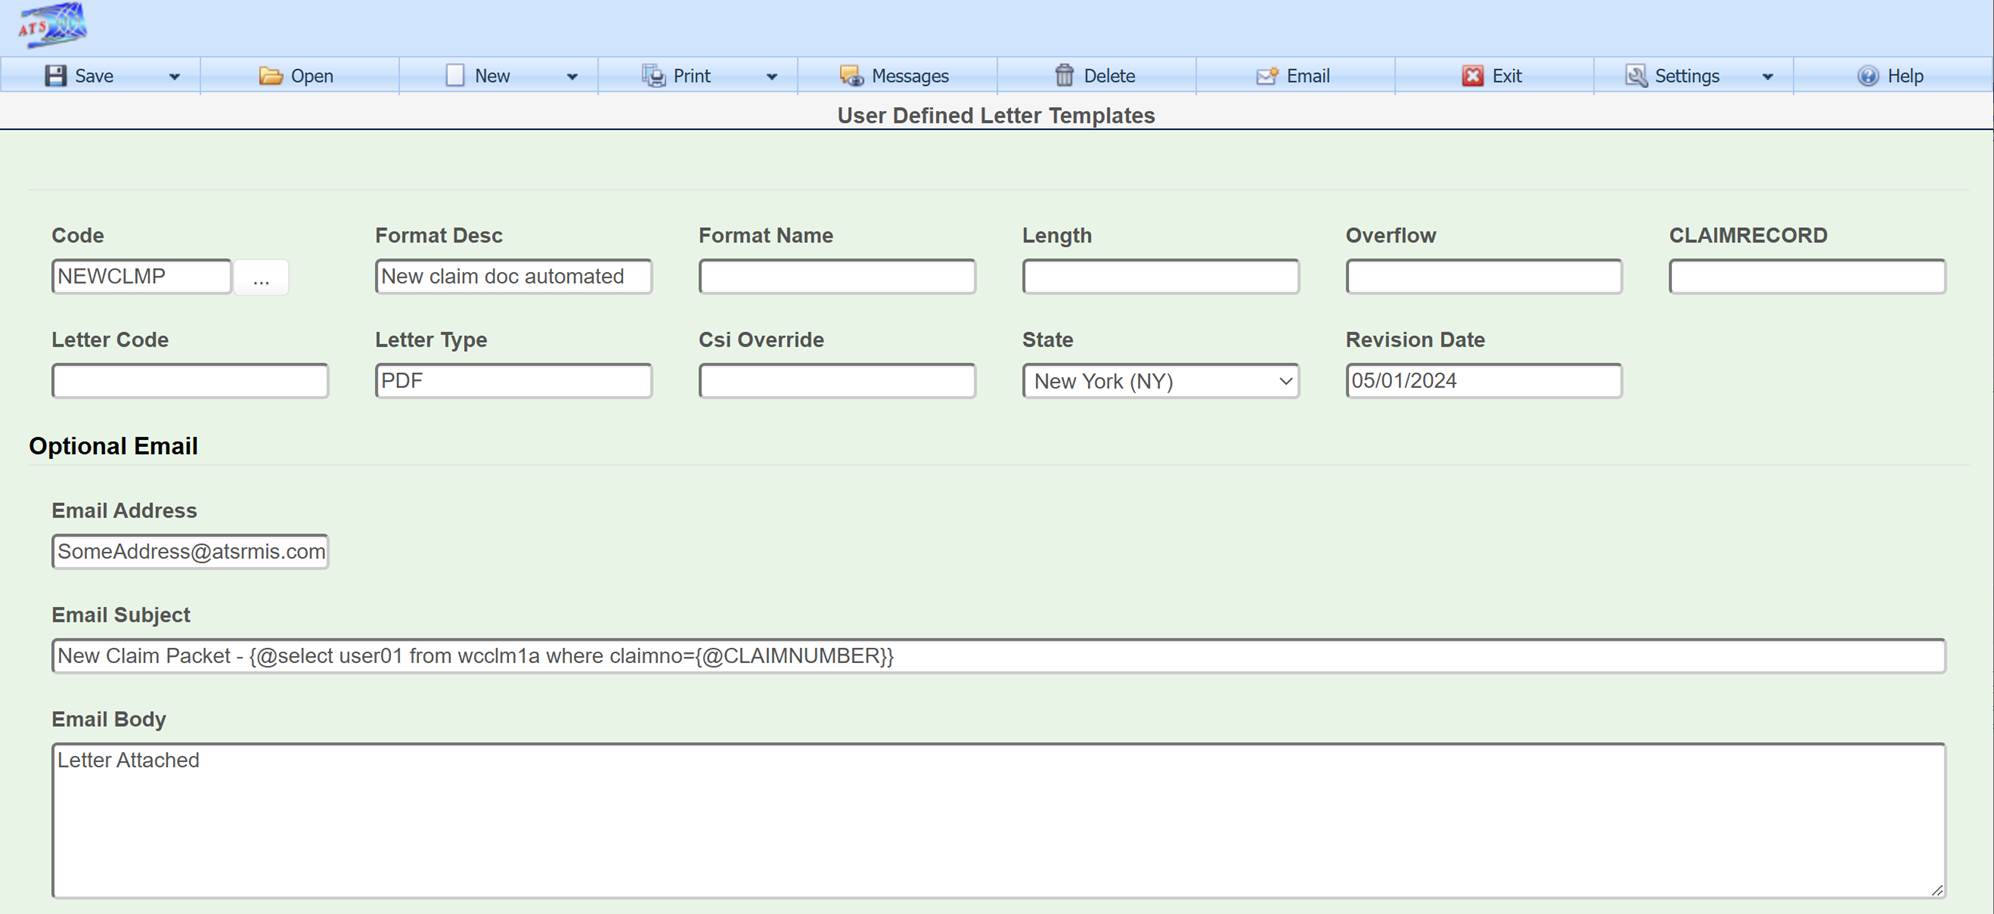
Email options are set in the in the Tables option found in Maintenance from the ATS Console.

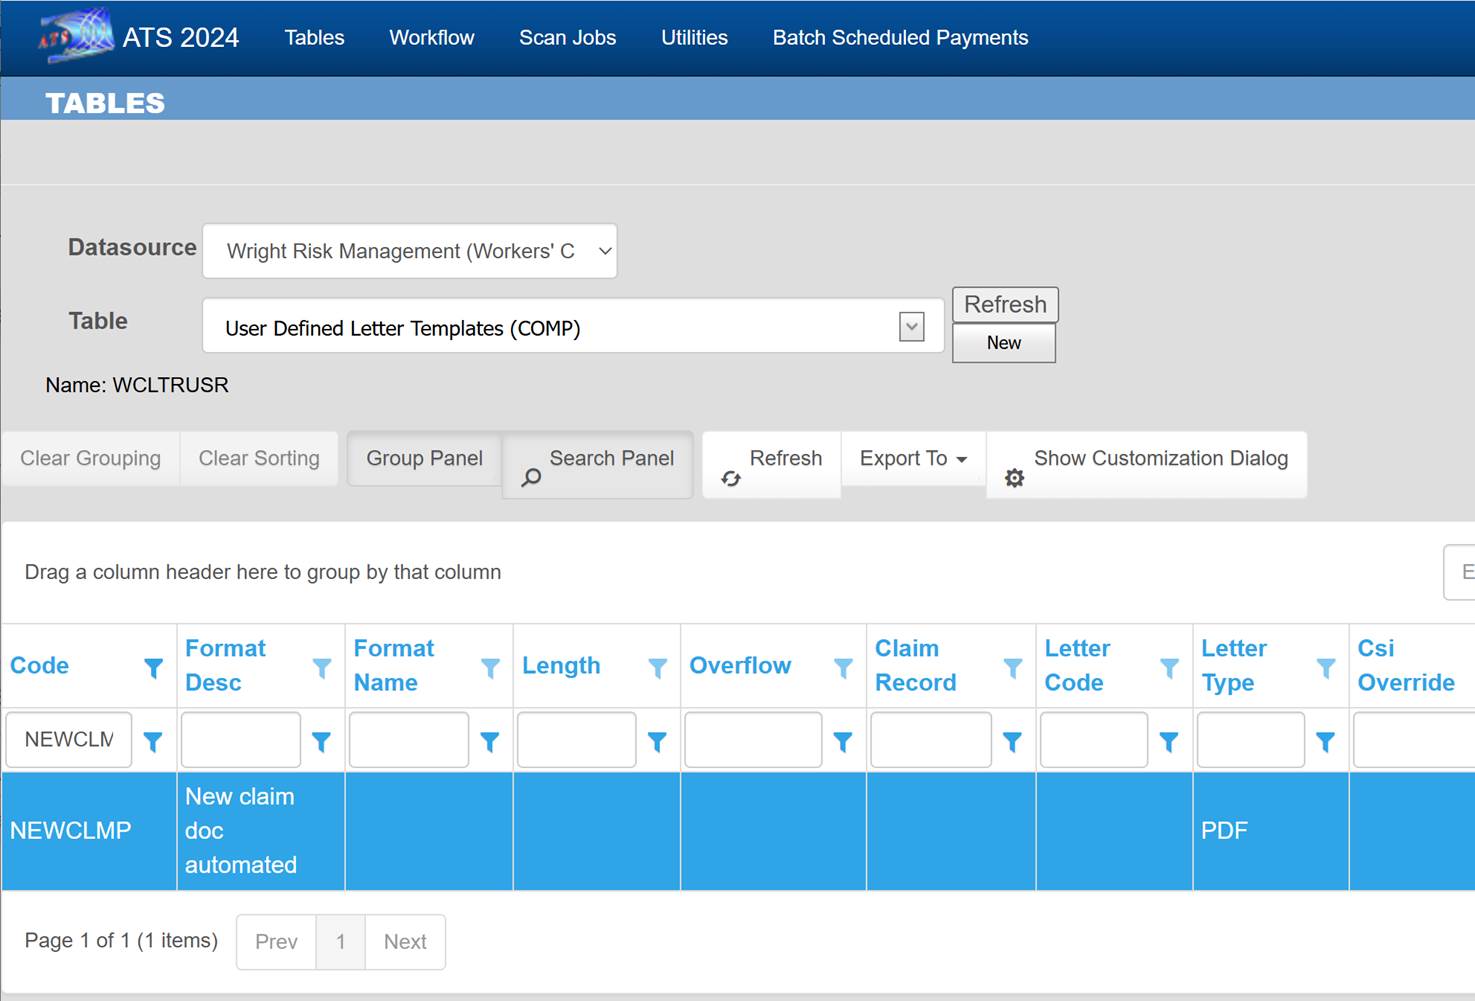
This template is set up to send an email to SomeoneAddress@atsrmis.com whenever a new NEWCLMP form is created and saved.
Email
Recipients