Printing Checks
Access payment printing with the Processes toolbar button on the ATS
Console.


Payment Approval Settings
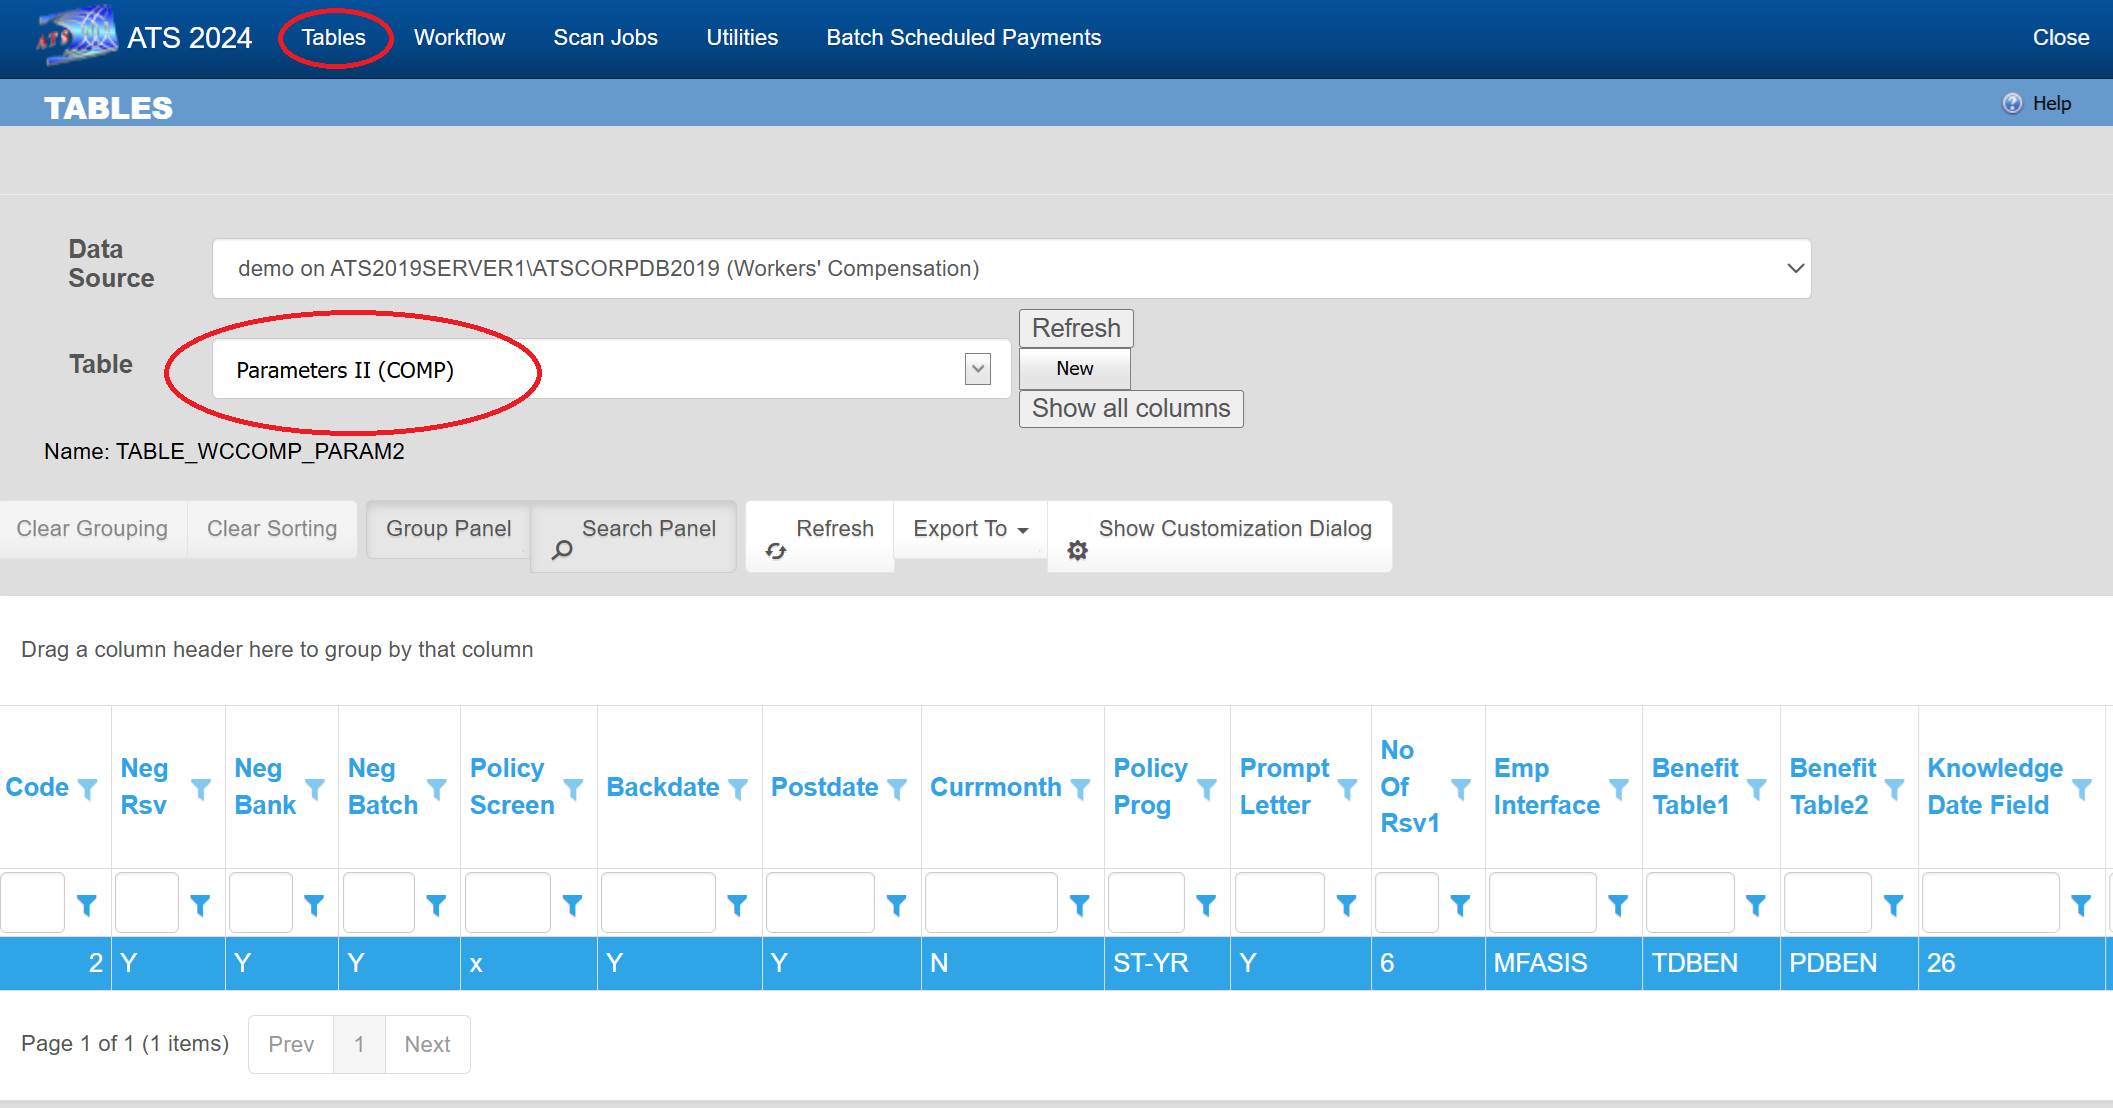
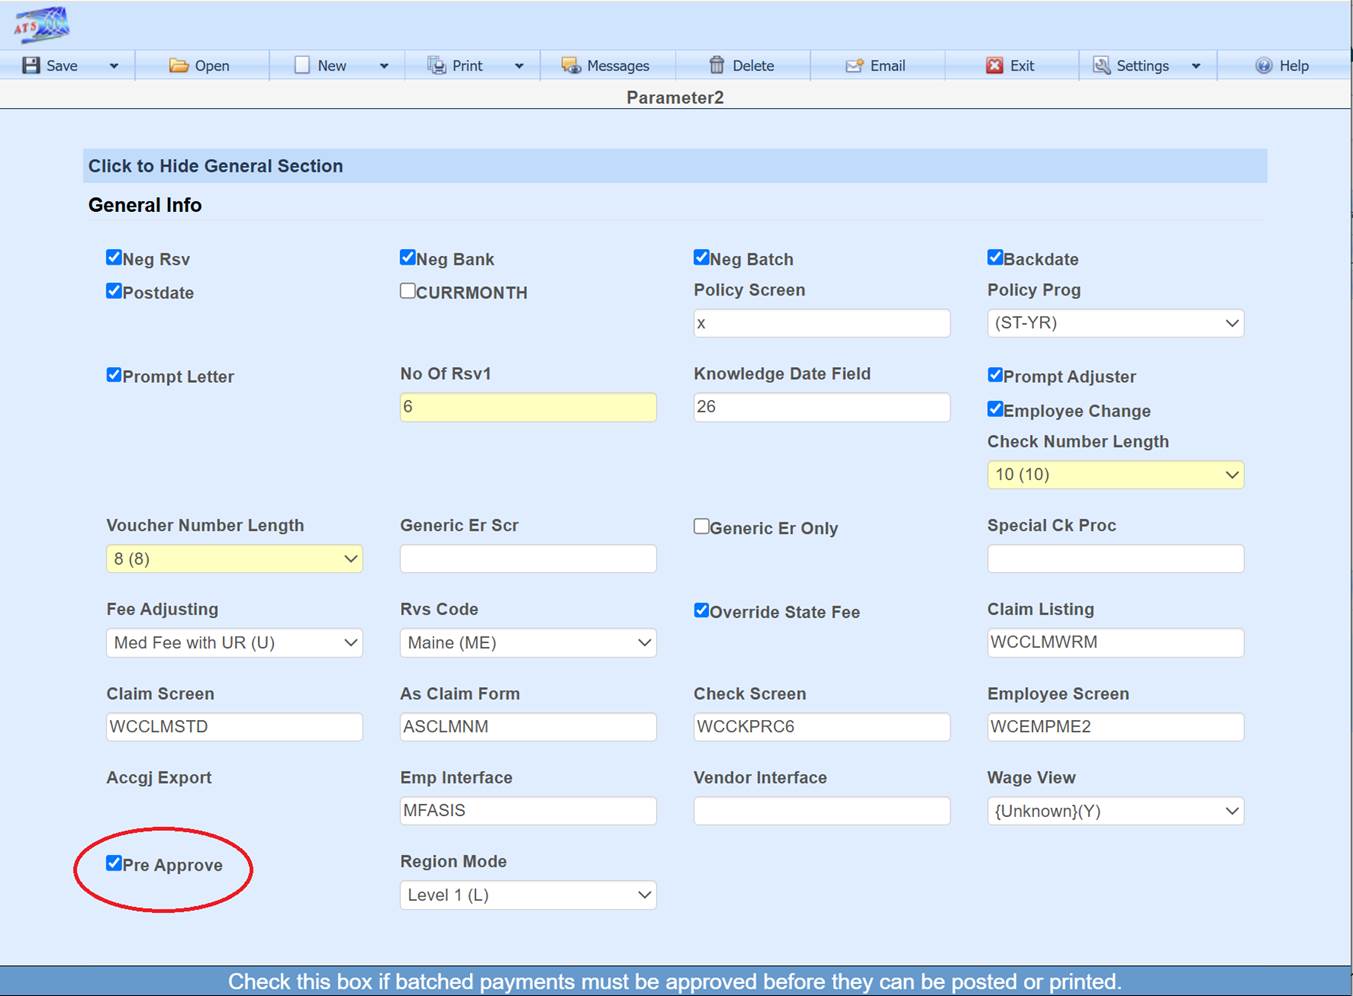
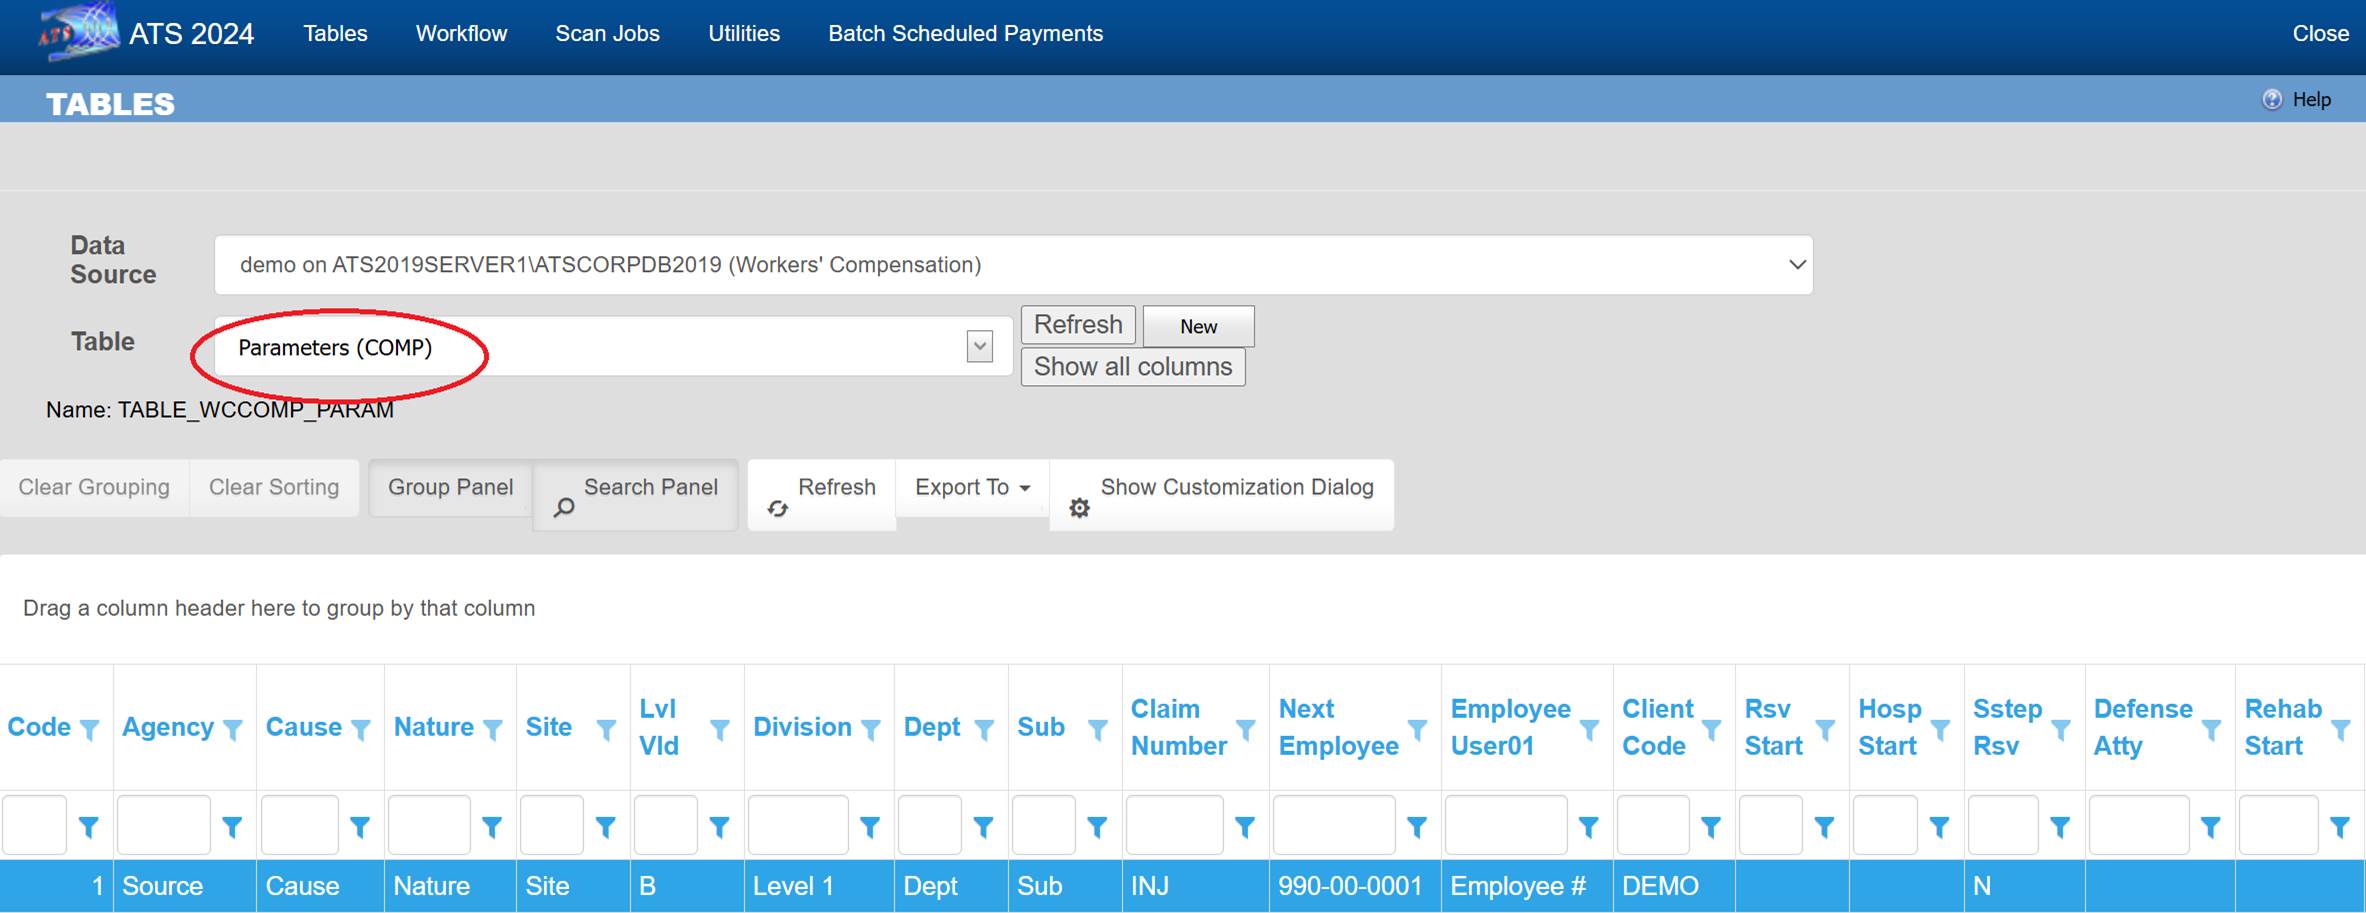
If the system parameters are set to use pre-approval mode, then only checks marked as approved can be printed. For users with authority, system parameters can be accessed from the Maintenance button on the ATS Console tool bar. Select Parameters II from the Table drop down and double-click on the record displayed in the grid to open the screen.
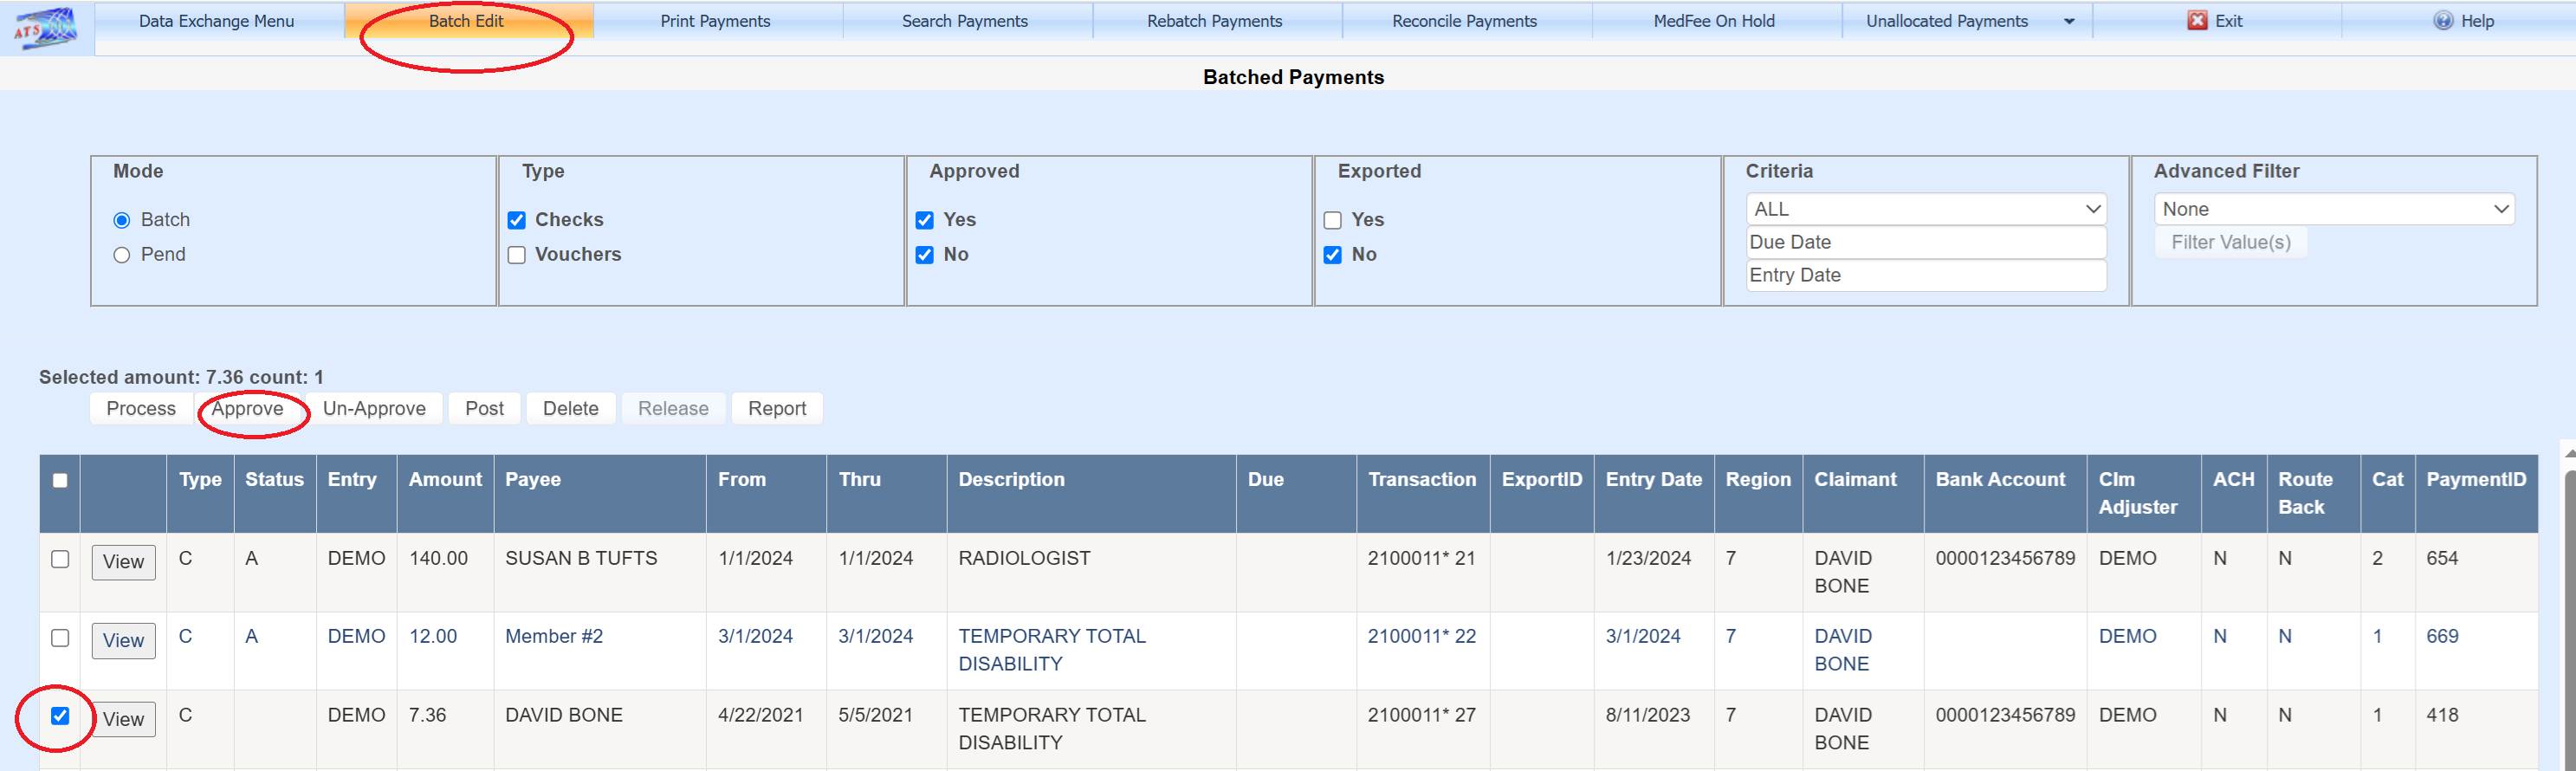
Approving Payments
Users with authority can approve payments for printing or
export using Batch Edit. Set the check box next to each payment to be
approved in the grid and click the Approve button.
Printing Payments
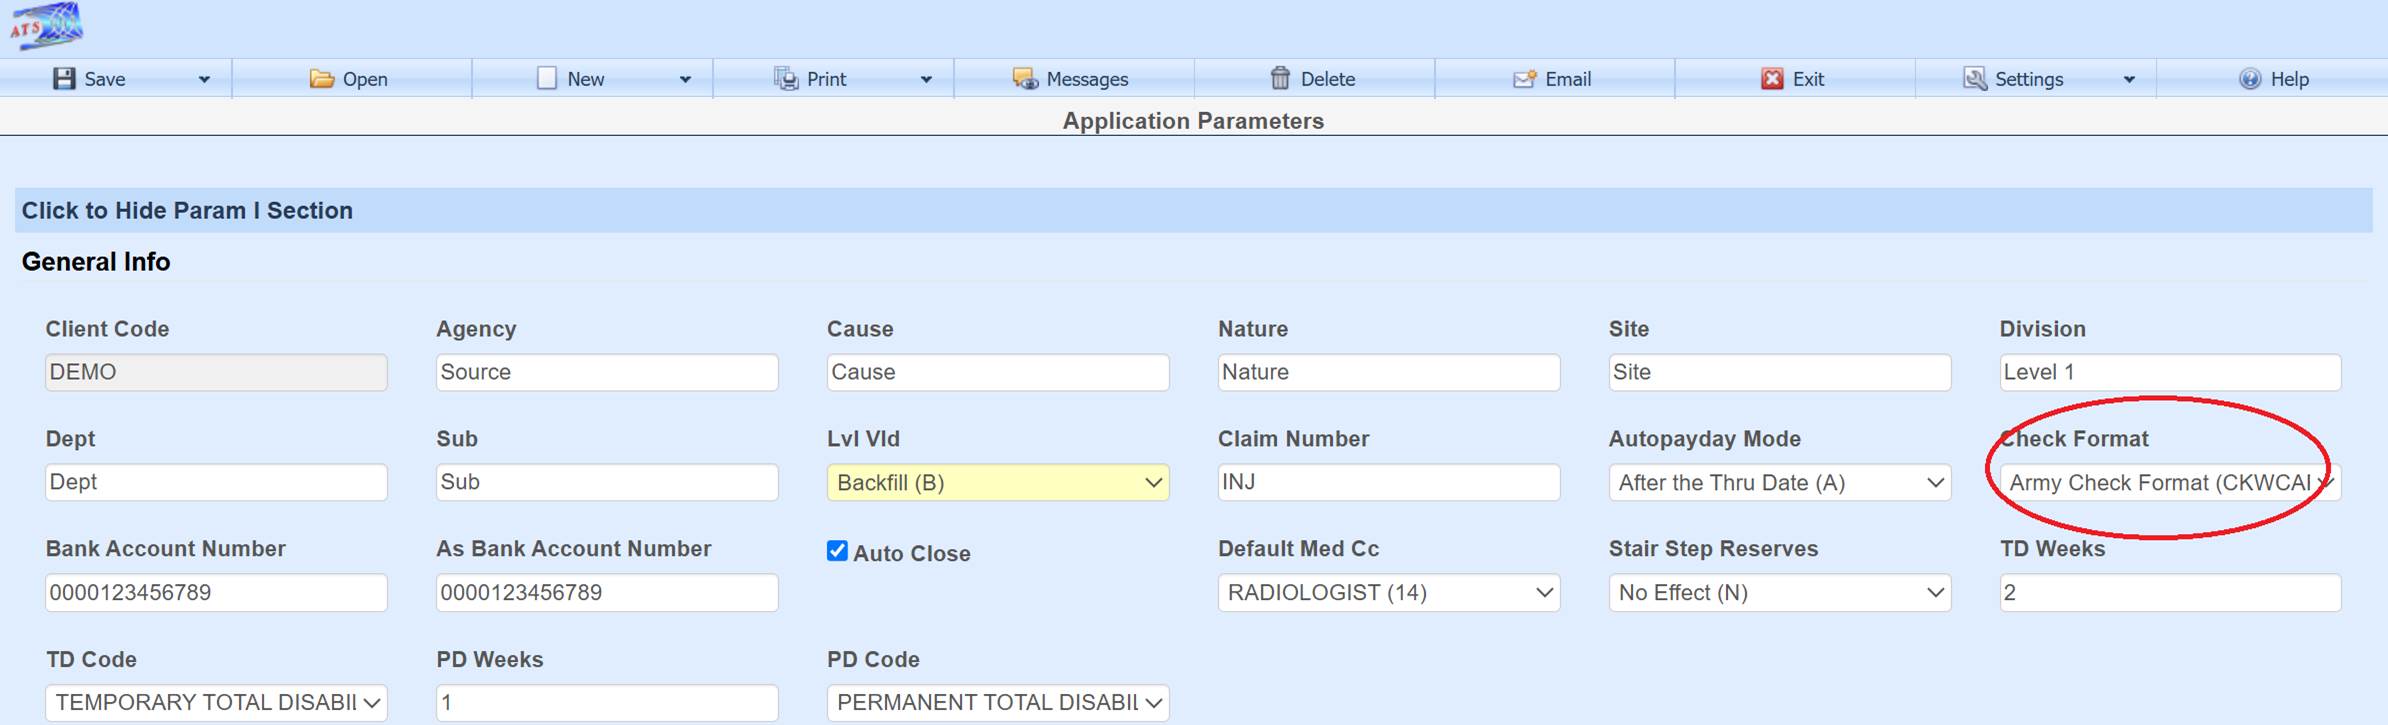
Checks are printed using a Crystal Report. The Check Format dropdown determines the report to use. There would only be more than one report to select from in the event multiple check styles are used. One possible need is for a record keeping copy to be printed. The Check Format dropdown default is set in the parameters screen. When the form number sequence is assigned, the value of the First Form Number field sets the starting number. The number is maintained in the bank account table and updated once the checks being printed have been posted. The Process Date field is used to assign the date the checks will show as having been posted to history, thus typically left as the current date. If the Combine Vendor check box is set, then payments for the same vendor will be combined into one physical check. The Assign Form Numbers button will fill the grid and assign form numbers for batched payments matching the Region(s), Level 1(s), Reserves Category, Due Date, Form Type, and Account Number selection criteria entered. Setting the Include Payments set for ACH checkbox will cause batched payments which are set only for export and have not been exported, to be included in the print job if they match the selection criteria. Once the payments are in the grid, they cannot be altered or deleted by any user using the Batch Edit screen. This stops payment data from changing once the payment process has started. The Clear Assigned Form Numbers button clears the grid if changes are needed. Once the Print Payments button has been clicked, the Assign Form Numbers can no longer be used until the checks have been posted with the Post All Payments button or the Clear Assigned Form Numbers button is clicked. This helps the user to remember to post payments after printing.

Check Format Default
The Payment Printing screen Check Format dropdown
defaults to the setting found in Check Format on the parameters screen.
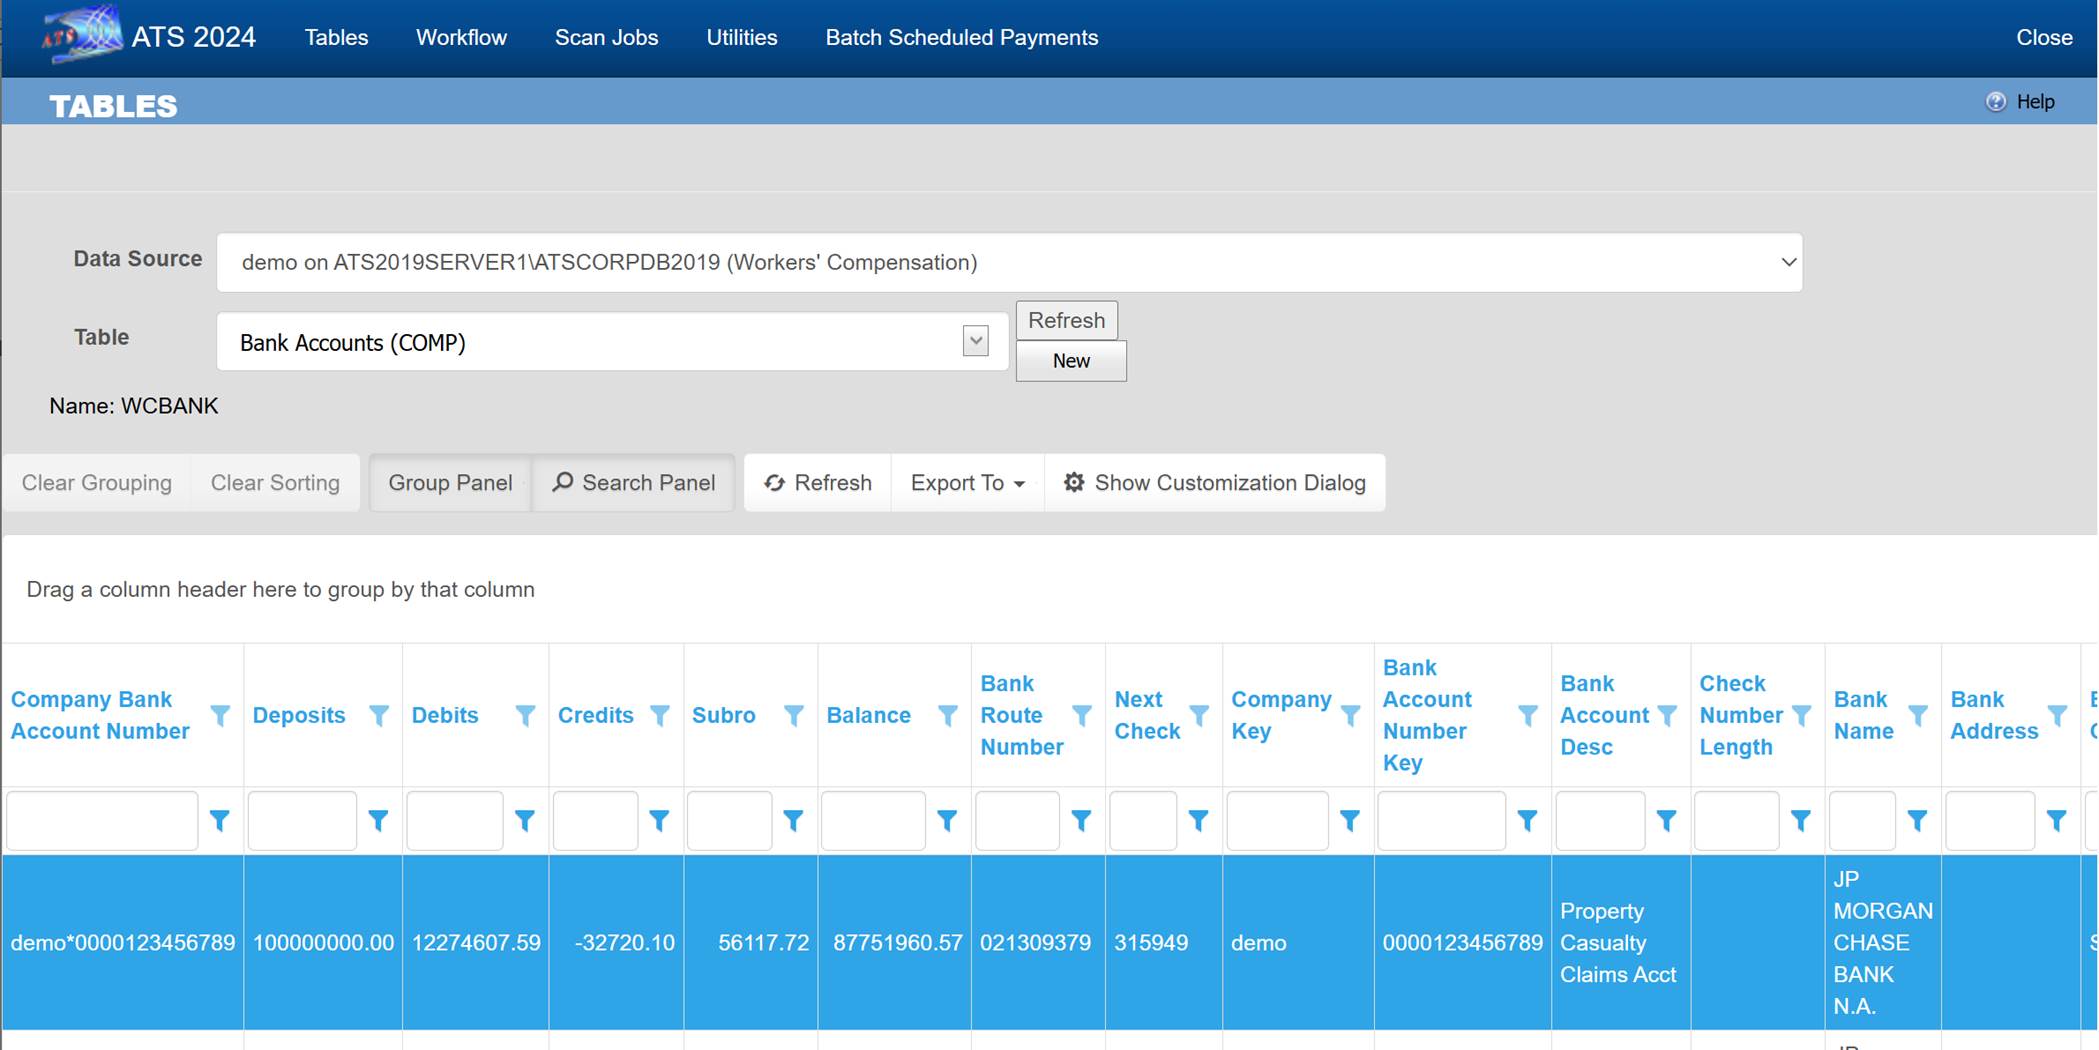
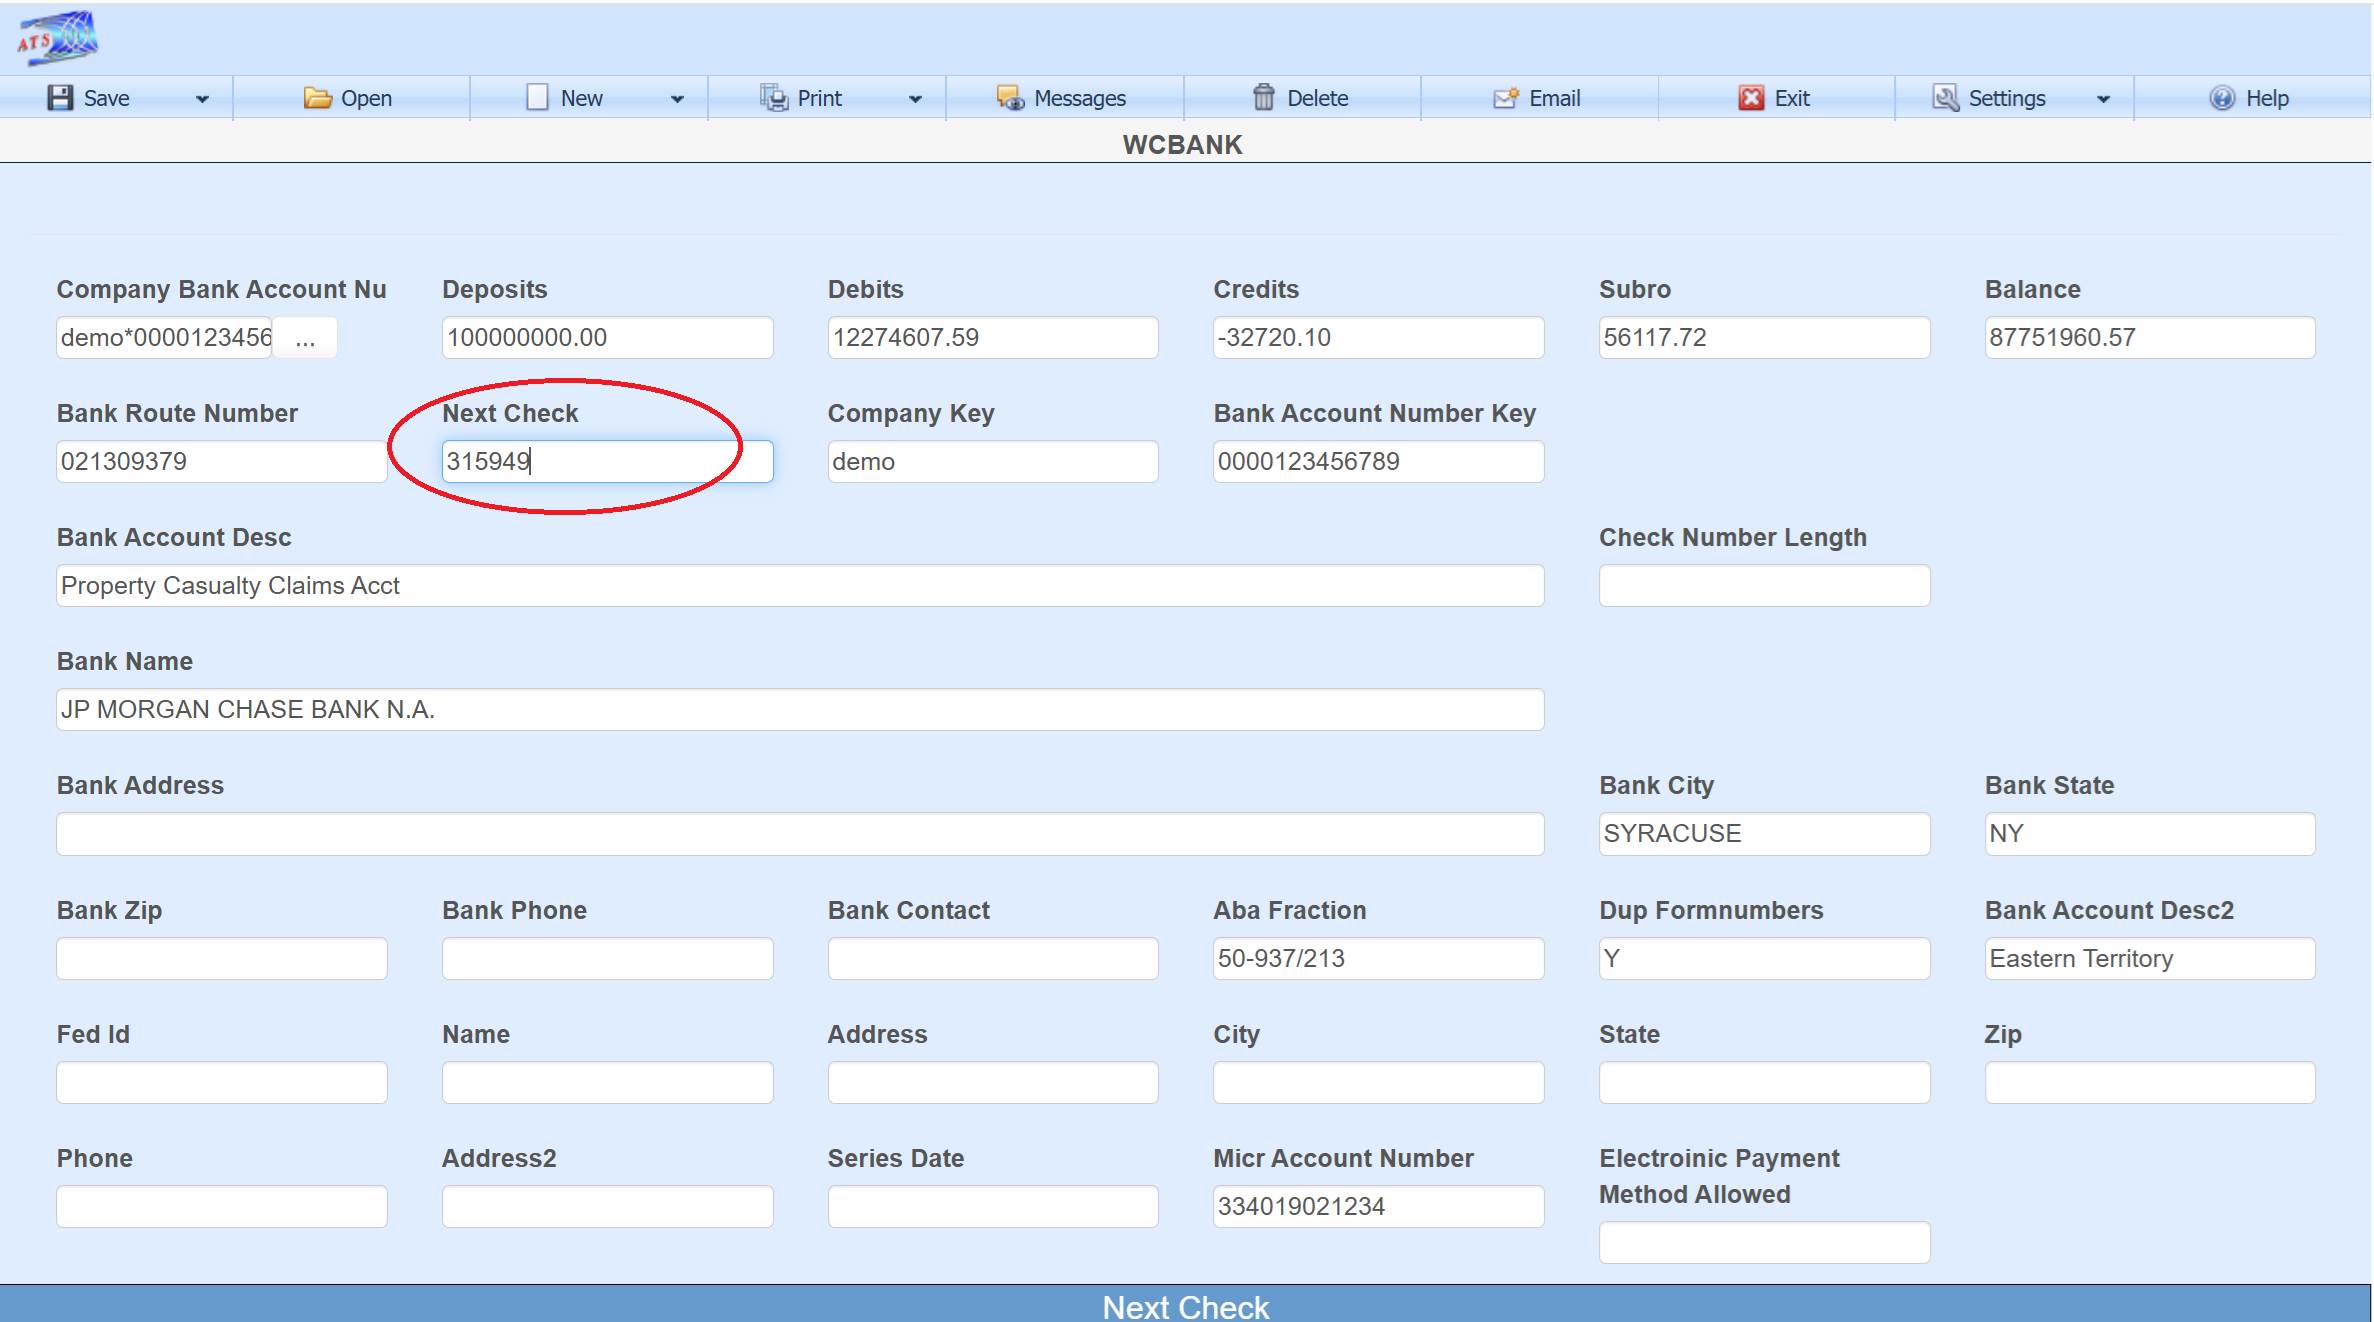
Bank Account
The next bank account number along with other bank data used on the check can be found in the bank account screen.