Payments
Accessing Payment Entry
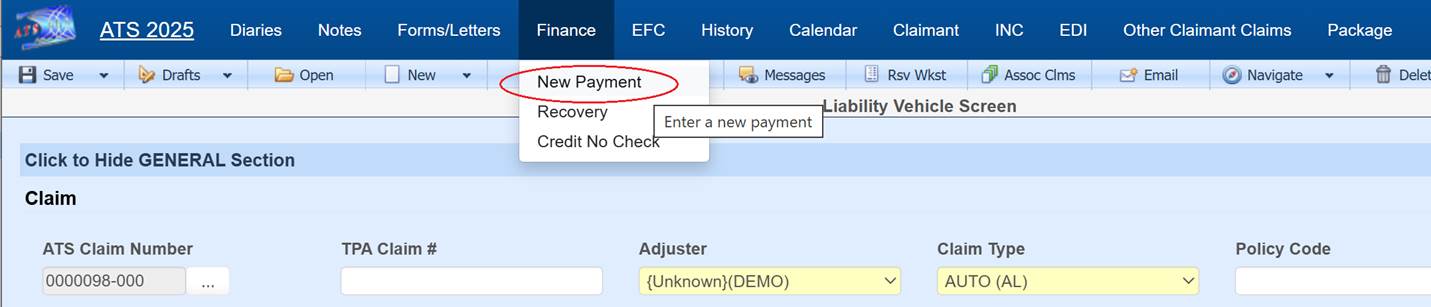
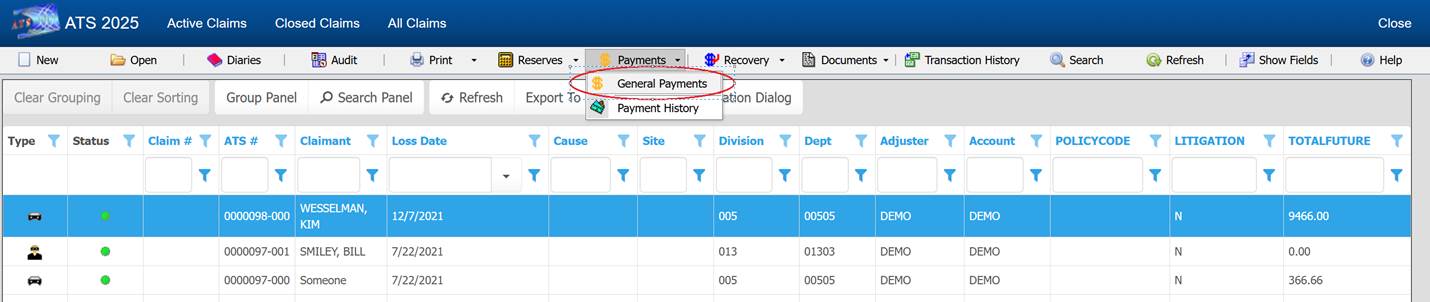
The payment
entry screen, as with many other options, can be opened from the claim screen or
claim search page.
Payment Field Customizations
Field
properties can be over-ridden on the payment screen to change the requirement
status, background color, default value, tab stop on/off, and visibility. Unlike the majority of
data entry screens in the system which allow users with authority to make
changes to these and additional properties, ATS support will need to assist in
changes made to the payment entry screens.
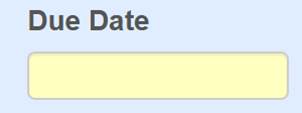
For this example,
the requirement status of Due Date has been
turned on and is thus now showing with a yellow background. The system default is not required for Due
Date.
Reserves
A red message
on top of the page will let you know if the claim is closed.
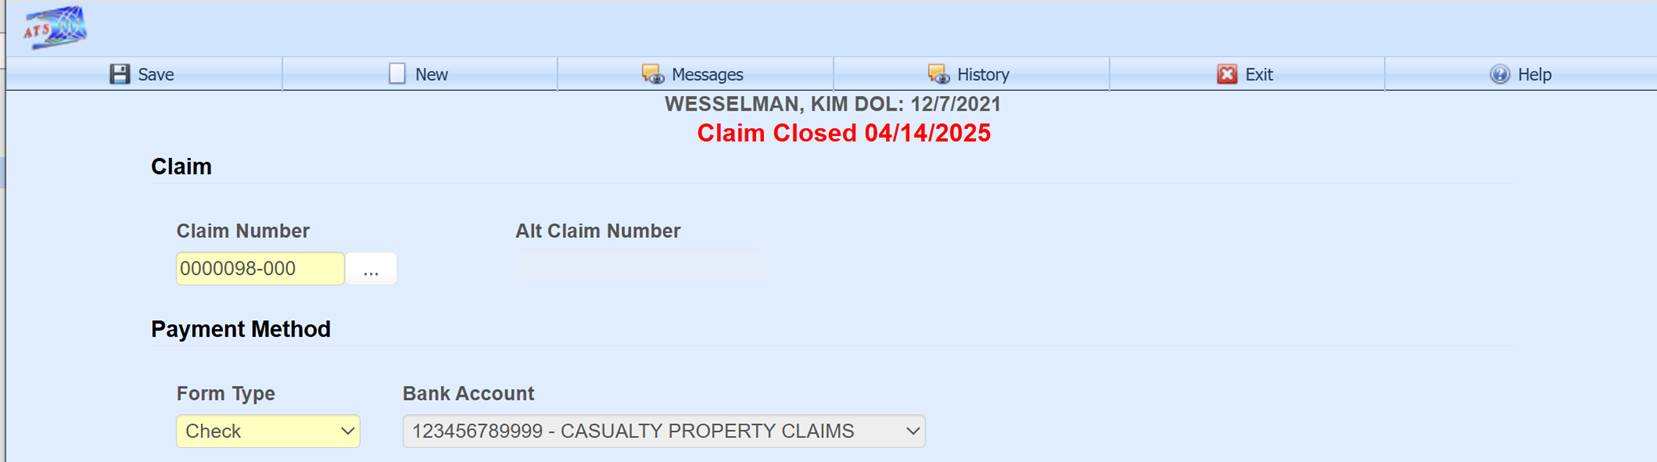
If the claim is
closed, and you decide to make the payment, the application can automatically adjust
the reserves depending on system parameter settings. Authorized users can adjust these settings from
the Maintenance option found on the ATS Console
page.

From the Table drop-down, select Parameters
(PAC) and double-click the record in the grid to edit. The Stair Step
Reserves drop-down has three options, C -
only closed claims, A - any time a payment
is being made that exceeds the current reserves, and N
– which forces the user to adjust reserves prior to the payment any time
reserves are insufficient. There is also
a Neg Rsv option
on the Parameters II page to allow payments to be made without reserves set.

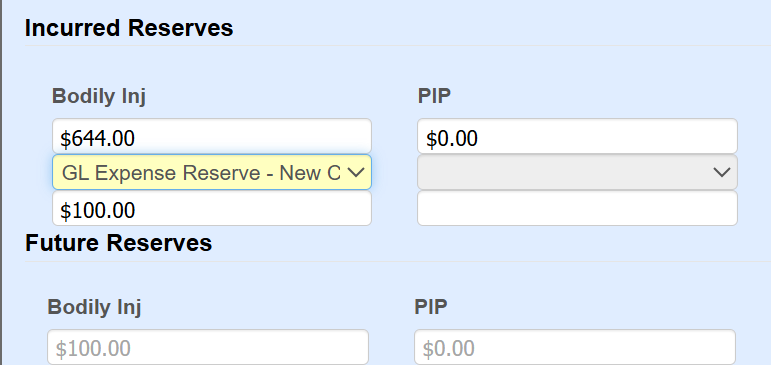
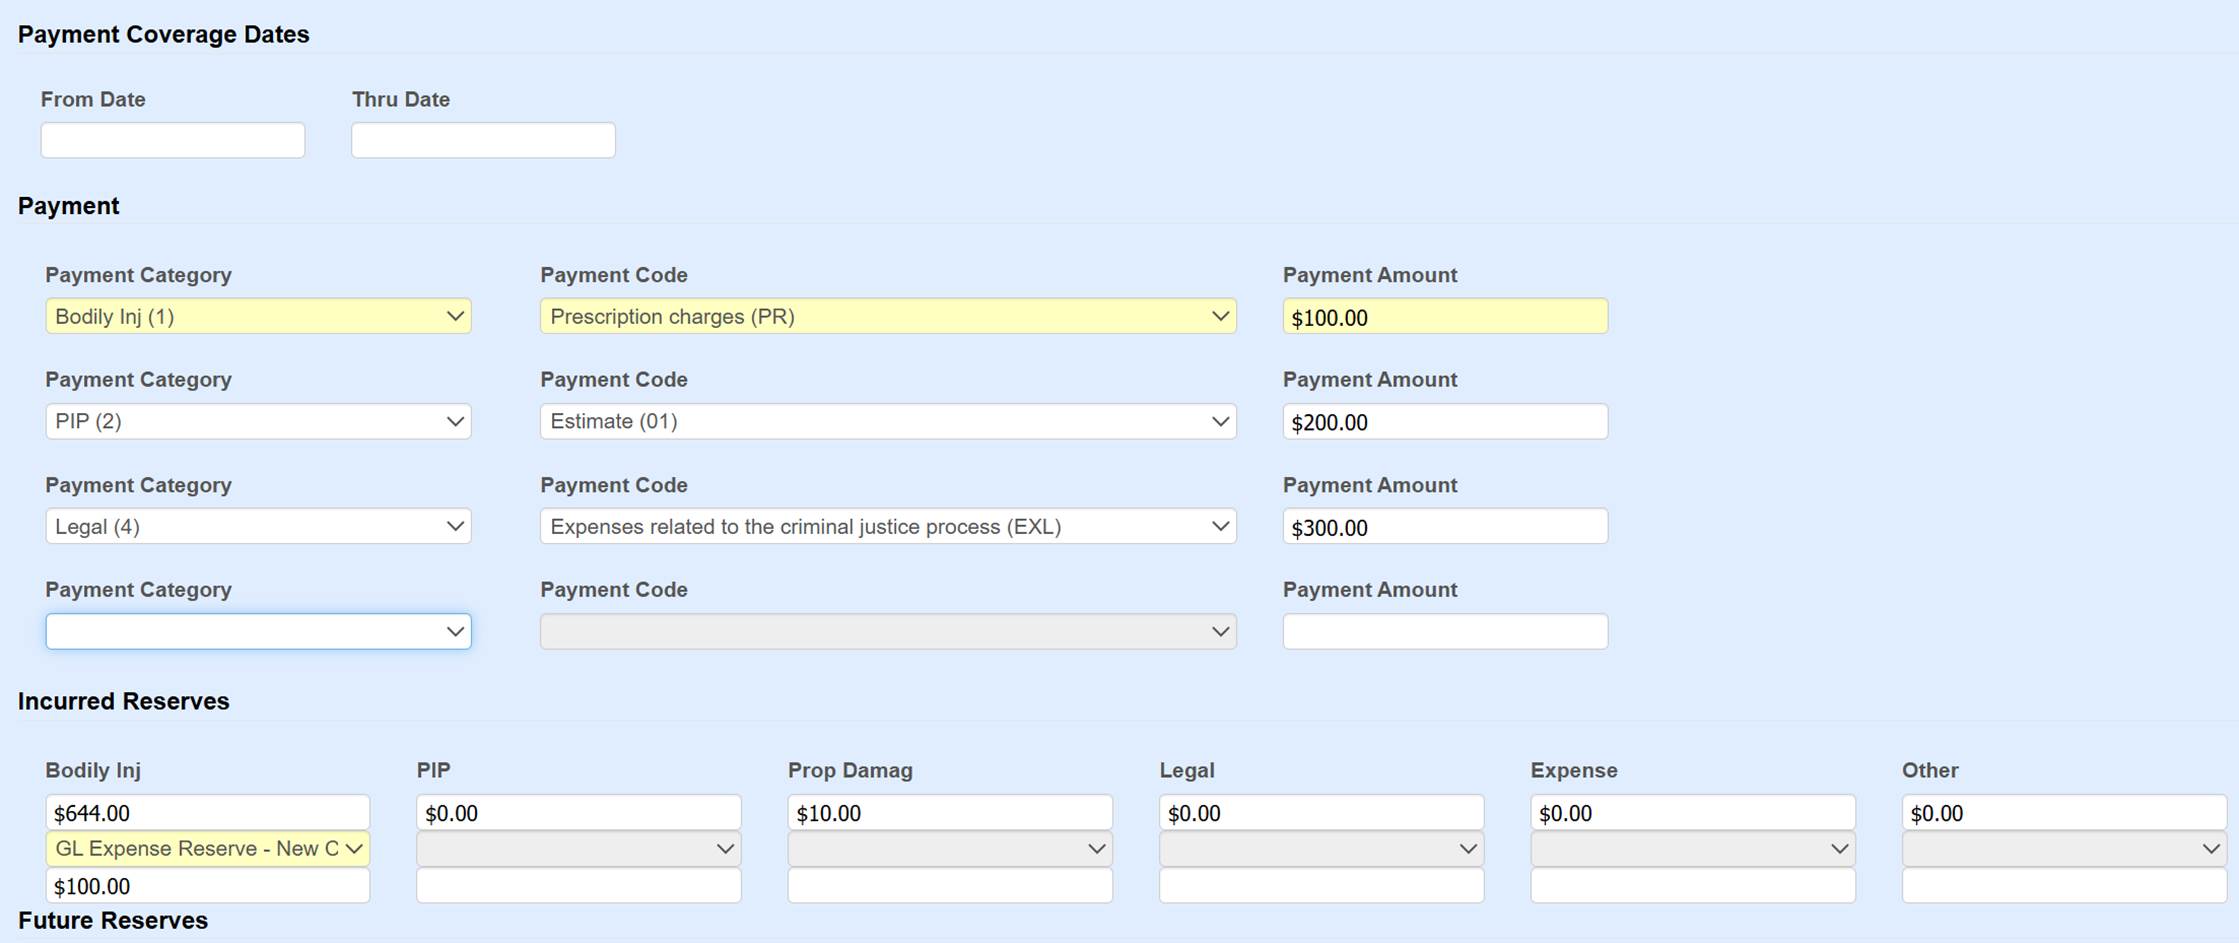
Reserve information is displayed at the bottom of the
payment screen. Your system might not
be set to use all the reserve categories shown here or names used.
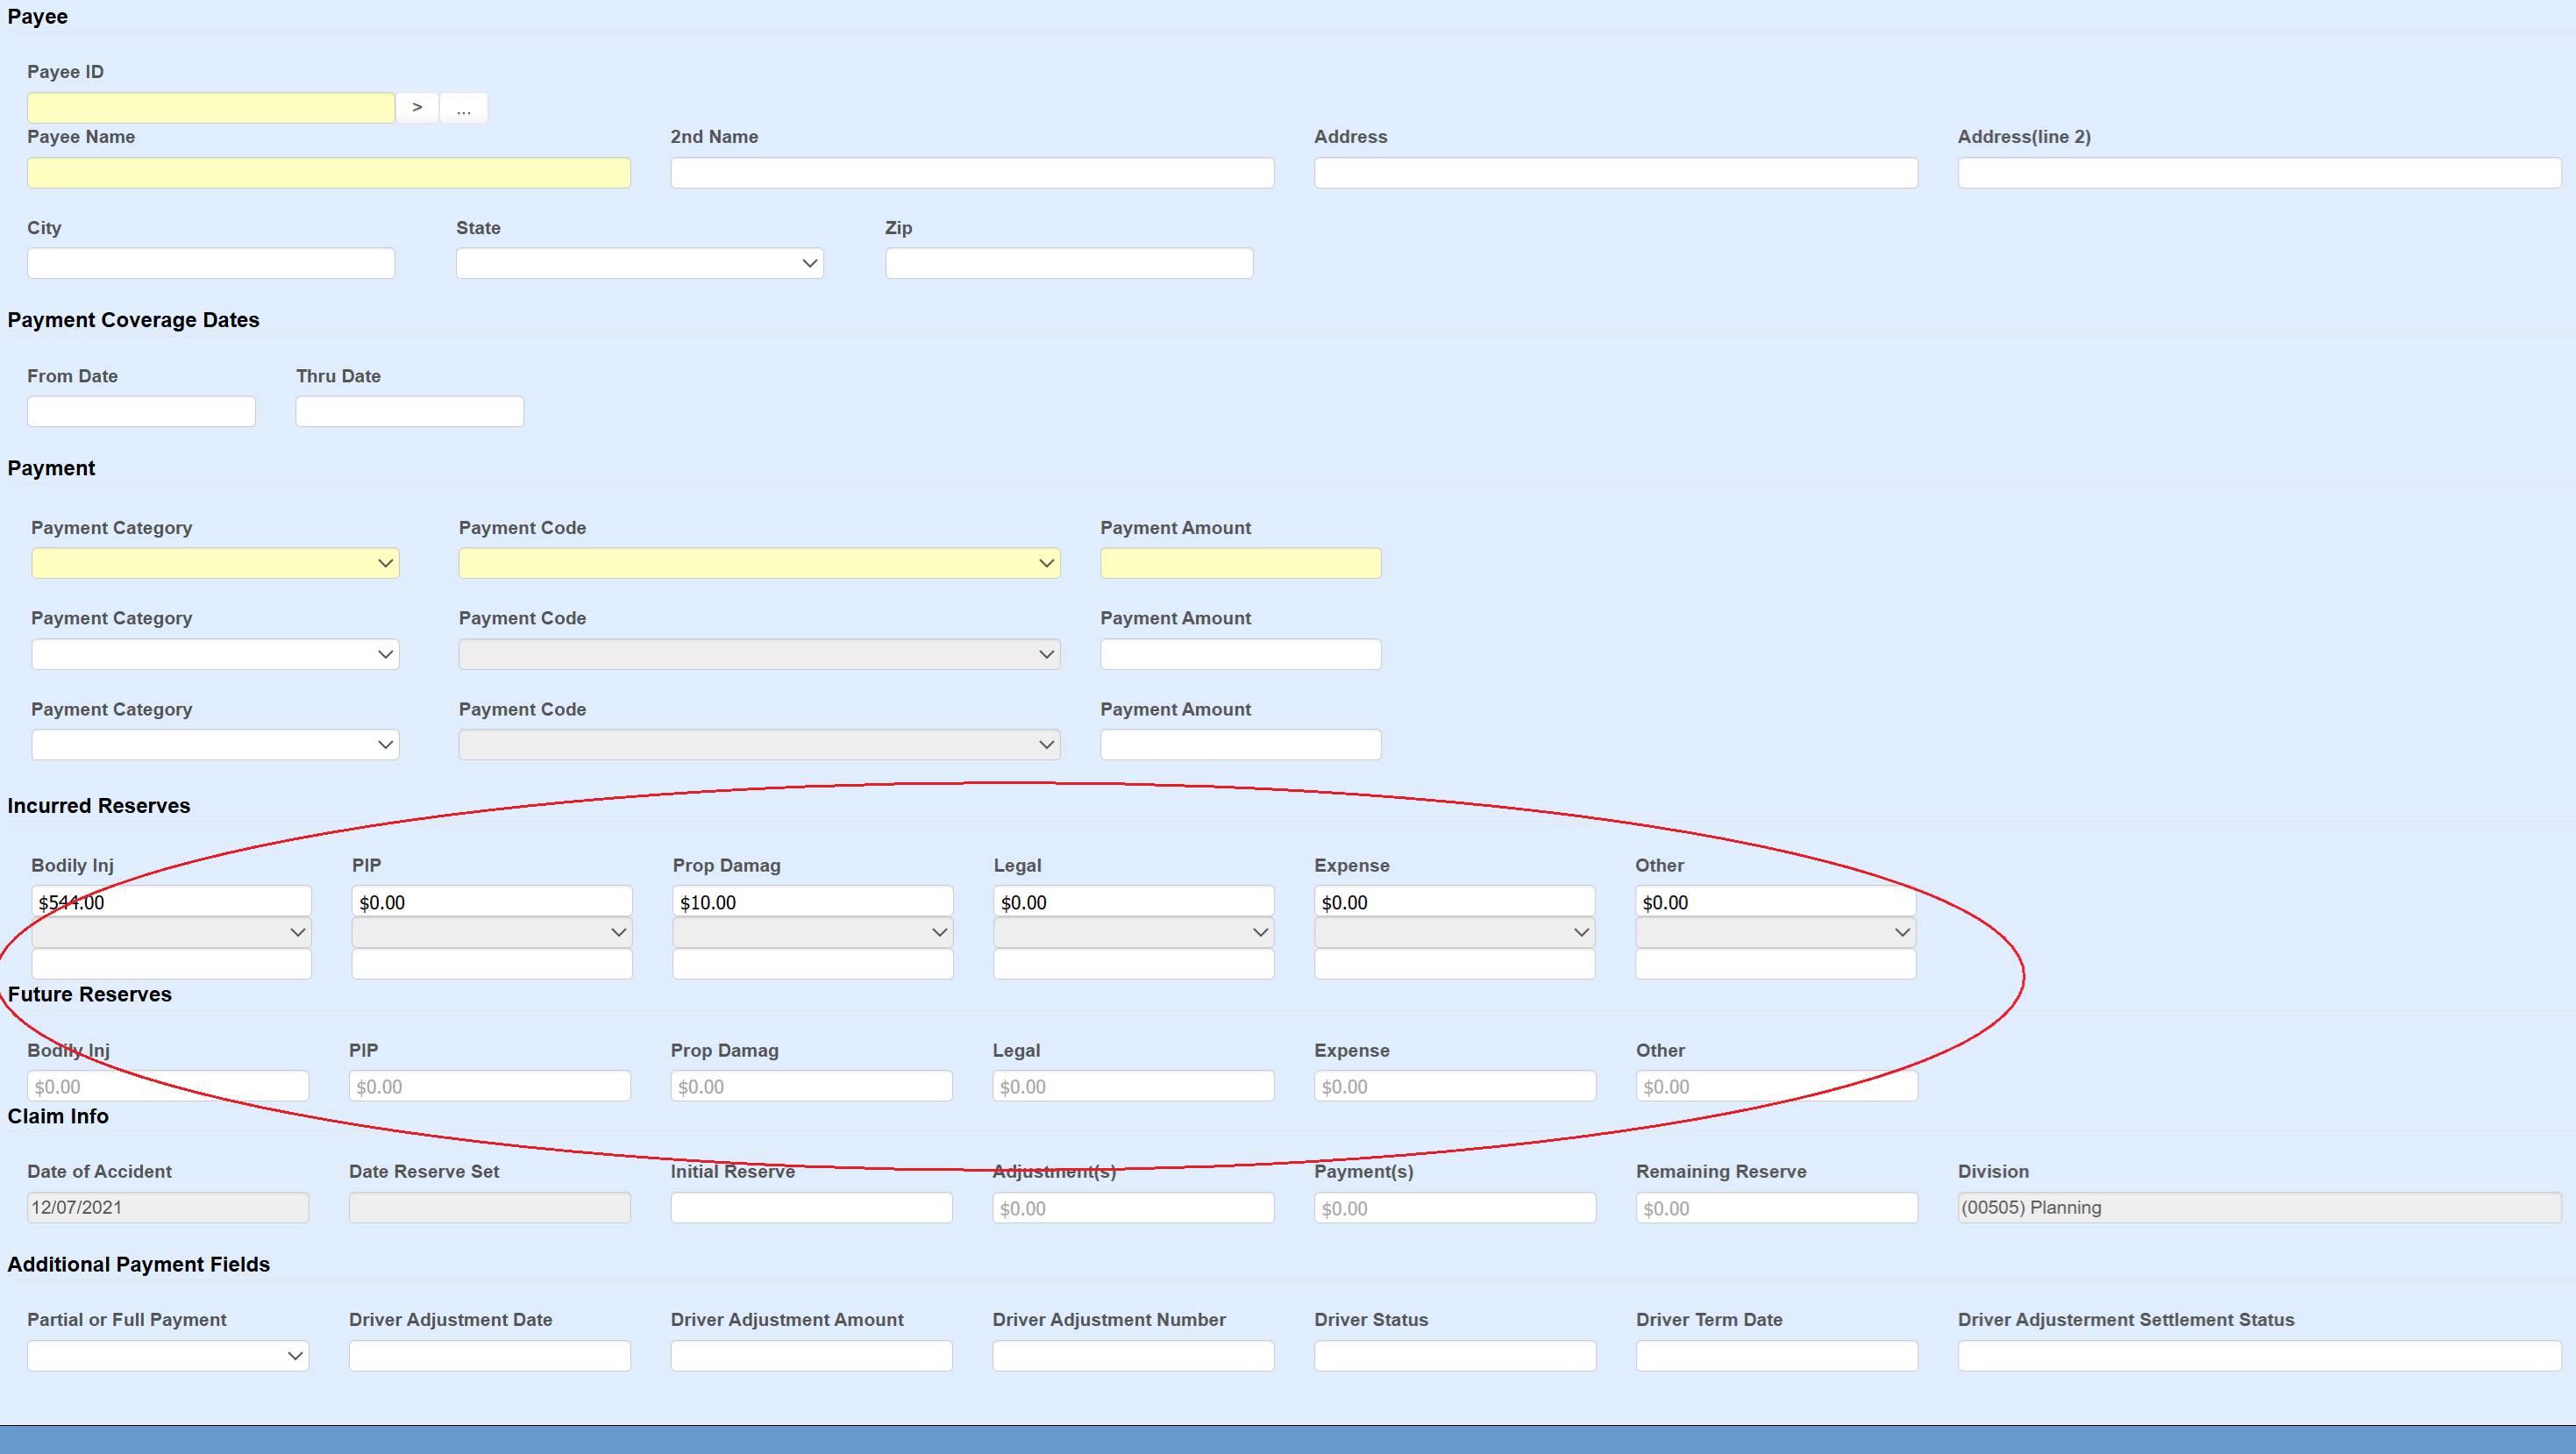
For users with
reserve authority, incurred can be adjusted on the payment screen.
Batch/Notate
The Mode drop-down determines if the payment will be
batched for printing/export or notated directly to check history with the check
number and process date entered by the user.

If the payment
is being batched, then Due Date can be
entered to determine when the payment should be printed. The Separate
Handling field, which if set tells the printing process not to combine
this payment with any other payment records to the same payee.

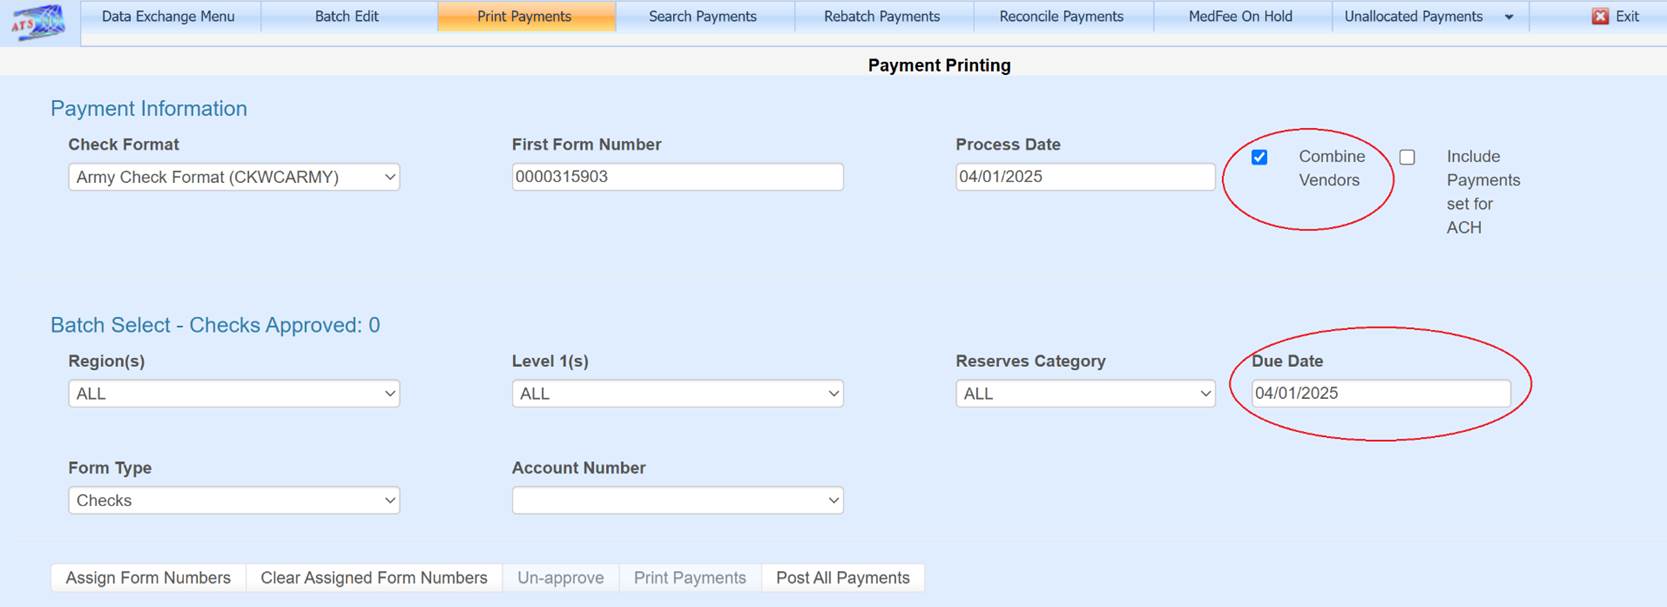
When checks are
printed from the Payment Printing page and the Combine
Vendors check box is checked, then payments with the same payee will be
combined into one physical check, unless the Separate
Handling field was checked when entering the payment. The Due Date field
on the Payment
Printing page will filter out batched payments unless the due date on
the payment record is set to nothing or the same date range.
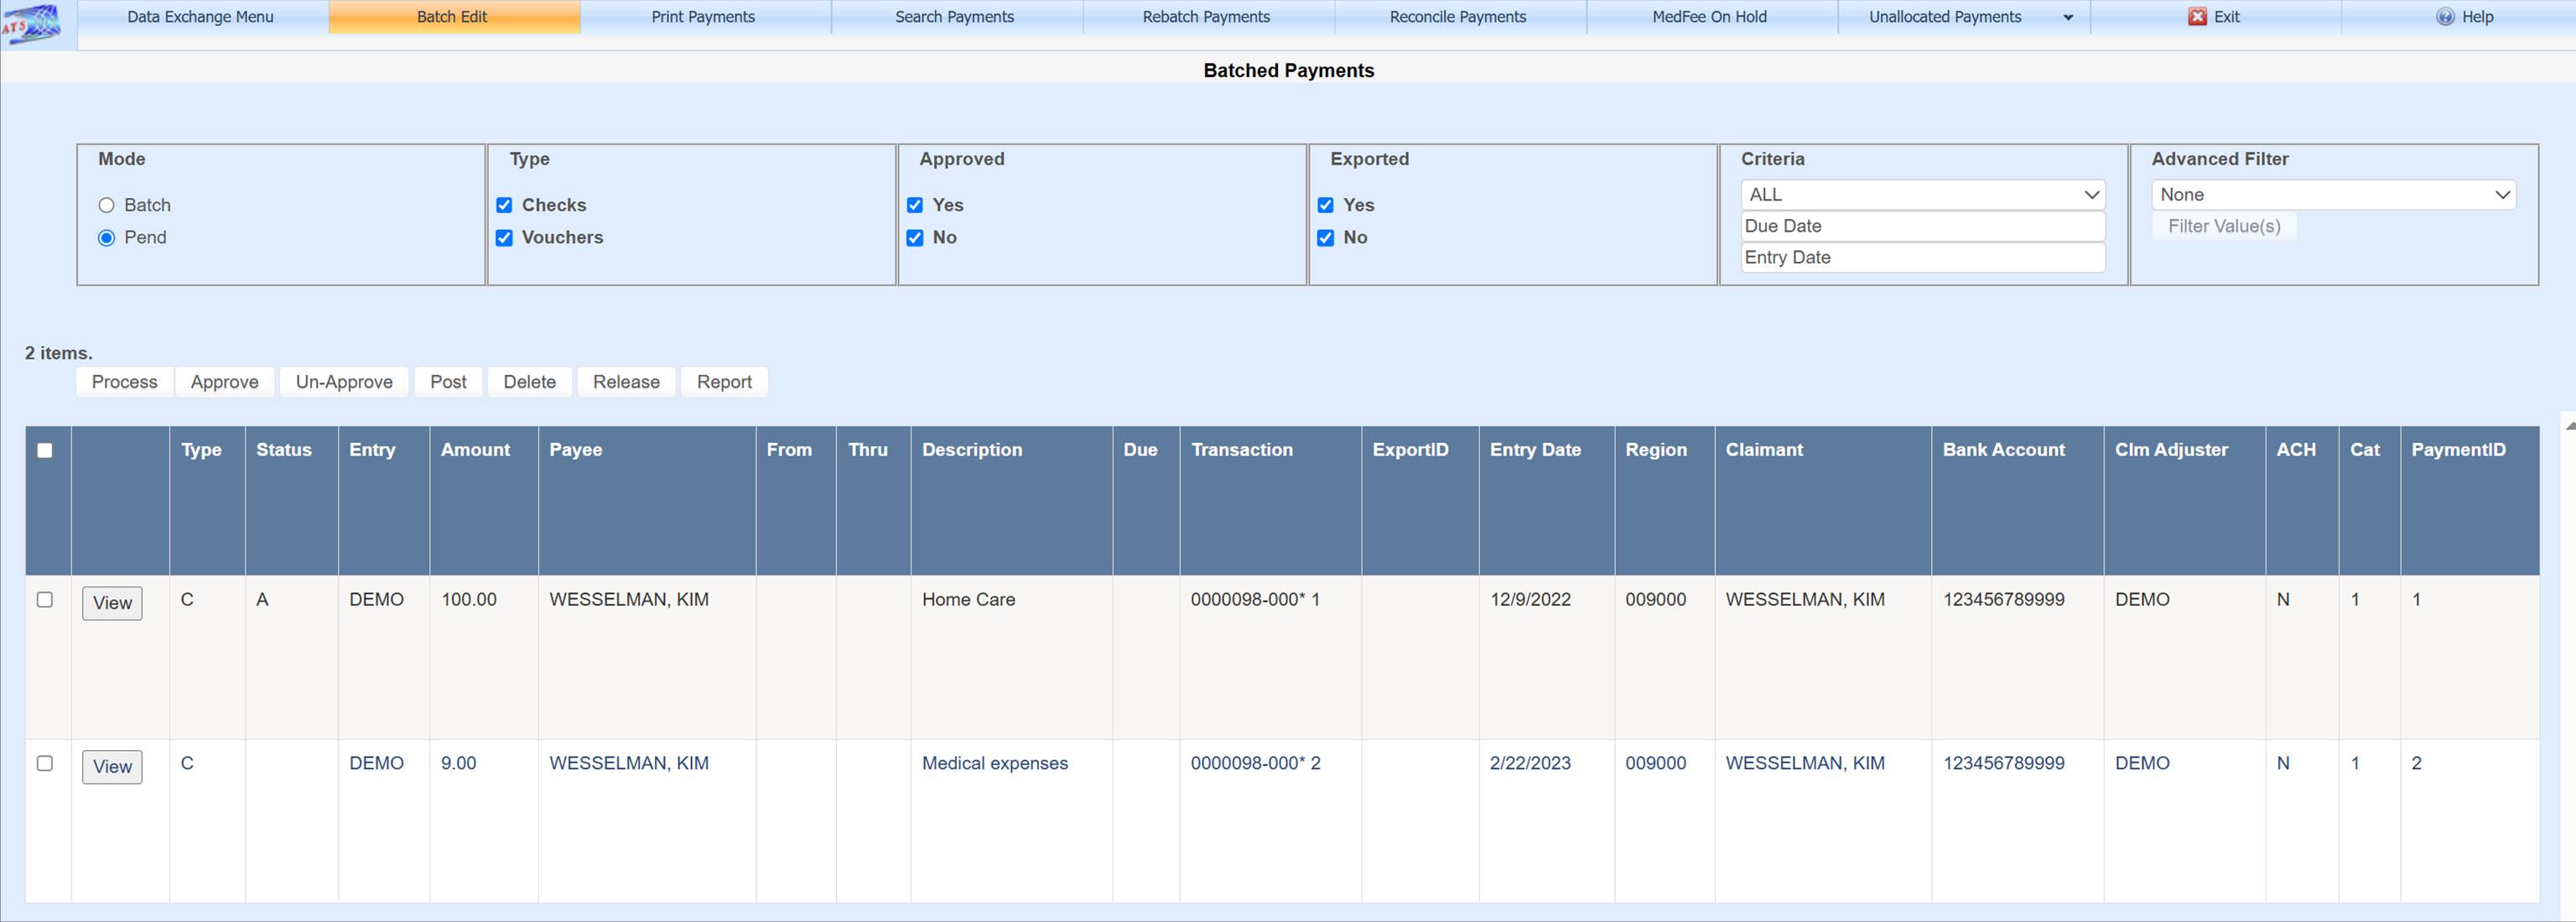
Pending Payment
If the payment
amount is larger than the user is authorized for, then the payment will be
pended where it can be released by a user with authority. Pending payments are released from the Batch Edit page found under Processes accessed from the ATS Console.
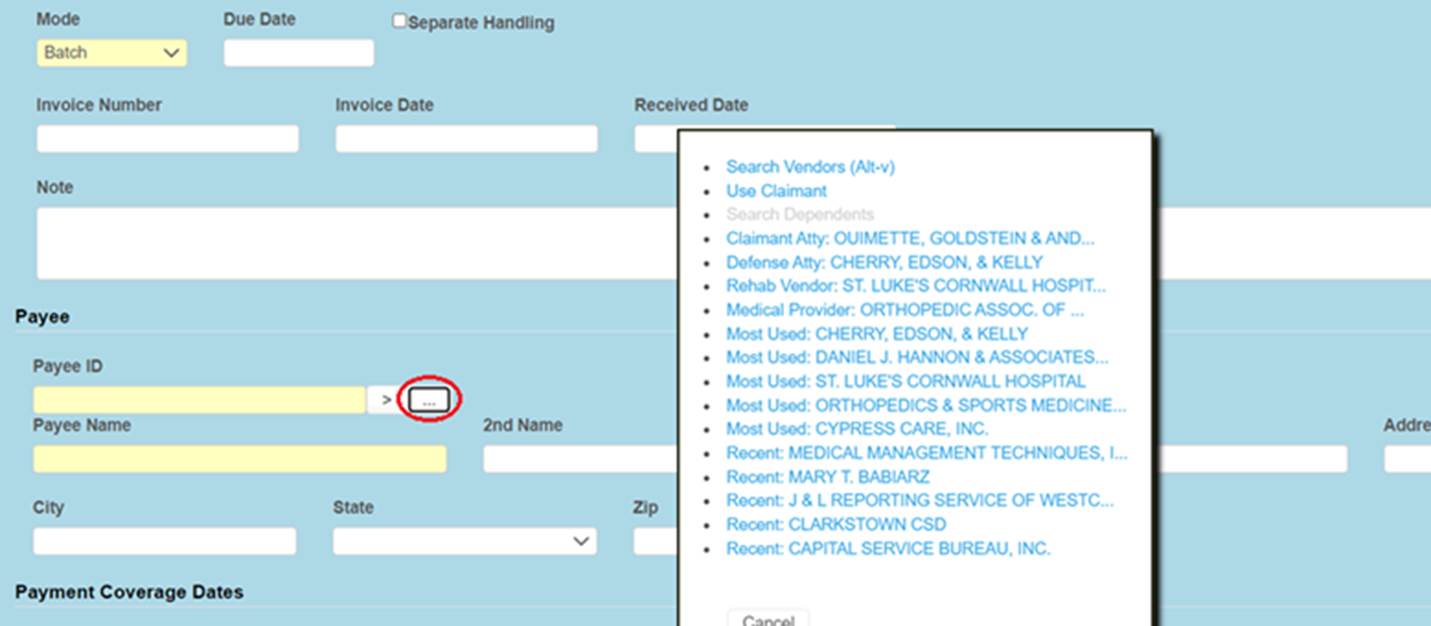
Payee Selection
The … ellipsis button next to the Payee ID field brings up a menu listing the top 5 most recent paid vendors, top 5 most used vendors, and vendors listed in the claim screen such as the claimant attorney. To search for a vendor, select option Search Vendors (Alt-v) or use the key combination Alt and V without the need to open this menu.
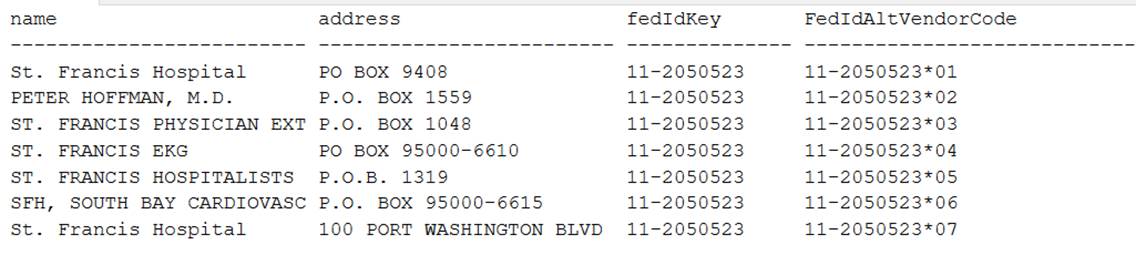
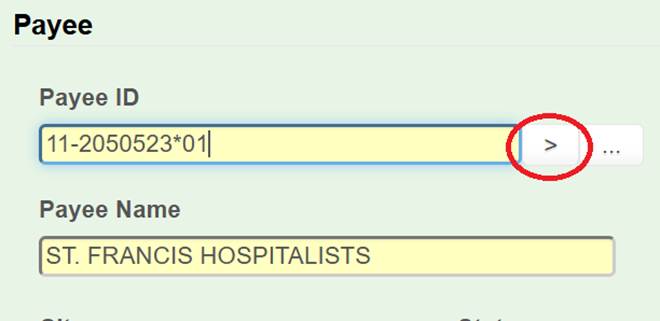
The > button next to the Payee
ID field will switch to the next active vendor record with the same
federal ID of what is currently entered in the Payee
ID field. In this example if the > button is clicked, the payee will change to Peter Hoffman using 11-2050523*02.
If just 11-2050523 is entered without
the *, then the first vendor record will be loaded, 11-2050523*01 if active. This allows the federal ID to be entered if
known without using the search menu.
Entering Multiple Payments
If there is
more than one payment record to be entered for the same payee, claim, service
dates along with all the other fields being the same, then they can be entered
here. The screen will grow thus
allowing an unlimited number to be entered.
A separate payment record will be created for each amount entered here
upon save.
Once a payment
is saved, the screen will be cleared to allow another payment. The vendor’s information and service dates
will remain unless the system settings are set to clear them. ATS support can help with this
adjustment. The Claim Number field on the upper left of the screen allows you
to switch to another claim, thus once you’ve saved a payment, another can be
entered for a different claim without exiting the page. The Messages button
on the toolbar will show a list of payments entered for the session.
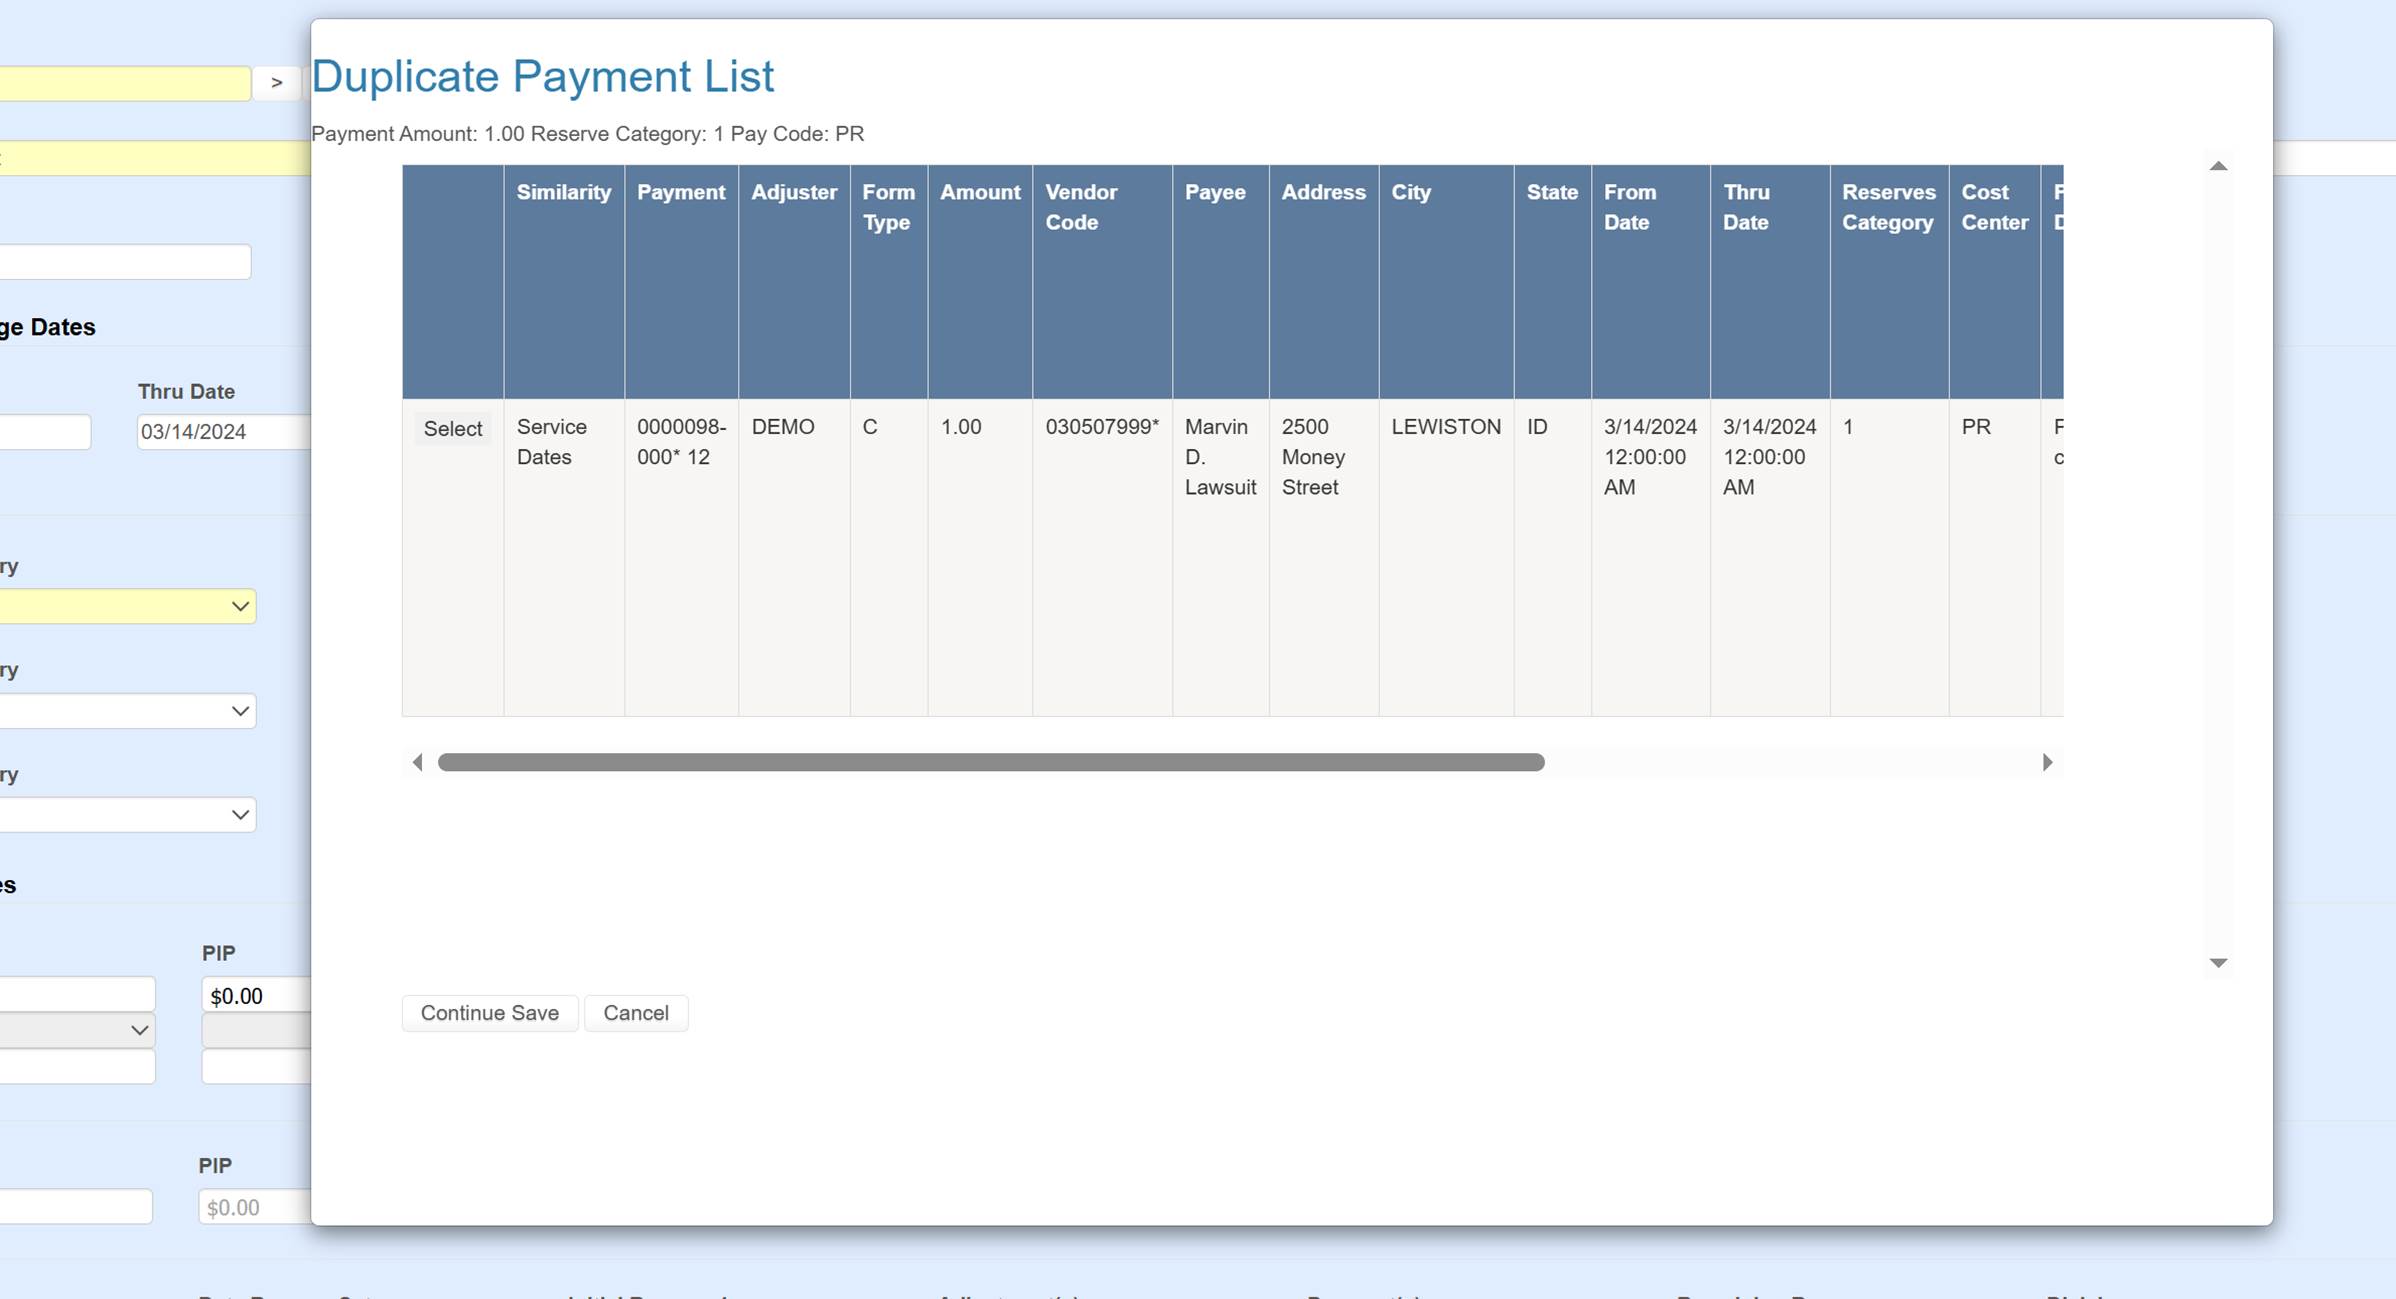
Duplicate Payment Warning
Upon save, a list of existing payments with
the same claim number, reserve category, and ((similar
service dates and the same payment code) or (invoice number and vendor)) will
be displayed in a warning pop-up with an option to continue to save or cancel. Payments can be opened on this list with the Select button.
Print
The toolbar Print
button will list records that have been saved in the current session and
can be printed to a Crystal report.
