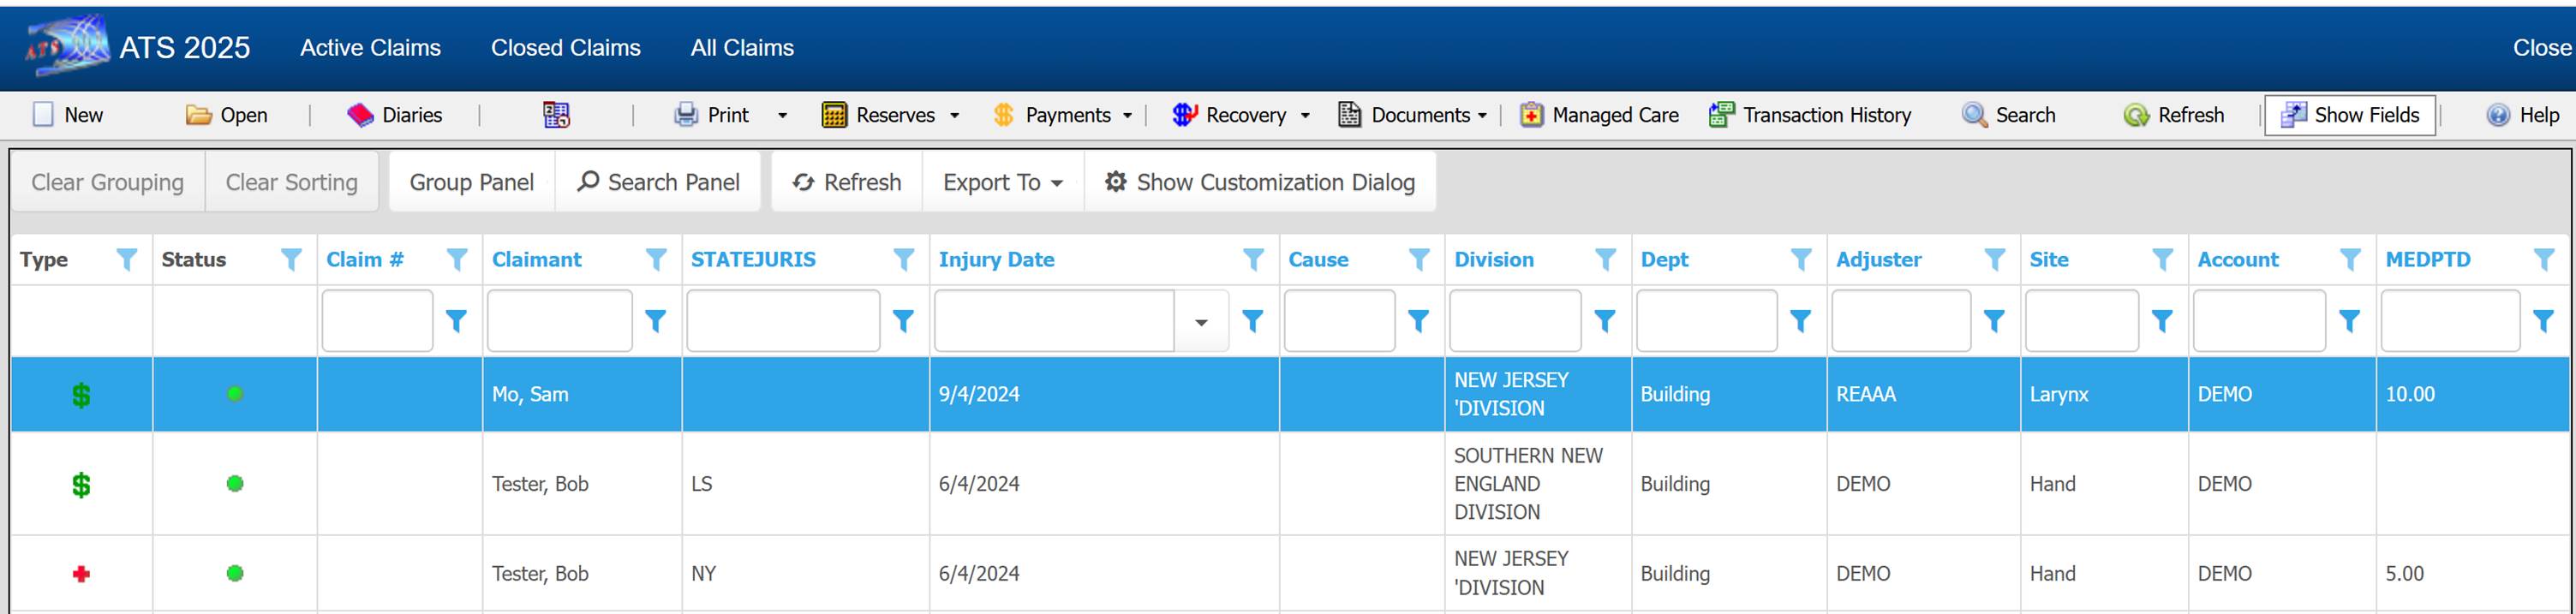
Search Grids
Filtering Options
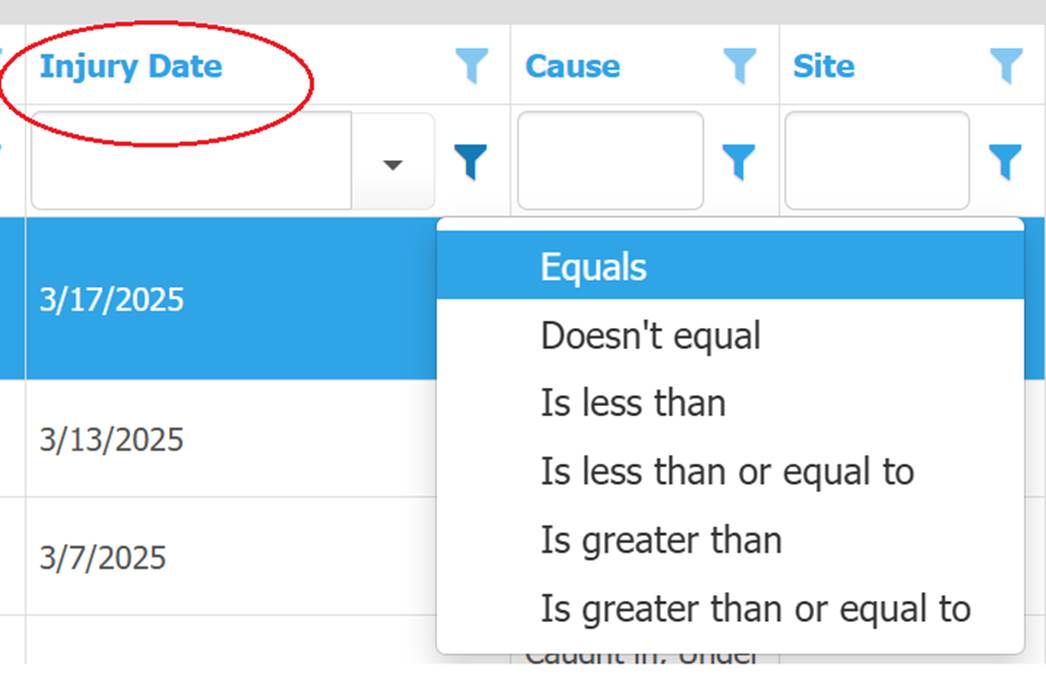
There are
several comparison options for filtering out data depending on the data type.
Clicking the
Filter Button will display a list of comparison options.
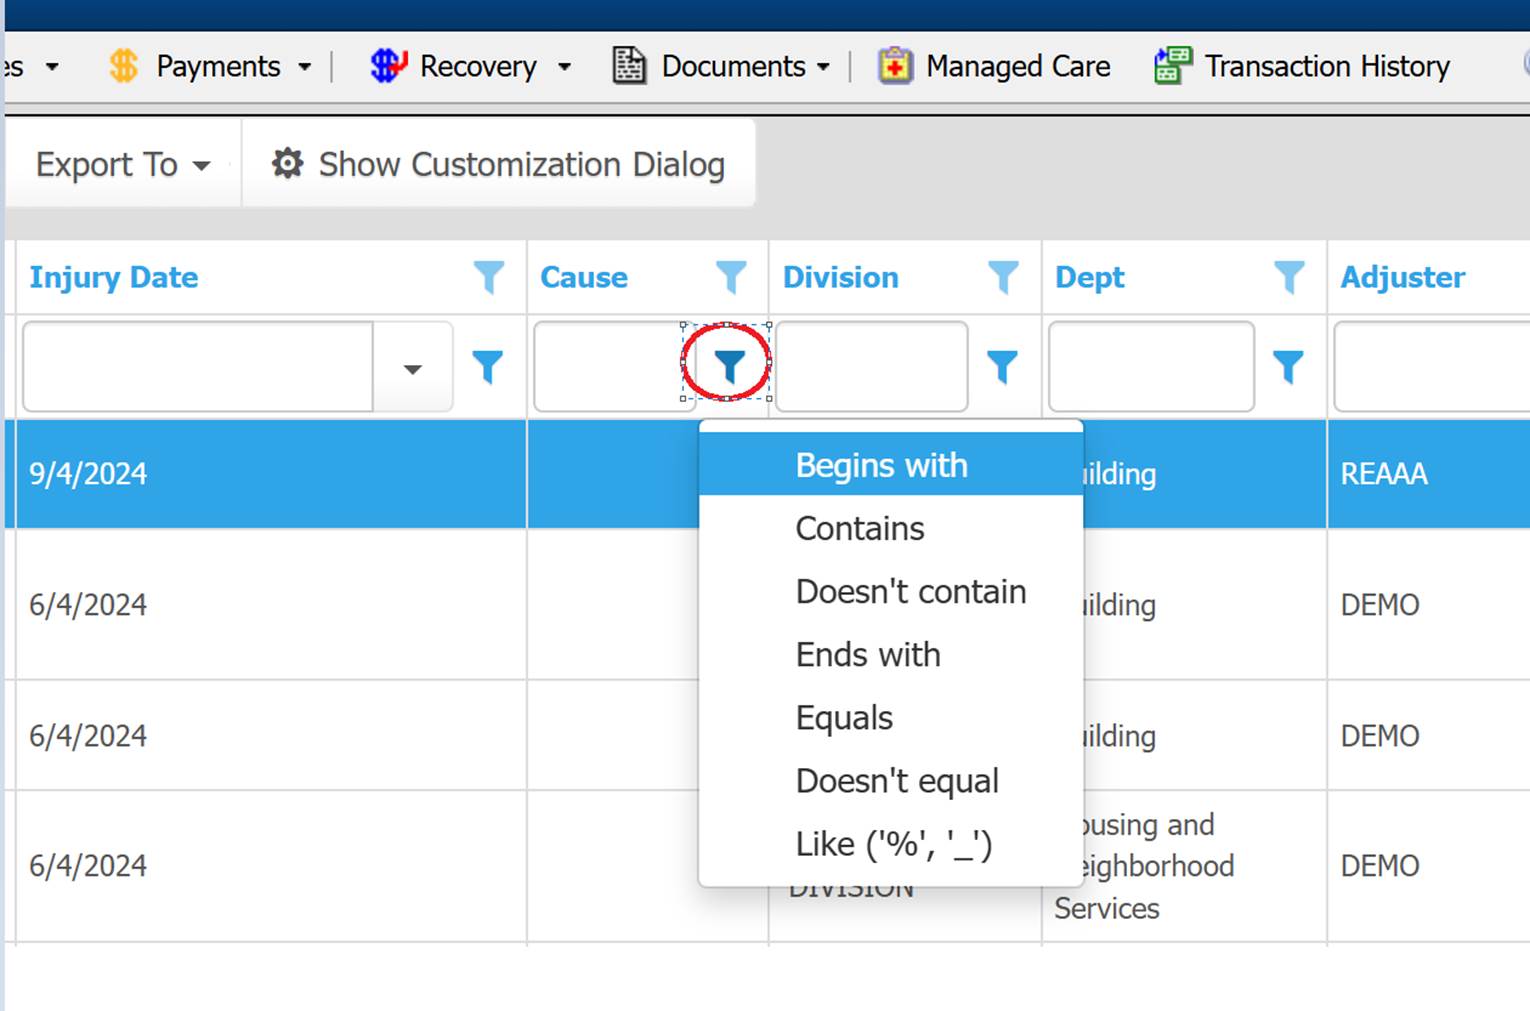
Date and numeric columns have different comparison options than alphanumeric.

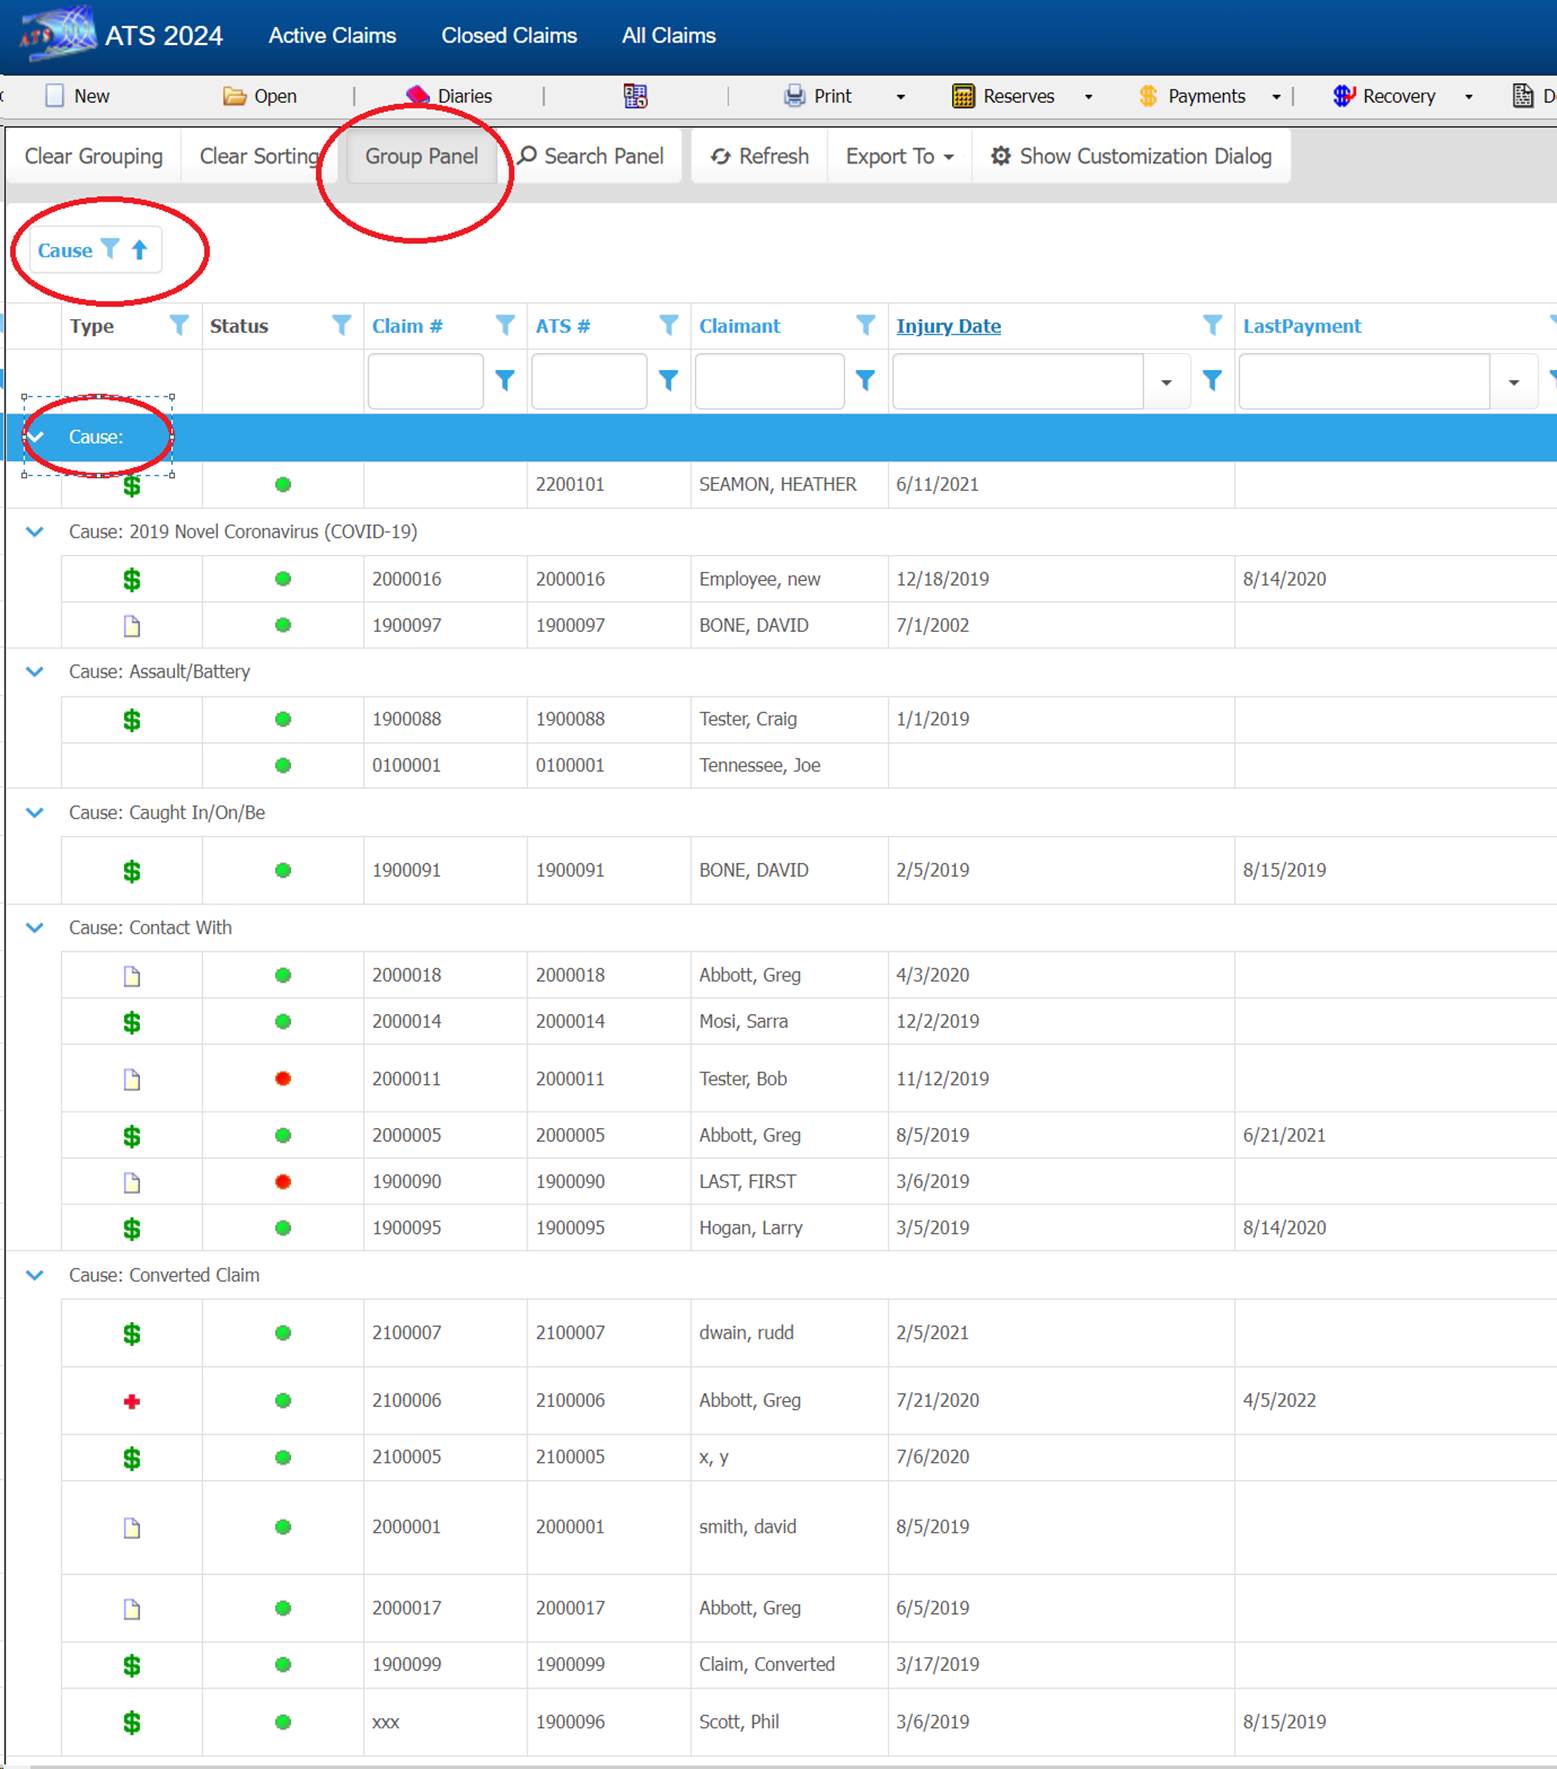
Grouping Results
Grids have a grouping option to allow the records to be grouped by the desired data. To group, click on the Group Panel button. The text “Drag a column header here to group by that column“ will be displayed. Next drag a caption name from the grid over top of this text. In this case Cause was grouped.
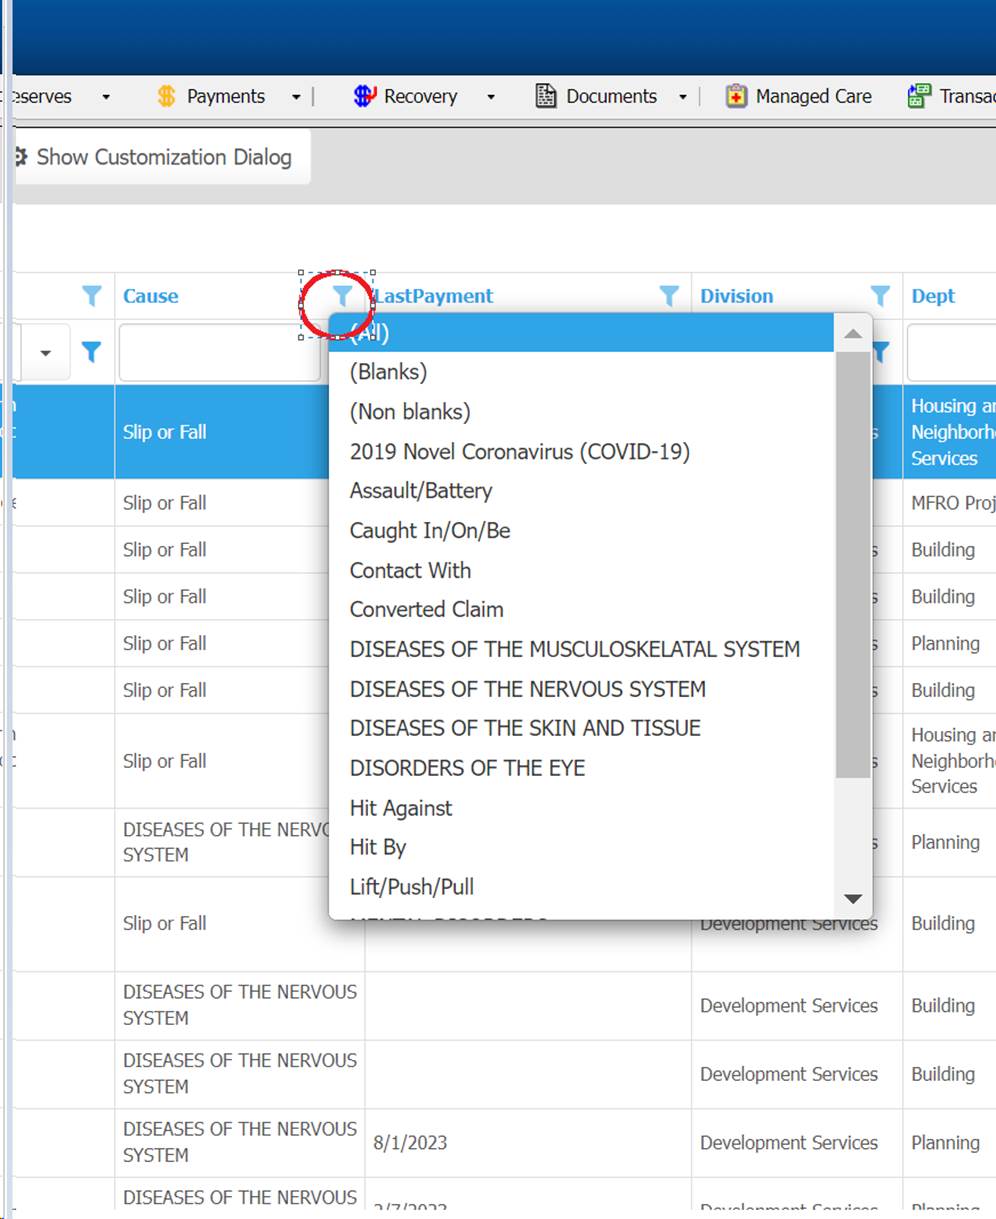
Distinct Results Item List
The grid has a feature to show all possible items to search by. In this case the cause of injury items.
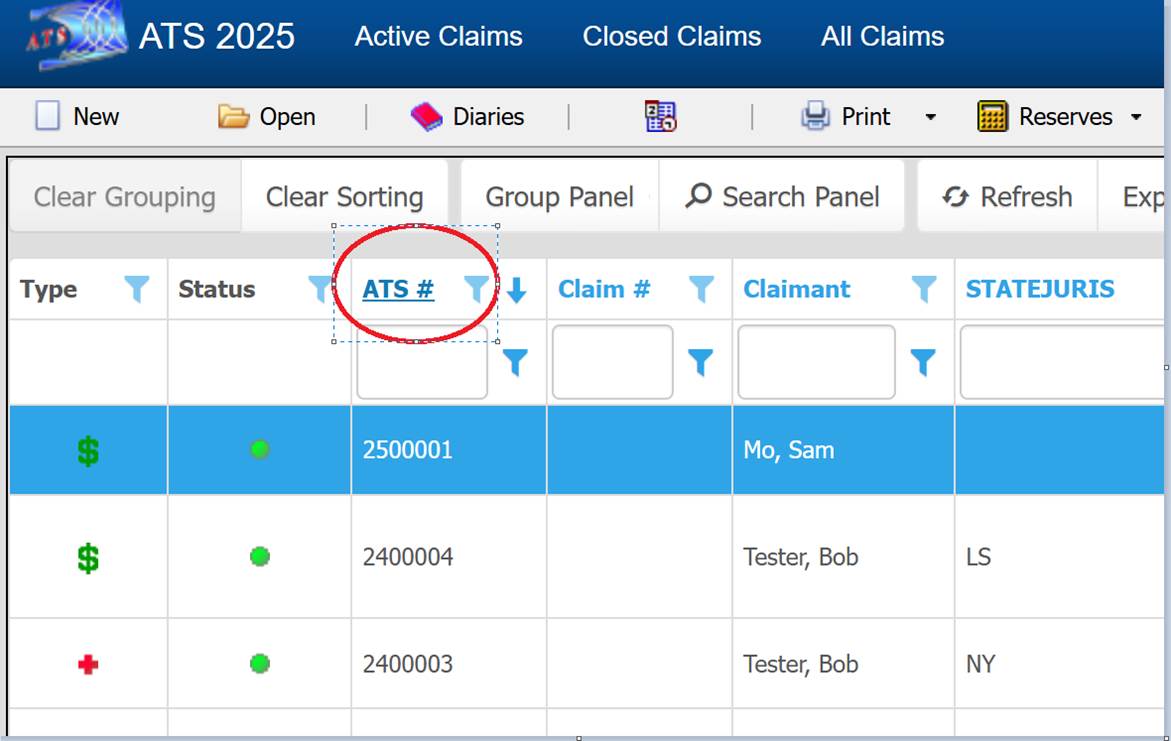
Ordering Results
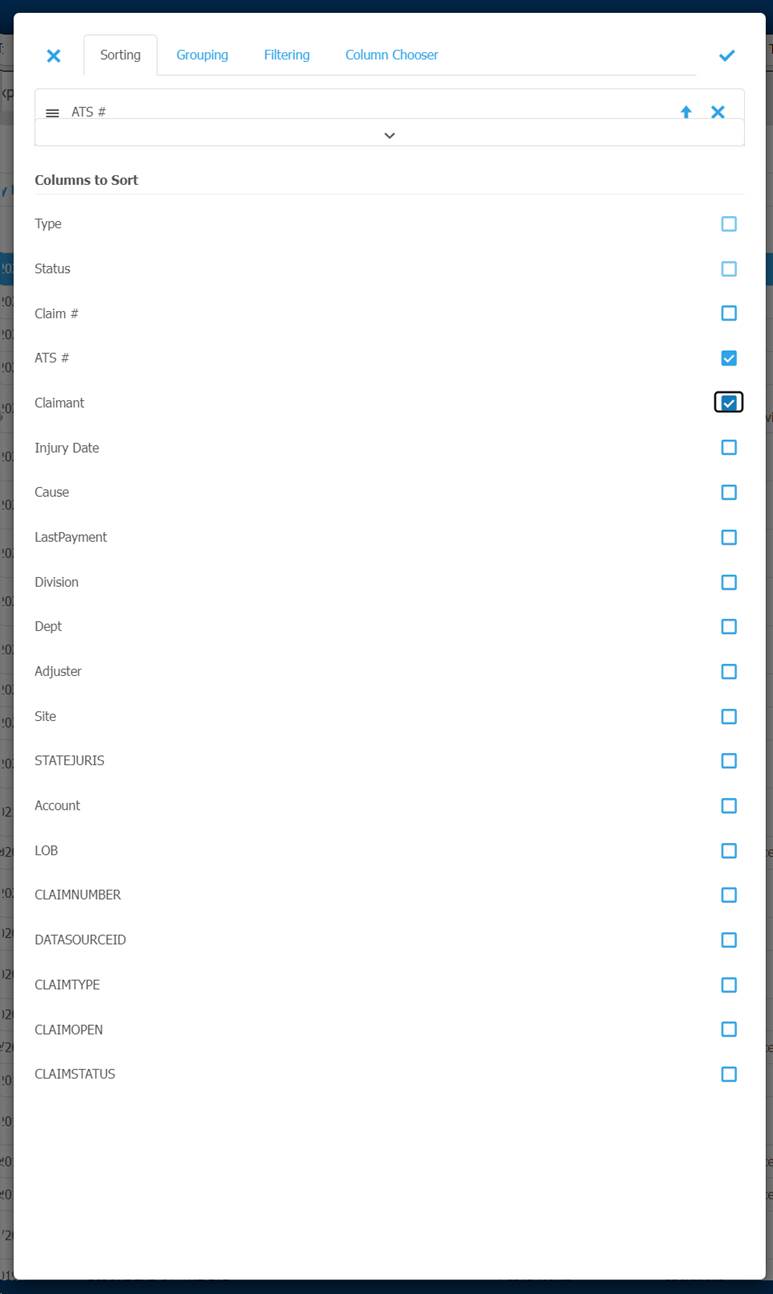
Ordering by a column can be done by clicking the header. In this case the ATS # column is being used to sort the records.
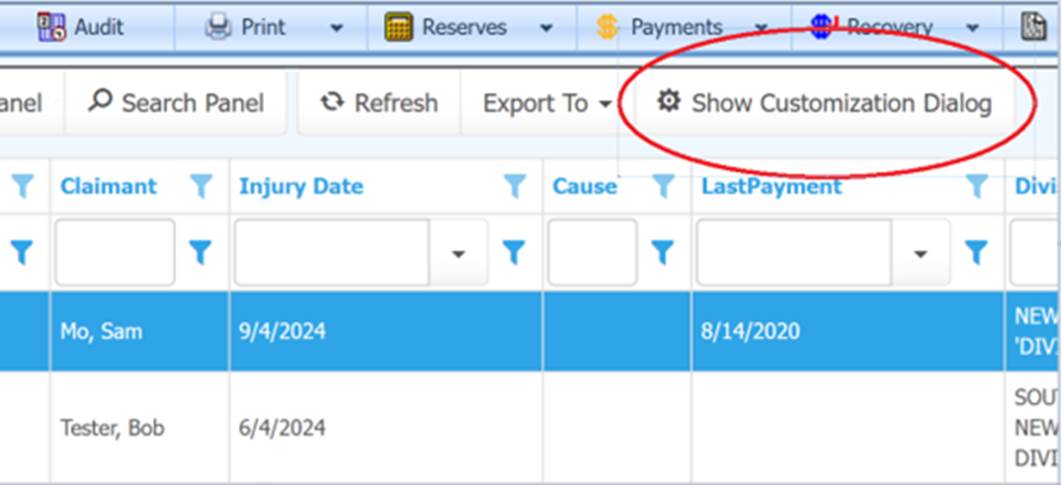
Multiple items can be sorted using the Show Customization Dialog button in the grid.
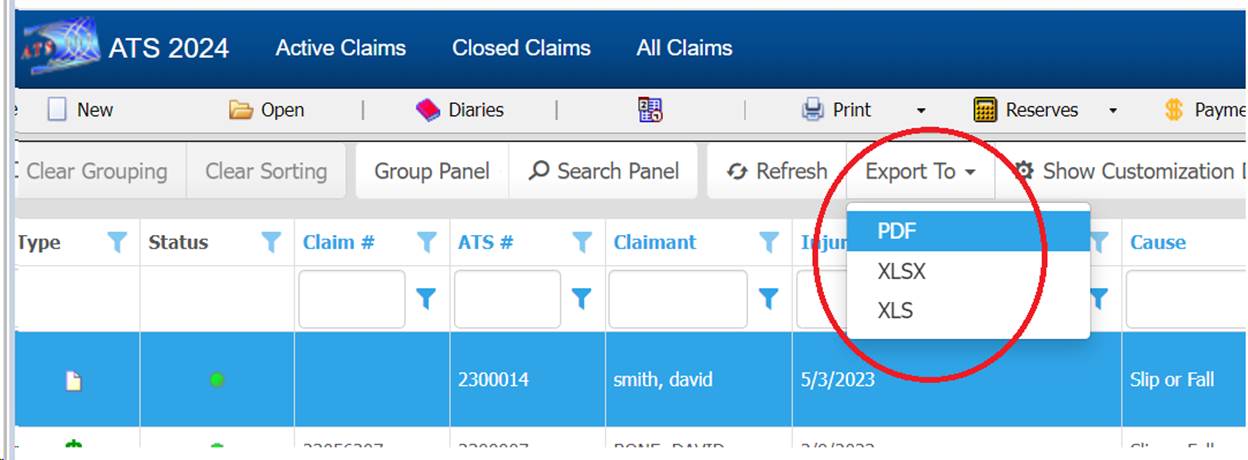
Reporting of Results
Most grids
have an Export
To button on the toolbar with Excel and PDF menu options. This is one way to create a quick report or
export based on the selected data. Many
grids also have a Show Fields button on the toolbar to allow users with authority to
customize the columns of their own grid without affecting other users.
This option gives more flexibility when creating a report from the grid
as well as searching for records.
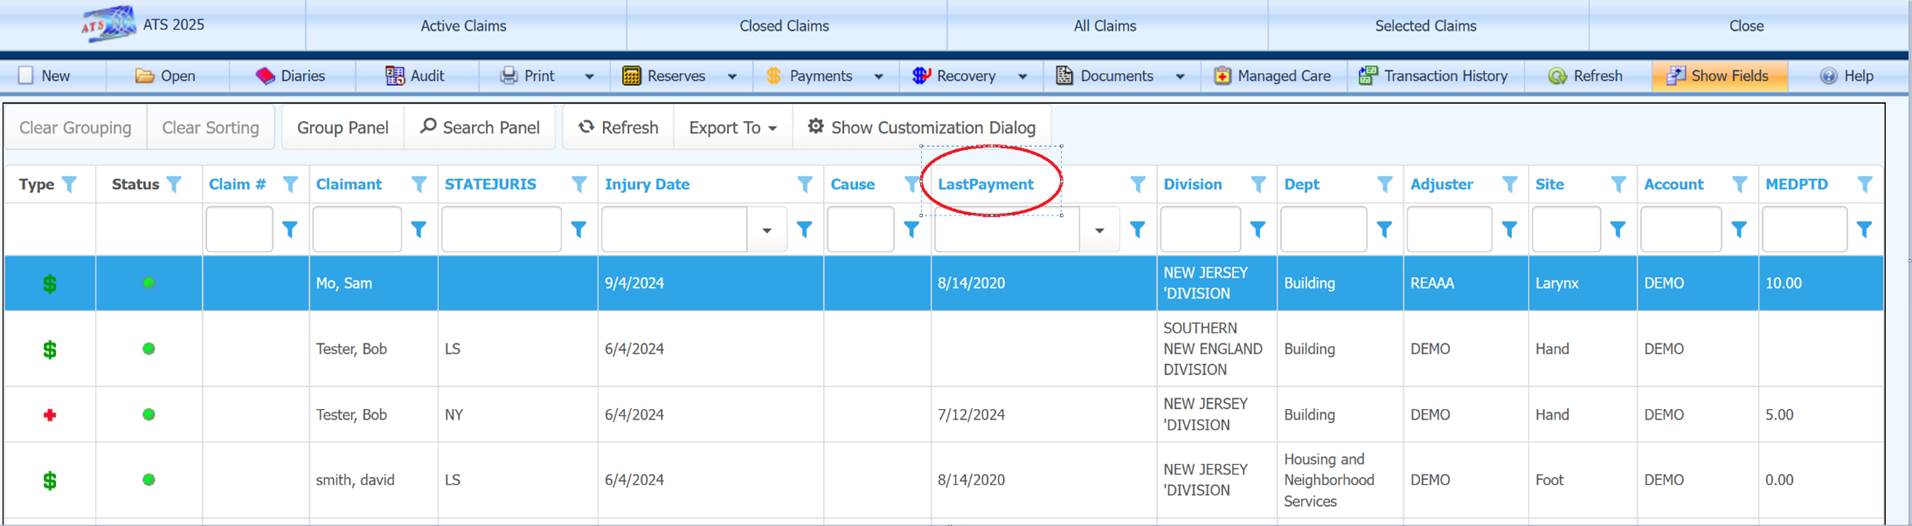
Grid Customization
Clicking the
Show Fields button
in the claim selection grid will bring up List Manager allowing columns to be
added, removed, re-ordered and created.
The Selected list on the right contains columns used in the claim search
grid. Items can be included and excluded
using the “<” and “>” buttons to move items between Available and
Selected. The columns on the grid can be
re-ordered by changing the location of items in the Selected list using the
“Move Up” and “Move Down” buttons.
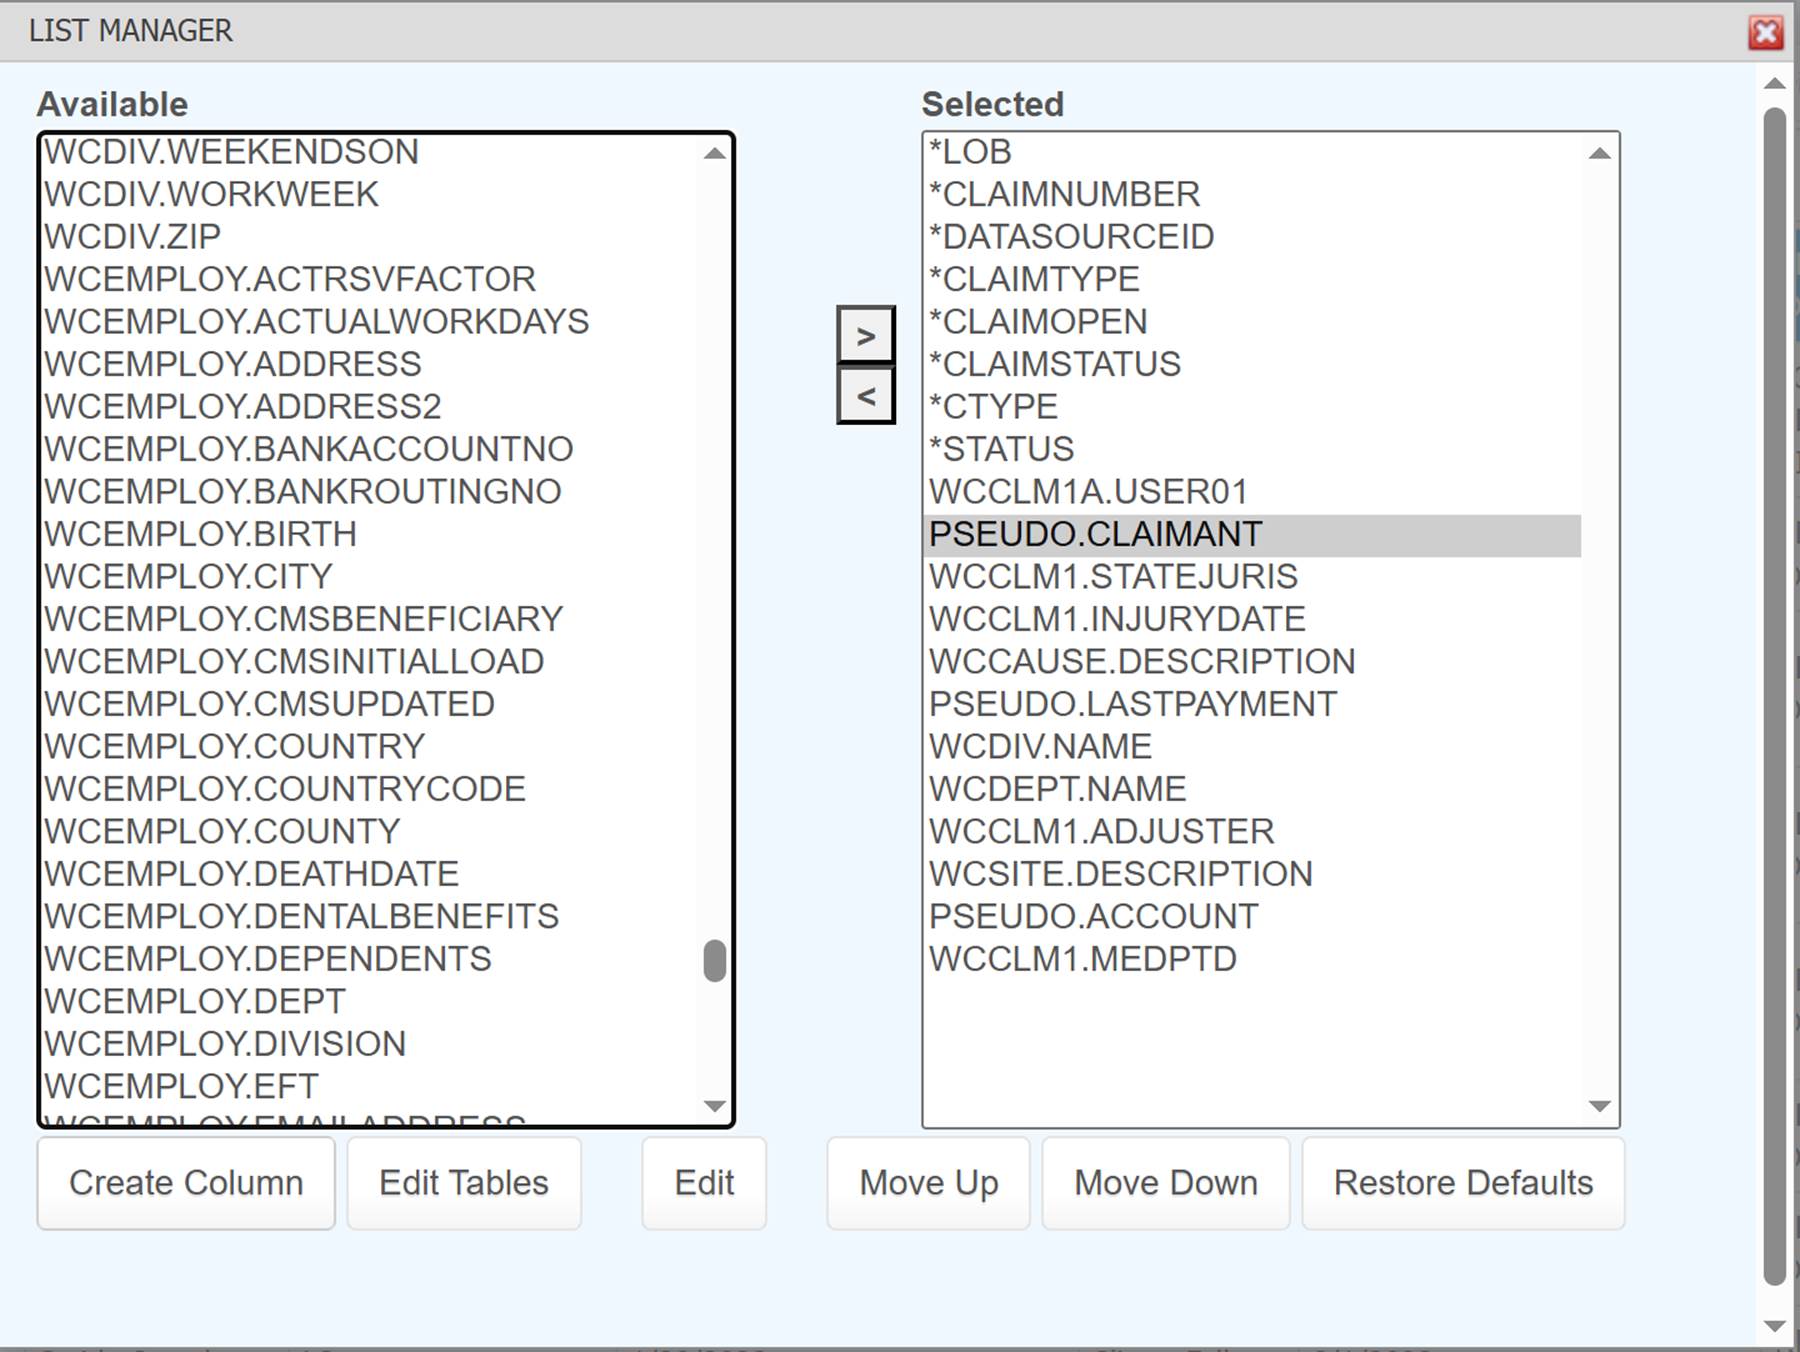
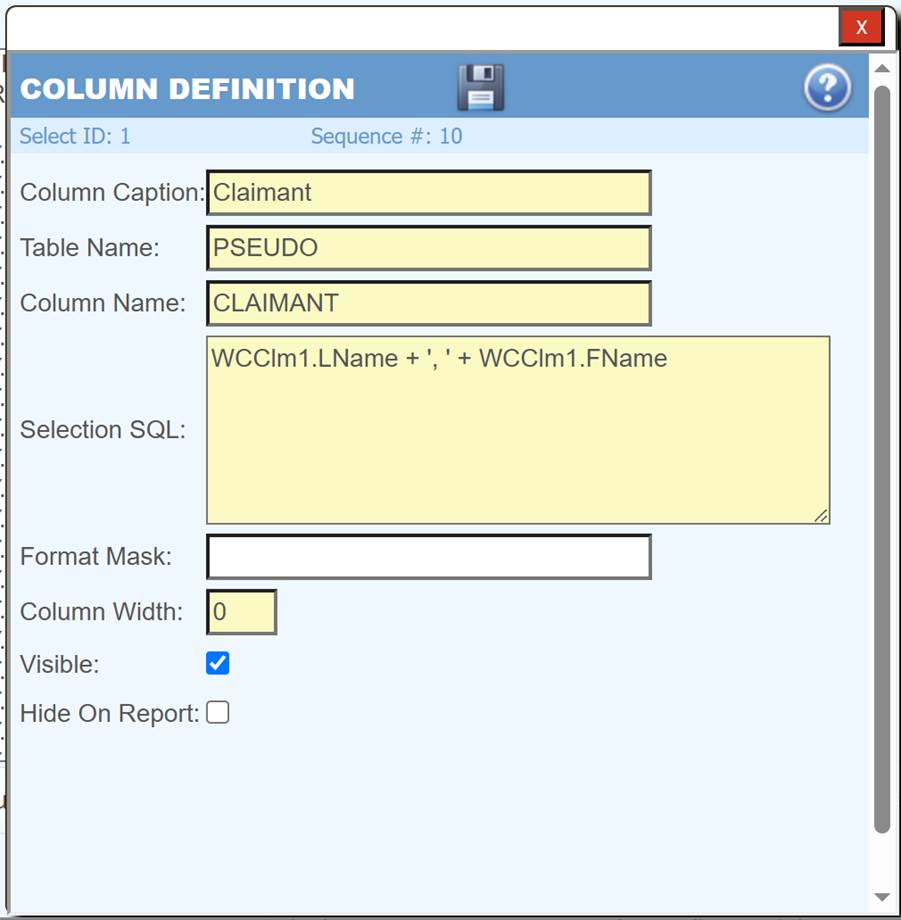
For more advanced users, the Create Column button can be used to create a
pseudo column. In this example “PSEUDO.CLAIMANT”
concatinates the injured employee’s first and last name with the caption
Claimant.
In this
example a sub select is used to show the claim’s last payment date with the
caption LastPayment.