The process home page
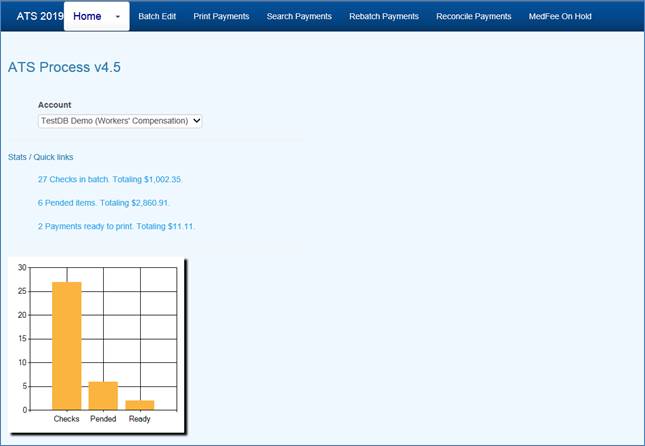
Figure 6‑4: Process Home Page
Batch
All payments that are entered with a status of “B” are batched for future processing. At any time, these batched payments may be reviewed, approved, posted, deleted and/or released (when pended) by anyone with the proper access level.
Use the Batched Payments menu and click the Process button to view all the payments.
Use the Previous and Next buttons to page through the list. The columns contain the following information.
|
Column |
Contents |
|
Type |
The
type of payment where C = check and V = voucher |
|
Status |
“A”
if the Approve feature is used, otherwise empty. |
|
Entry |
The
code for the user who entered the payment or AUTO if the system batched the
reoccurring payment. |
|
Amount |
The
amount of the payment |
|
Payee |
The
name of the payee |
|
From/Thru |
The
dates in the billing period |
|
Due |
The
date the payment is to be issued |
|
Desc |
The
pay code |
|
Transaction |
The
claim number followed by an asterisk and the number of
the payment issued for the claim |
|
Voucher |
The number
assigned when the
item has been
exported with the Accounting Interface module |
|
Entry
Date |
The
date the payment was batched |
Mode Filters
The Edit Batch utility has a wide variety of features as evidenced by the number of buttons and check/edit boxes that appear on the form. Each of the features, including those available from the menu, will be covered in the following sections.
There are two buttons that may be used to process batched (the default) or pended payments which were entered for more than the operator’s check writing limit.
The following filters are available to select a specific group of batched payments.

Figure 6‑5: Batch Mode Filters
(Not) Approved
The ATS System has a Pre-Approve feature that may be used to require the approval of payments before they can be printed.
If the Pre-Approve flag has been set in Module Parameters, these filters will be enabled so that all payments that are not approved will be listed when the Process button is clicked. Remove the check in the Not box to get a list of approved payments. (Approved payments will have an "A" in the Status column.)
(Not) Exported
By default, all the payments that have not been exported using the Accounting Interface will be listed. Remove the check in the Not box to get a list of exported payments that have a number in the Voucher column.
Criteria
When the Region feature has been implemented, this filter may be used to display a list of payments for claims in a specific region. An operator may only view payments for a particular region if one is specified in the operator's record and the Region View is turned on.
Also available is the due-date filter.
Advanced Filter
By default, the payments for all the claims that meet the other criteria (filters) will be listed. When this is a long list, it may be difficult to find a payment for a specific claim. In that case, click the Claims ellipsis button to display the Select Claim screen. Pick a claim and only those payments will appear on the list.
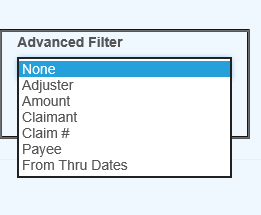
Figure 6‑6: Advanced Filter
Operations
![]()
Figure 6‑7: Operation Buttons
A variety of buttons are available so you can perform the following functions.
Approve/Un-Approve
If the Pre-Approve flag has been set to "Y" with Module Parameters, these buttons will be enabled so batched payments can be approved by an operator with the authority to print checks. Otherwise, this button will be disabled (grayed out) since this step is not required. When this feature is used, approved payments will have an "A" in the Status column.
Delete
Any payment may be deleted from batch by an operator with Delete permission. Simply highlight the desired item and click the Delete button. The program will ask if you want to perform the operation. To continue, click Yes. The program will remove all references to the batched payment from the system and adjust the reserves/paid amounts for the claim.
Post
When a check has been made out by hand or printed with a foreign system, an operator with Print Payments permission should use the Post button to post the payment to the check history table. The date and form number may be changed if necessary.
The next voucher number is found in the client’s record, whereas check numbers are stored in the information for the bank account.
Release
Use Pend mode to view any payments that were entered for an amount over the operator’s check writing limit. Select one of the payments. If your check writing limit is higher than the amount of the payment, the Release button will be available to place it in Batch mode.
 View
Button(s) on the grid
View
Button(s) on the grid
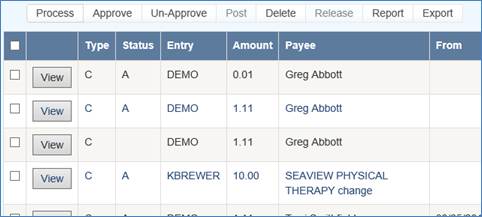
Figure 6‑8: Grid View Buttons
Use the View button to view all of the information on a specific payment. With proper authority information within the batched payment can be modified.
Report
The Report button may be used to produce a wide variety of reports with the currently listed payments.
Export
The Export button will export the grid to a Microsoft Excel type format.
Rebatch
This feature is used to search printed items that may need to be reprinted due to a print job error or a mistake on a check or checks.
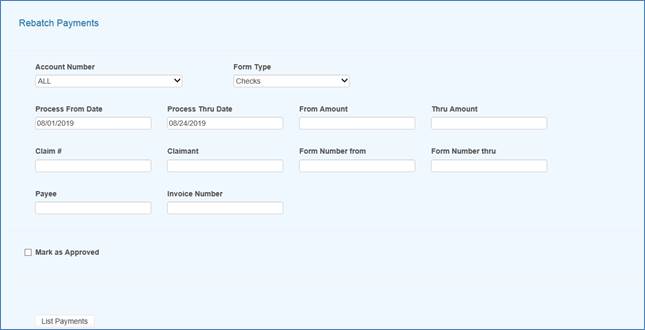
Figure 6‑9: Rebatch Payments Screen

 Once
you enter the search criteria and have records in the grid you will then be
presented with the View option button as in edit batch as
well as a button to Rebatch the selected items. Use the check box to the
left of the item you wish to rebatch or use the checkbox in the header section
to select all of the records in the grid.
Once
you enter the search criteria and have records in the grid you will then be
presented with the View option button as in edit batch as
well as a button to Rebatch the selected items. Use the check box to the
left of the item you wish to rebatch or use the checkbox in the header section
to select all of the records in the grid.

Figure 6‑10: Payments Grid
Export
This button will export the grid to a Microsoft Excel type of format.